
We all hate wires right? They can get tangled easily and they look messy. When we have too many wires/cables on our desk we tend towards going wireless, I guess. I use a wireless keyboard and mouse, wireless charging port for my phone and in fact, I bought an Oculus Quest 2, which can be used without connecting cables to the PC/Laptop.
Now when it comes to VR development, wouldn’t it be easy if you could directly test your Unity scene on the headset wirelessly? That’s possible now if you own an Oculus Quest 2!
Now when it comes to VR development, wouldn’t it be easy if you could directly test your Unity scene on the headset wirelessly? That’s possible now if you own an Oculus Quest 2!
Want to watch the video instead?
Until recently your Oculus Quest/Quest2 had to be connected to the PC/Laptop via a link cable to play PCVR games or to test Unity scenes. But now with the beta feature called Air Link we can play/test games/projects wireless on the headset. So let's see how that's done.
💡Prerequisite: You need to have Steam VR downloaded and installed. Also, make sure to have a shortcut for that on your desktop
1. Setting Up Oculus Desktop App and Headset
We need to first download and install the Oculus Quest 2 Desktop app.
- Head over to the Oculus website and click on
DOWNLOAD QUEST 2 PC APP
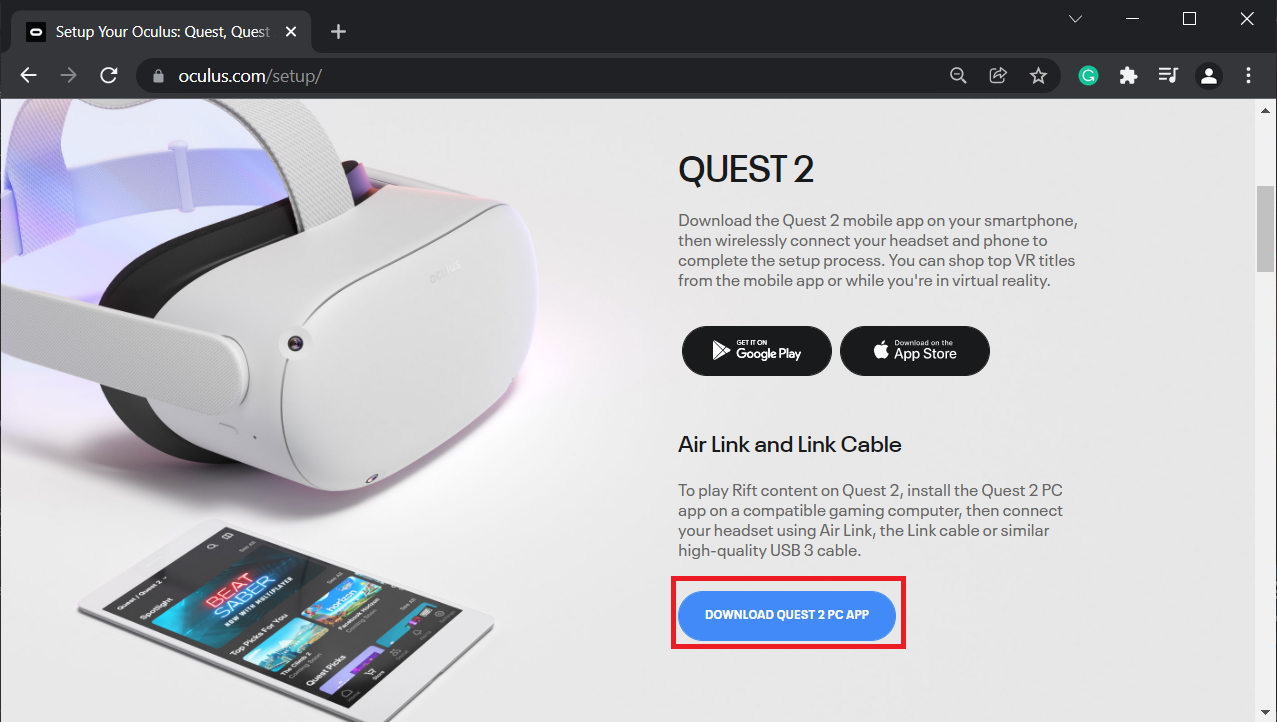
- Install the app and follow the instruction to log in.
- Head over to the Devices tab and click on
Add Headset→ selectQuest 2and click oncontinue→ selectAir link (Wireless)and click oncontinueonce again.

- Assuming you have already set up your headset by login into your account and completing the tutorials, if not you can check the initial setup here. On the home screen, select Quick Settings → make sure you are connected to the Wi-Fi and then go to ⚙️ Settings → select the Experimental Features tab→ enable Air Link, review the Air Link requirements and then select Continue.
- Now you will be able to see Oculus Air Link in the Quest Settings menu. Click on Oculus Air Link → from the list of Available PCs, select your PC and then select Pair. You will be prompted to confirm the pairing code displayed in your headset.
💡If you don't see a pairing code, make sure that both your headset software and desktop app are on v34 or later.
- Take off your headset, make sure that the code on your computer matches the one you see in your headset and click on Confirm. You can now close the pop-up.
⚠️ Do not close the Oculus desktop app!

That concludes the Air Link setup. Next, we’ll see how to set up Unity to make sure it works with Oculus.
2. Setting up Unity
You need to have your Unity project already set up for VR in general. If you are not sure how that’s done then you can check our blog on that before proceeding further.
I have set up my scene with an XROrigin including continuous movement locomotion system and a helmet prefab which can be grabbed. Before we can test your scene on our device, we need to make sure the project is set up correctly.
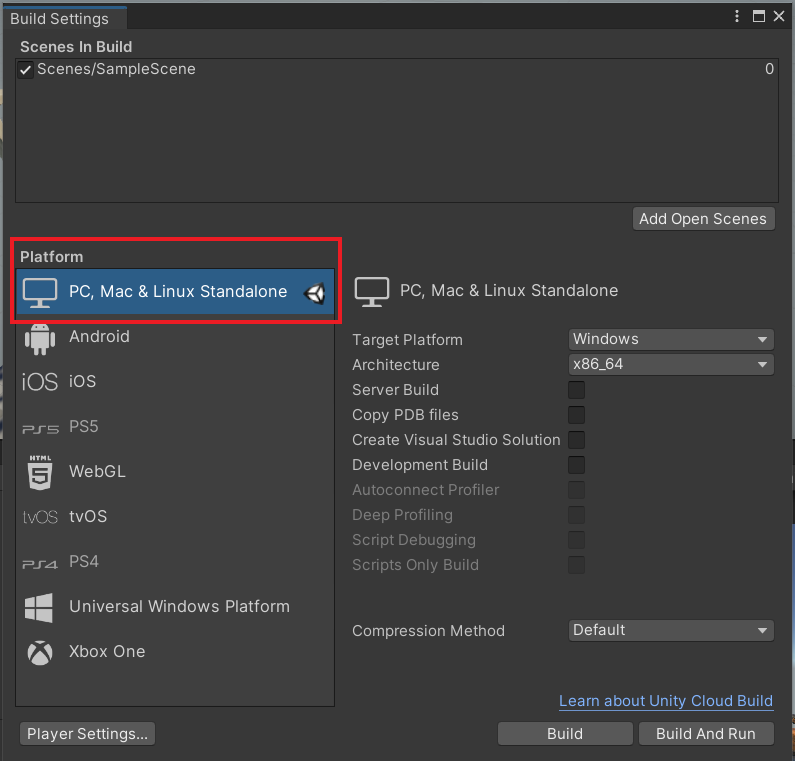
- Select
File→Build Settings. Here, make sure you have chosen the Platform as PC, Mac & Linux Standalone
- In the same window, select Player Settings → XR Plug-in Management. Here make sure you have ☑️ selected Oculus.
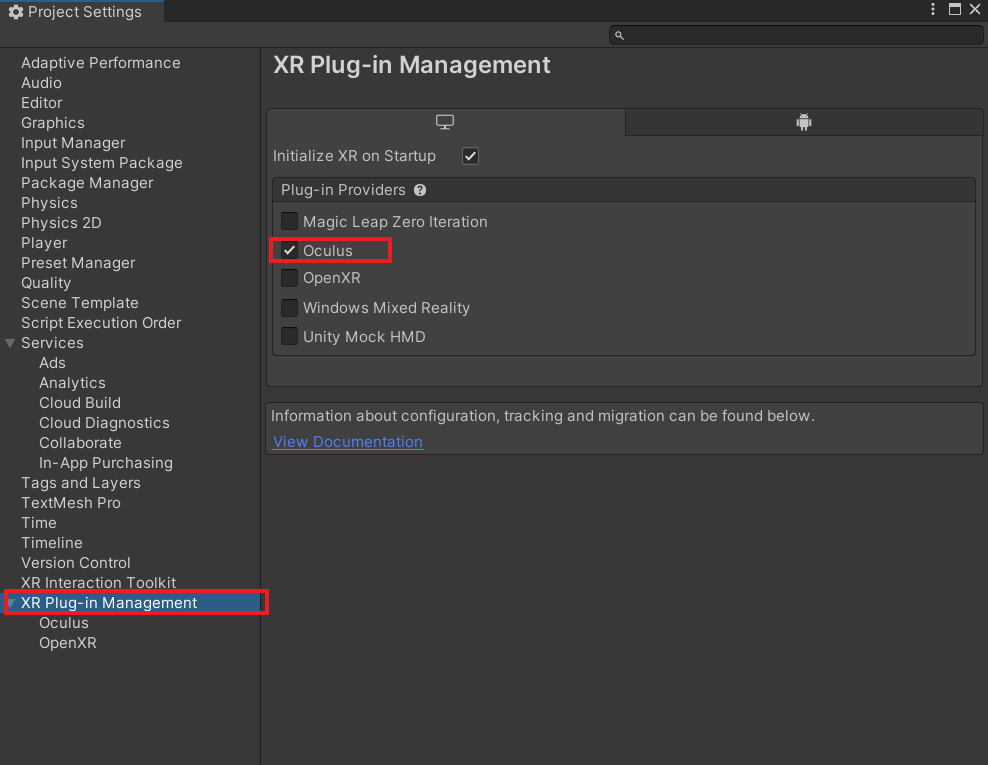
⚠️ Note: If you have both the Oculus and OpenXR plugin installed, the project might not work. So make sure to remove the OpenXR plugin from the Package Manager.
That’s all we need to do to make sure it works correctly. Next, we’ll see how to test the scene on the headset wirelessly.
3. Playing Unity Scene on Oculus Wirelessly
Finally, we have arrived at the section you have been waiting for. For this you need to wear your headset and do as follows:
- On the home screen, select
Quick Settings→ click onOculus Air Link→Launchthe Air Link.
- Wait for the virtual desktop to open, then click on the 🖥️ Desktop tab and choose the Monitor that has the SteamVR shortcut → open the SteamVR application.
⚠️ Note:
- You can launch the SteamVR even before connecting the Air Link but that might not work all the time.
- If your VR display is black after choosing the Monitor then, open Graphics Setting → click on
Browse→ navigate to the path C:\Program Files\Oculus\Support\oculus-runtime → select OVRServer_x64 and click onAdd→ select theOptionsfrom OVRServer_x64.exe, select thePower Savingoption and save. That should solve the black screen issue.
- Once SteamVR is open, press the Oculus button on the right controller to open the home screen menu → click on the 🖥️ Desktop tab and choose the Monitor where you have your Unity project→ open the project and hit ▶️ Play. Now you can test your scene on your headset.
- To quit the app, press the Oculus button on the right controller and click on Quit App → from the virtual desktop you can stop playing your scene by clicking the ▶️ Play button once again.
Conclusion
That was so convenient, right? It really helped me in my development process, I could test scenes comfortably without having to worry about cables or having to fear knocking something down the table.
Also, this procedure is almost the same for playing PCVR games on Oculus without a link cable. After launching Steam VR, you can press the Menu button on the left controller to open the steam library and you can choose the game you want to play.+
