
💡 Make sure you have a Unity project with version 39 of the Oculus Integration package imported.
Surface Projected Passthrough
Let’s begin by learning how to create a surface projected passthrough. As the name suggests, we can have a surface/geometry that’s defined by us and project the passthrough layer on it.
Scene Setup
In this section, we’ll set up our scene to work with passthrough.
- We’ll start by creating a new scene. Right-click on the Project window → Create → Scene → name it as SurfaceProjectedPassthrough → Open The scene
- Delete the Main Camera from the Hierarchy window.
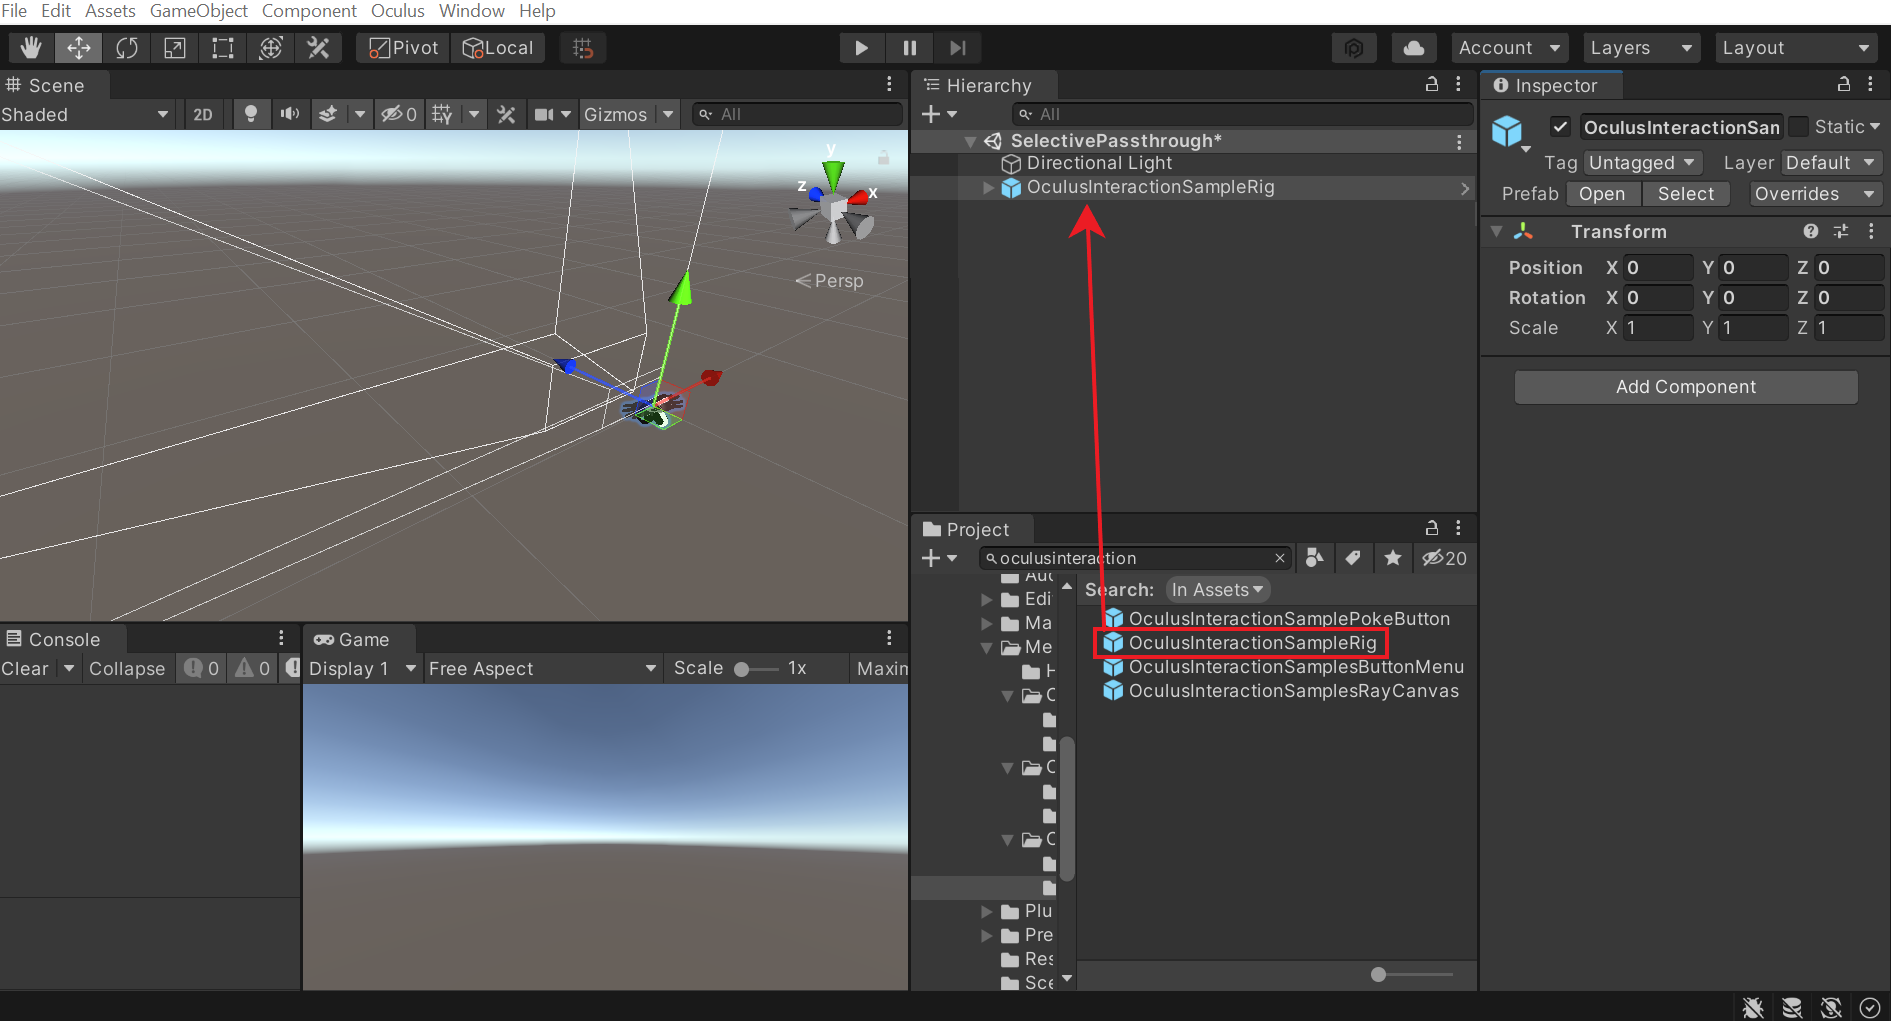
- Search for OculusInteractionSampleRig in the Project window → drag and drop it in the Hierarchy.

- Select the OVRCameraRig GameObject and make sure the Passthrough Capability and Enable Passthrough parameters of the OVR Manager component are checked.
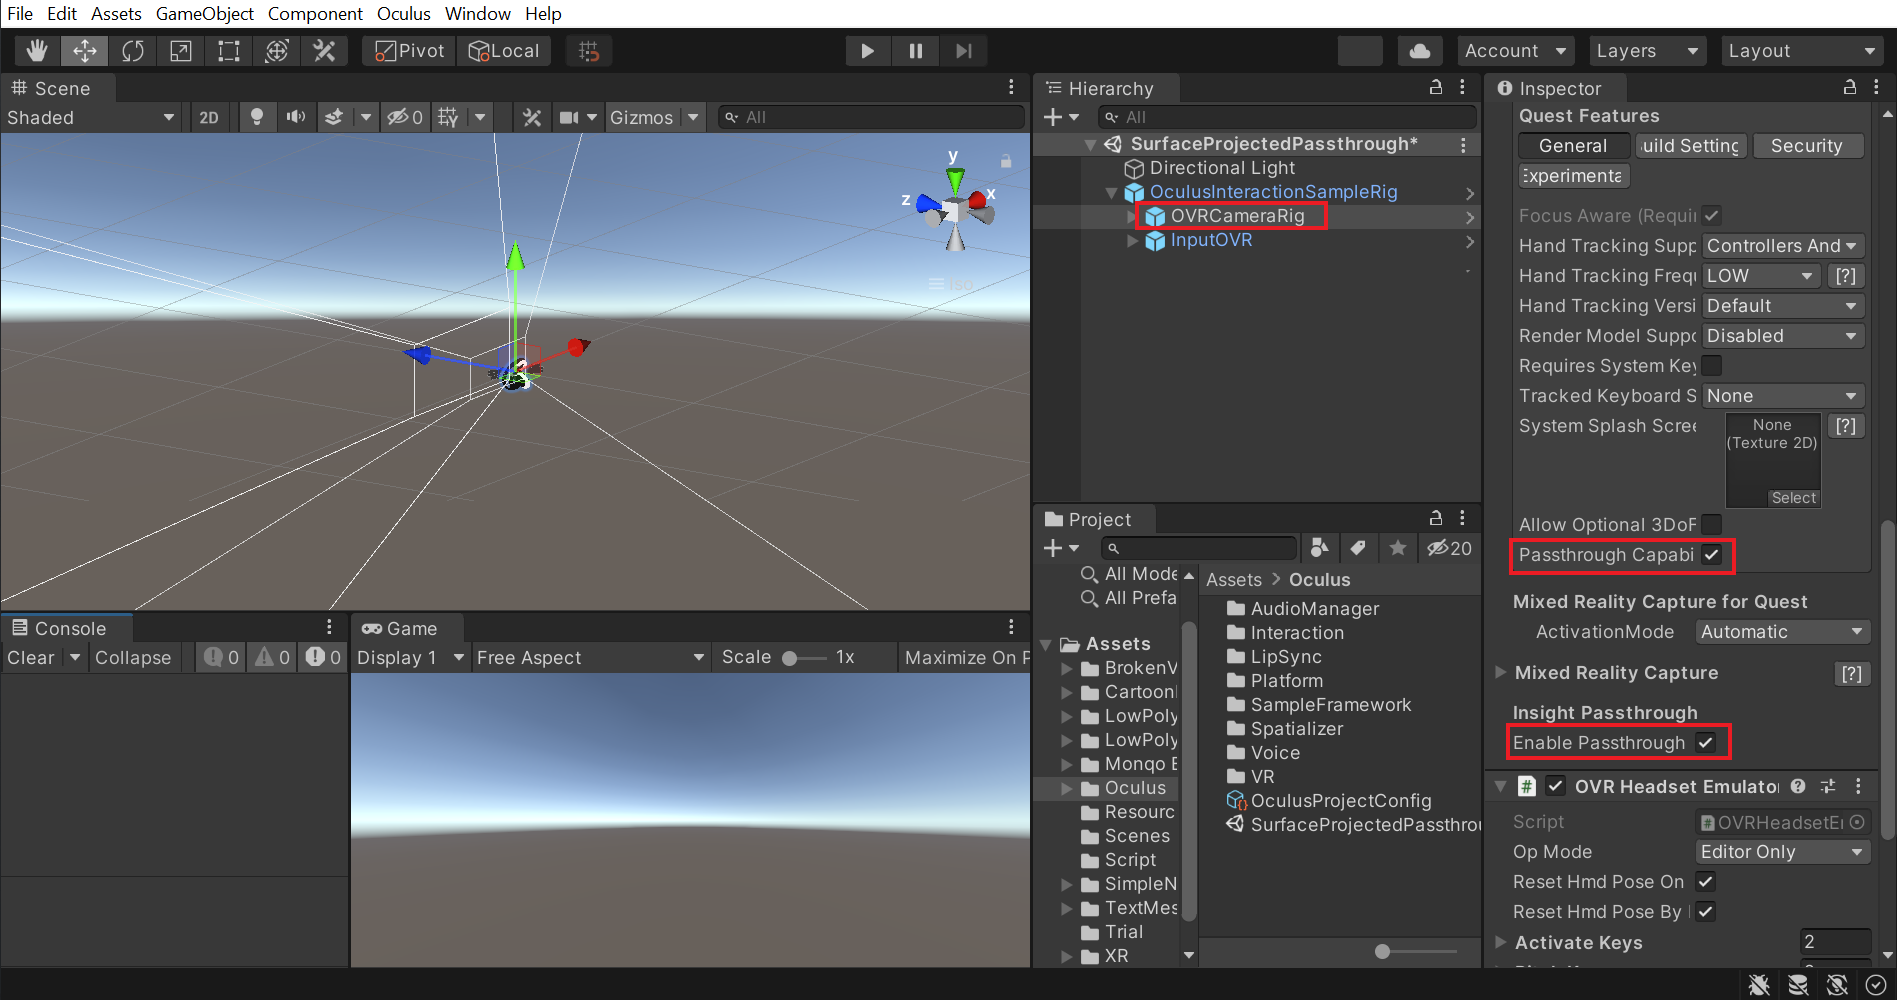
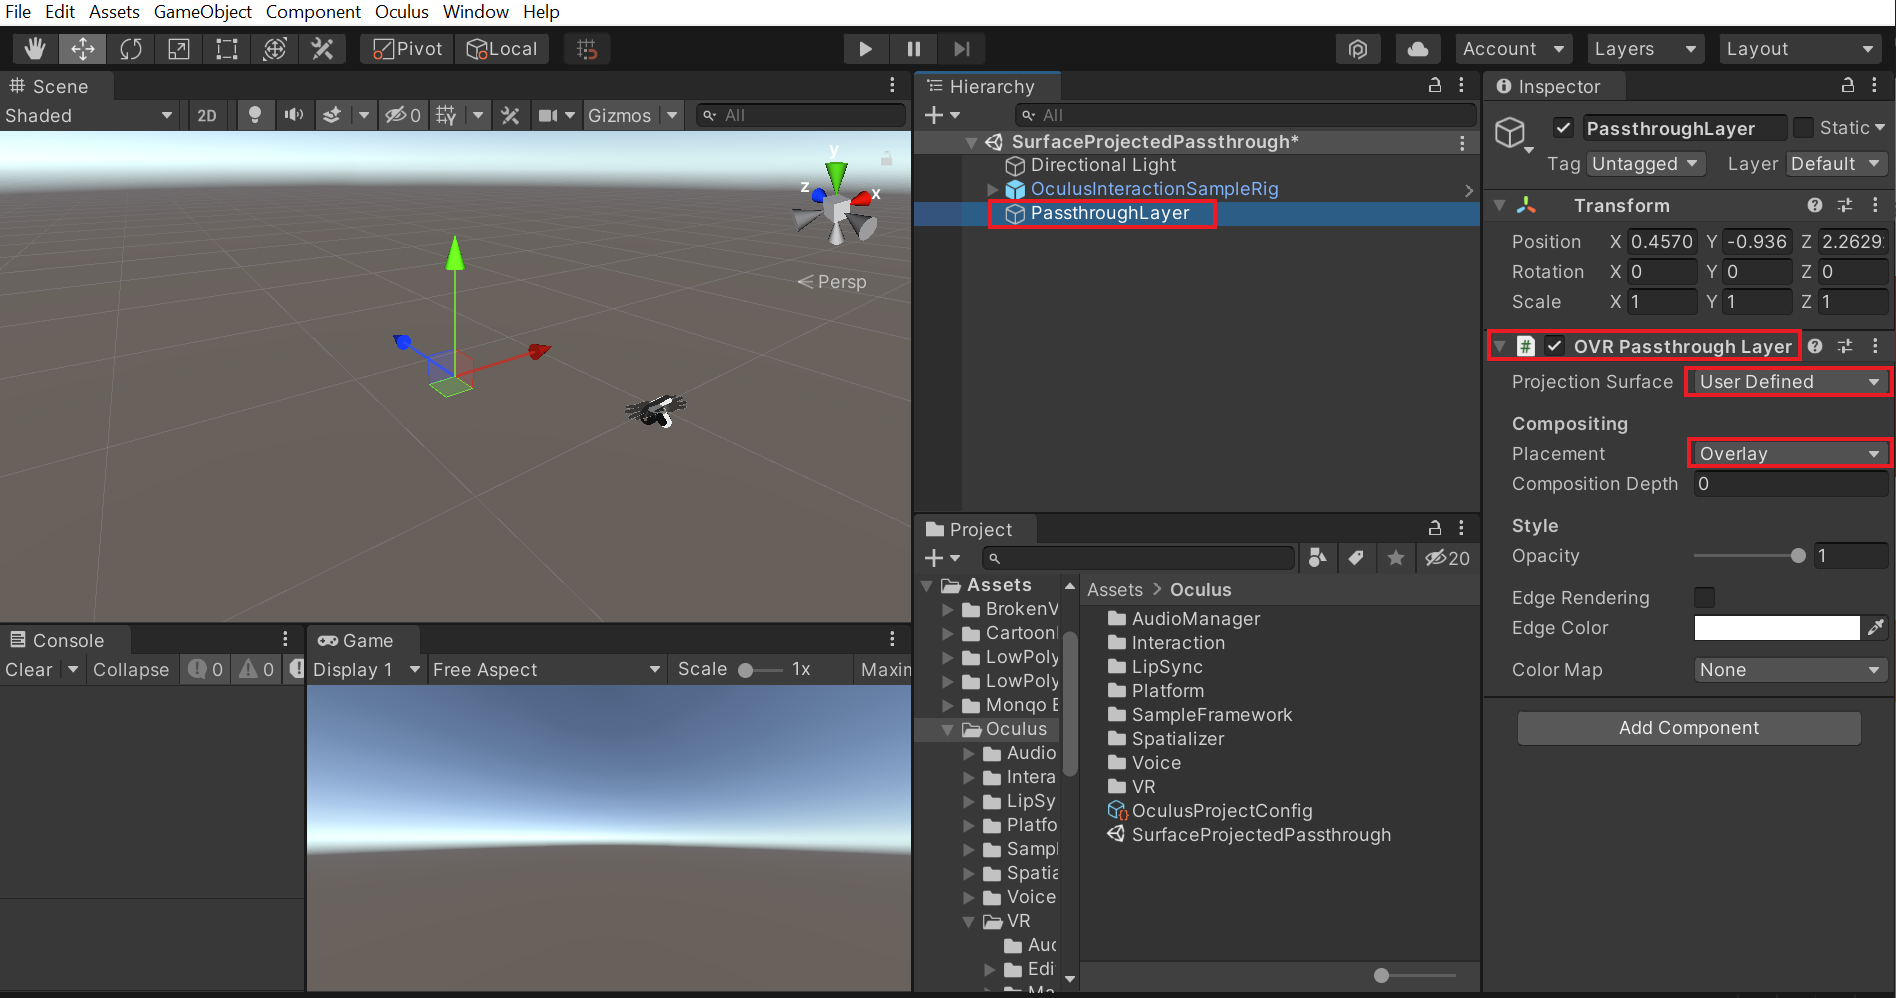
- Create an empty GameObject and name it as PassthroughLayer → add the OVR Passthrough Layer component → Set the Projection Surface parameter as User Defined → set the Placement parameter as Overlay.
- Now to add a virtual environment, search for RoomEnvironment in the Project window → drag and drop it in the Hierarchy.

With that, we have our scene setup. Next, we’ll see how to add the surface onto which the passthrough layer should get projected upon.
Creating Projection Surface
The projection surface can be of any shape i.e it could be a Quad or a Cube or a Sphere, etc. But the important thing we need to keep in mind is that the projection surface should match the surface of the real world. For example, if we have a flat object like a laptop screen in front of us and we project it on a sphere, the screen will be distorted. Similarly, if we have a curved surface in front of us and it’s projected on a plane, the curved surface will look distorted as well. In this blog, we’ll use Quad as a projection surface but feel free to any surface of your choice.
- To create a Quad, right-click on the Hierarchy window → 3D Object → Quad.
- Name it as ProjectionSurface → adjust its size and position. We’ll place it vertically behind the table.
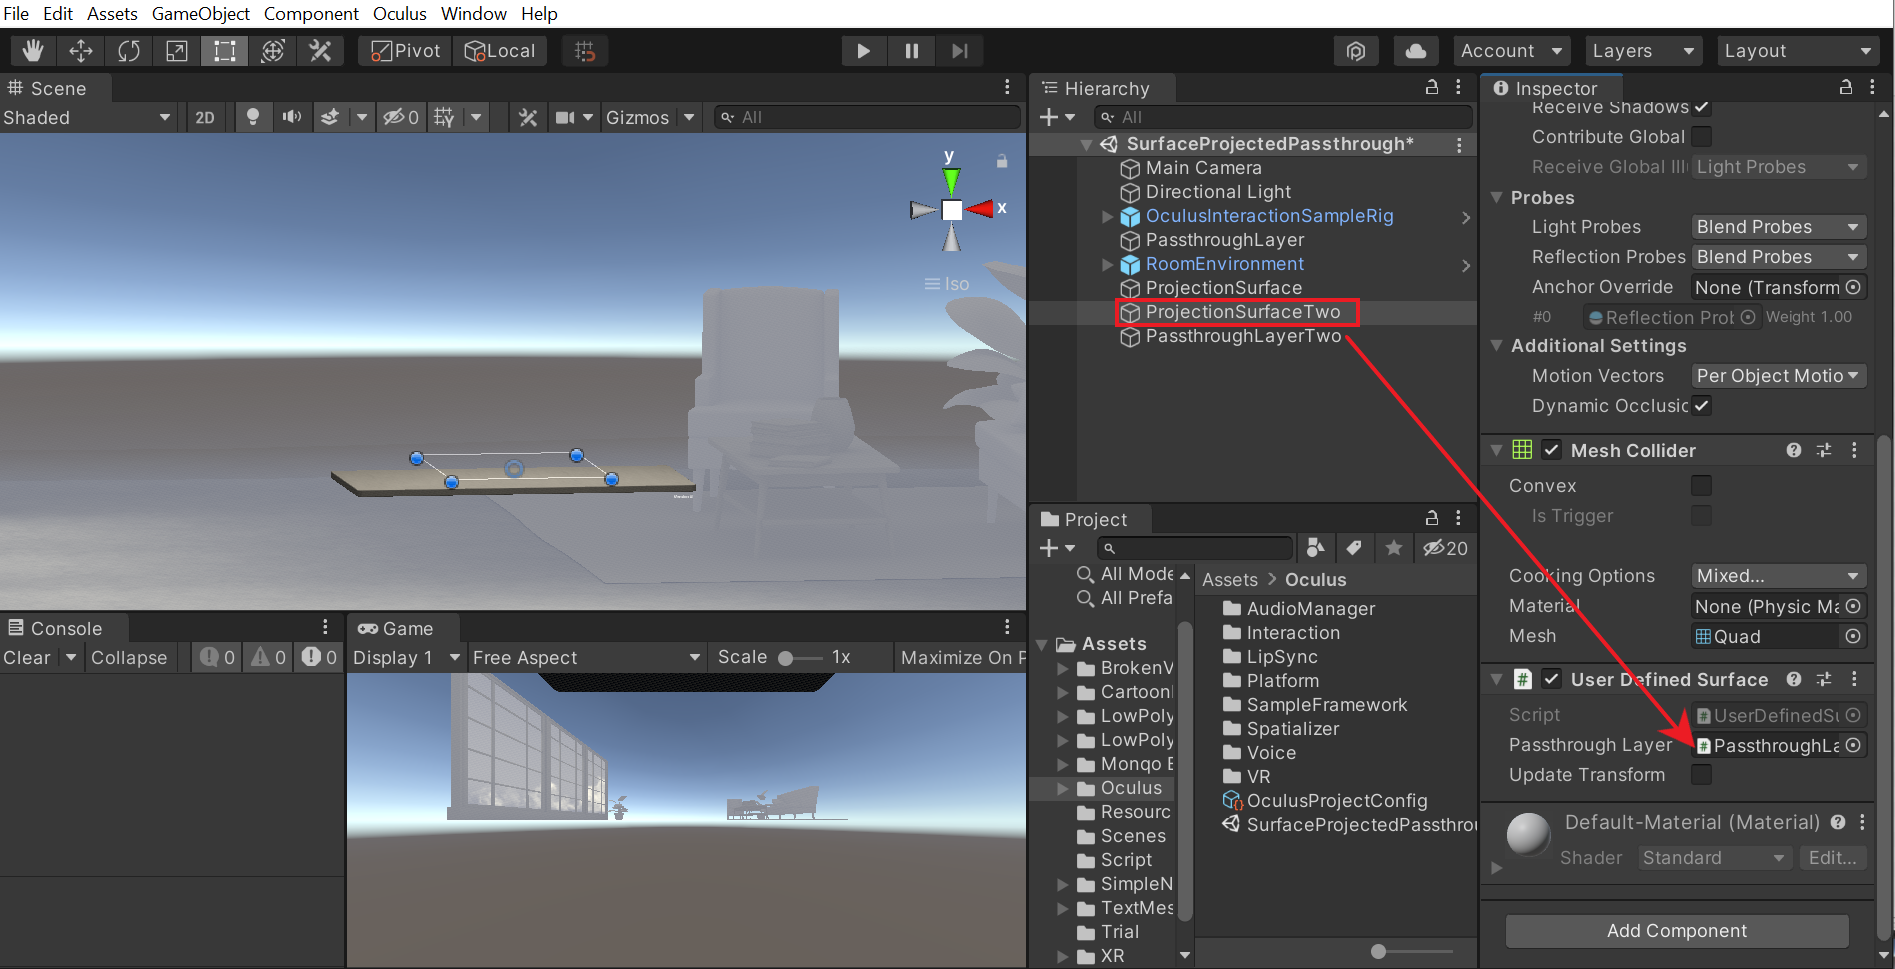
To assign this surface for projecting passthrough, we’ll need to write a simple script and add it to the ProjectionSurface GameObject
- Create a new script and name it as UserDefinedSurface.
- Copy and paste the following code. The script takes the OVRPassthroughLayer component and uses its API call to assign the surface we created as a projection surface.
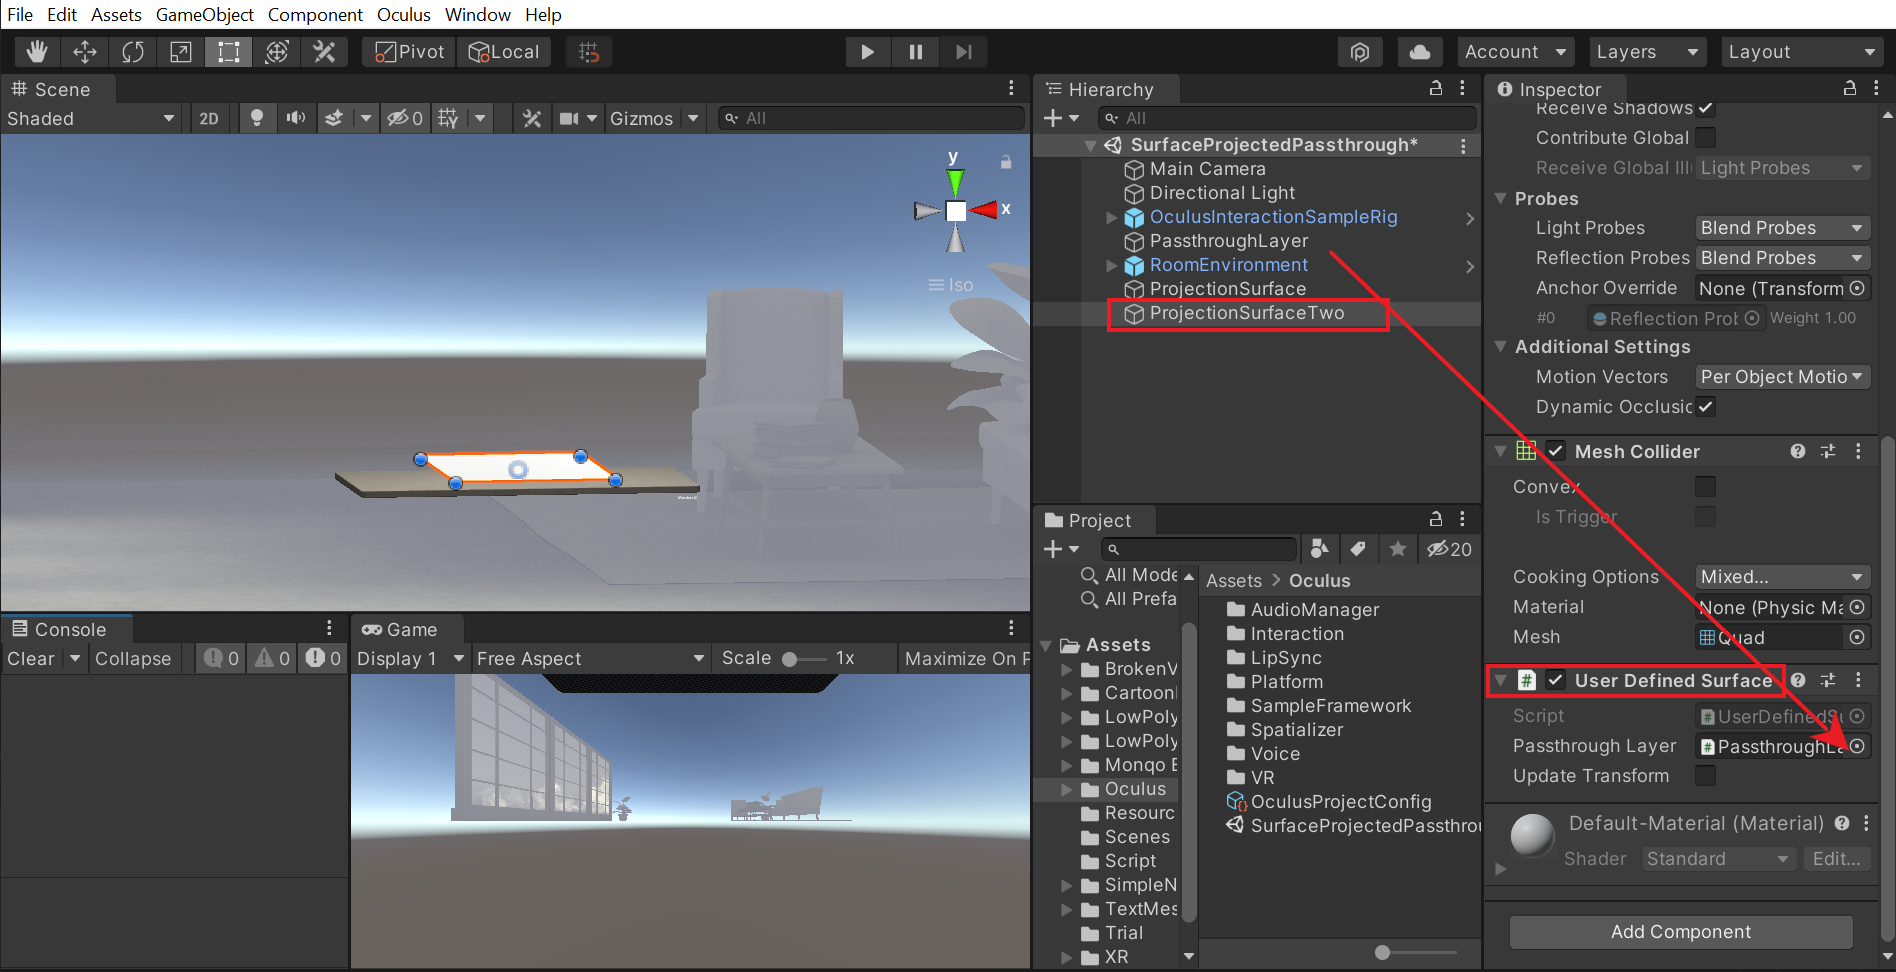
- Add the script to the ProjectionSurface GameObject → drag and drop the PassthroughLayer GameObject into the Passthrough Layer parameter → leave the Update Transform parameter disabled. If the Update Transform parameter is enabled then the surface can be moved during run time.
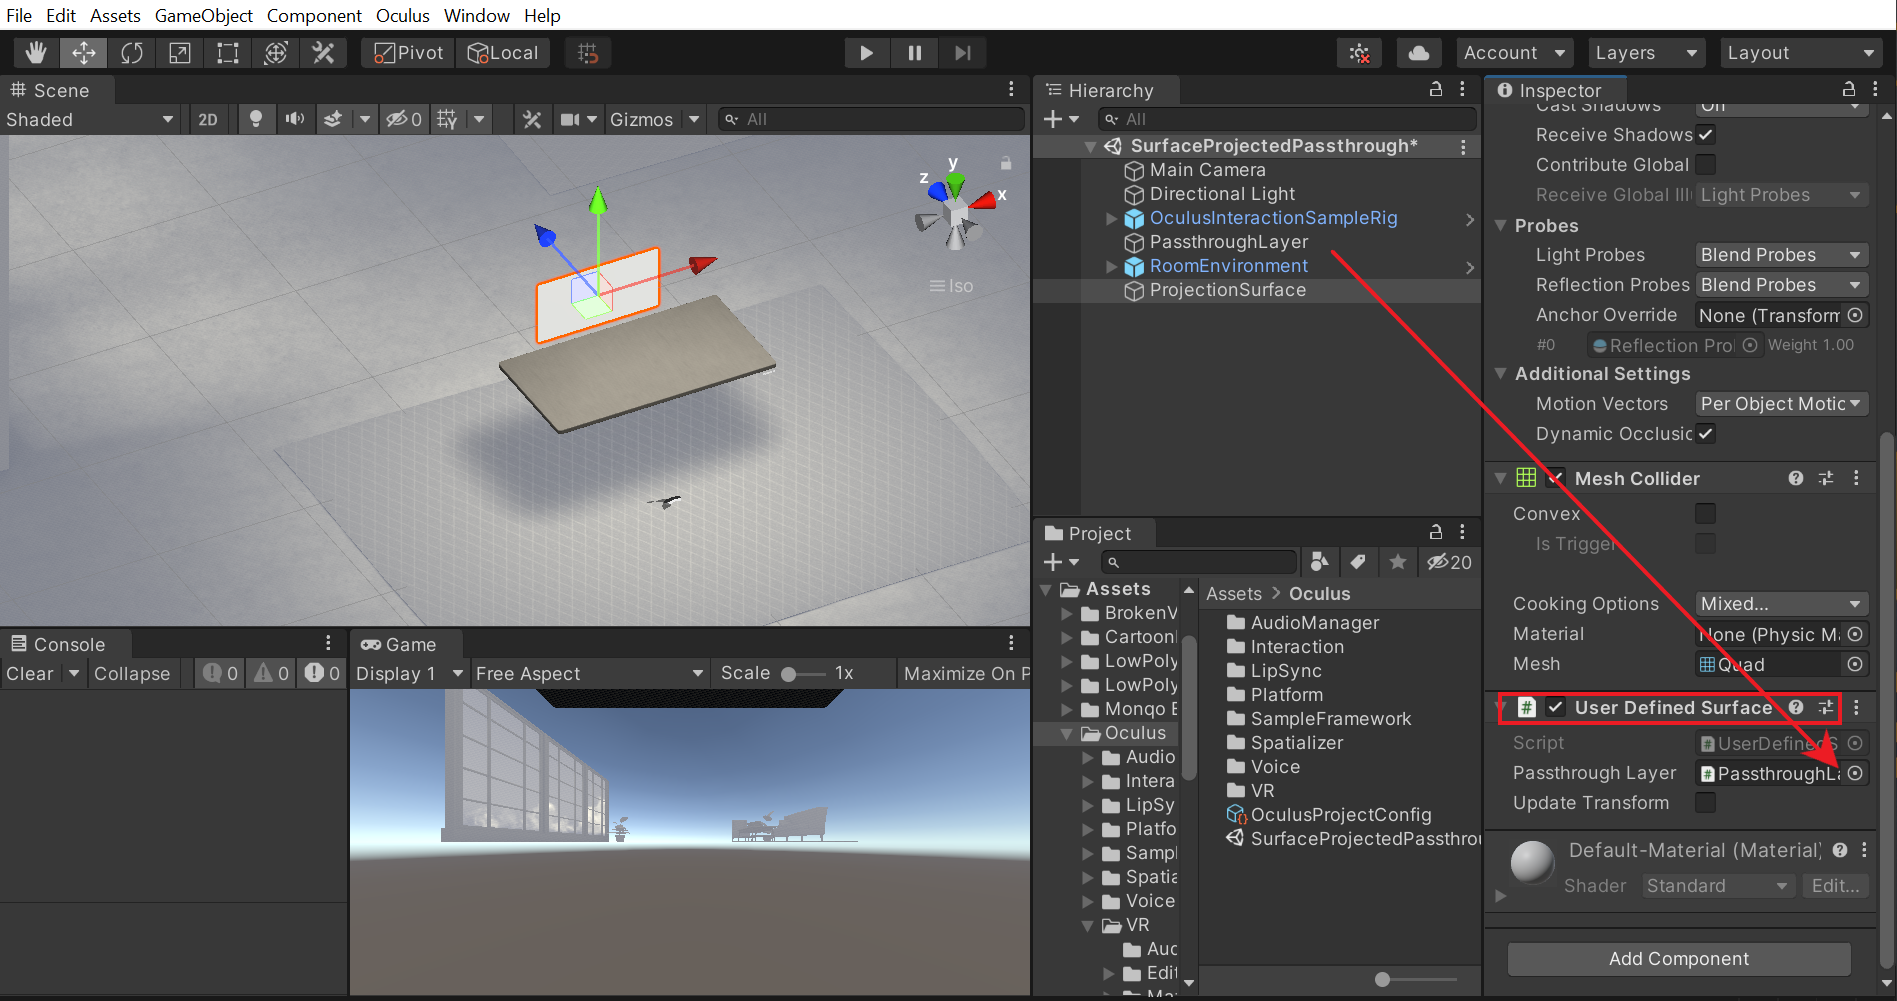
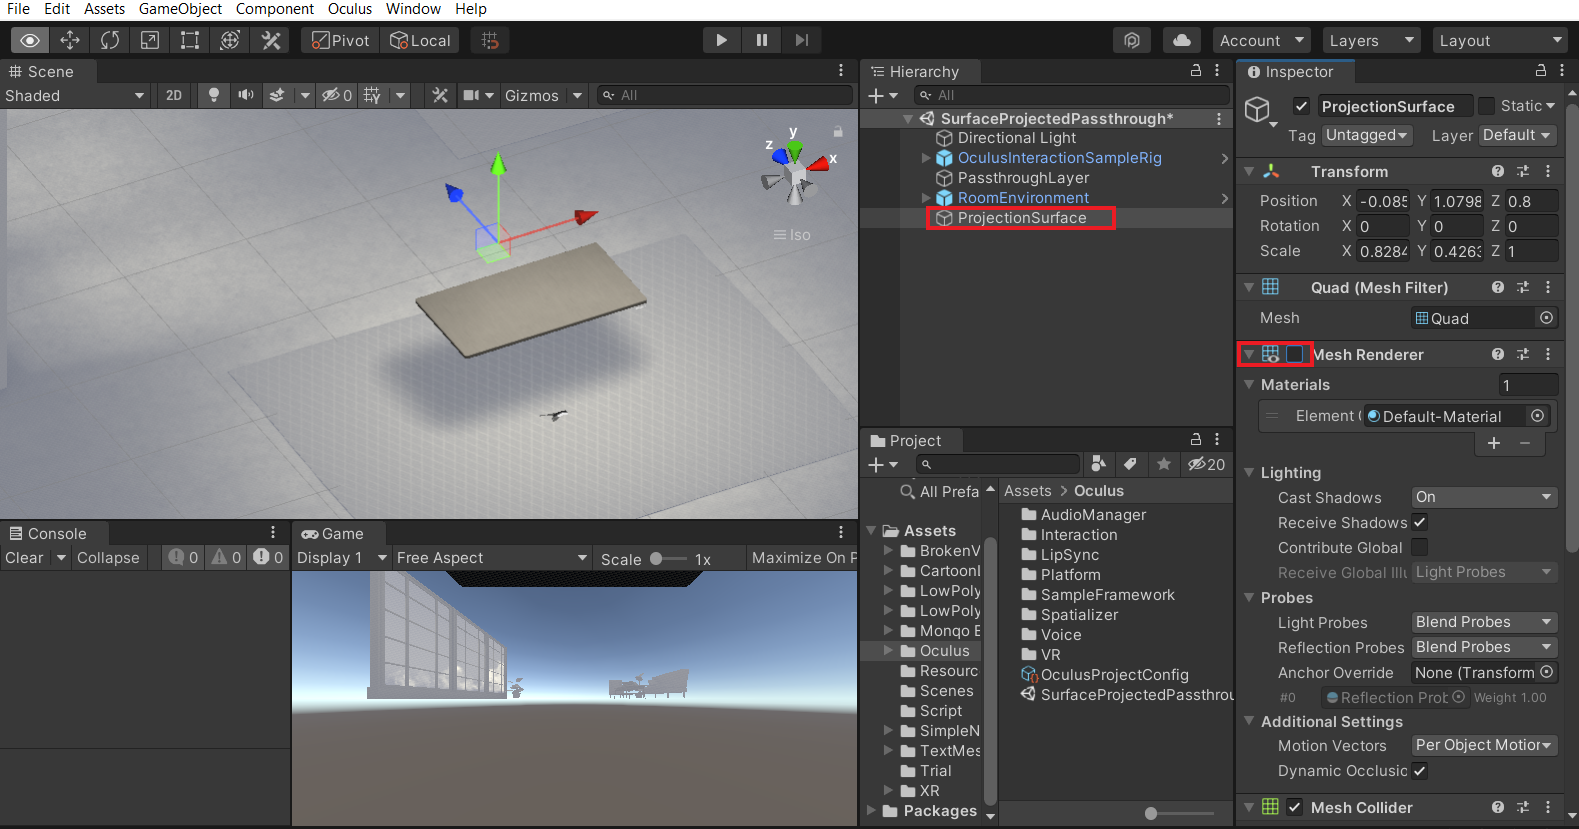
- We can now select the ProjectionSurface GameObject and disable the mesh renderer as we only need the mesh.
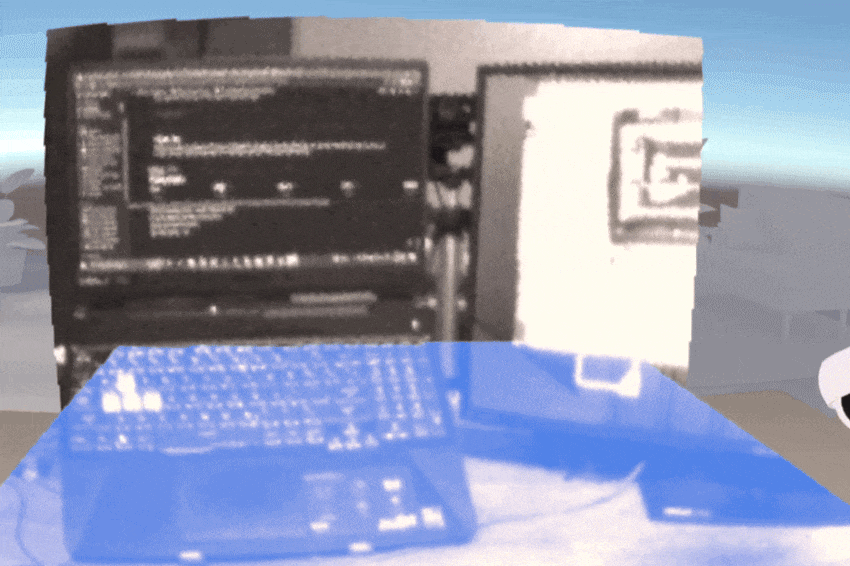
- Press the play button. Now we should be able to see the Passthrough only within the Quad.
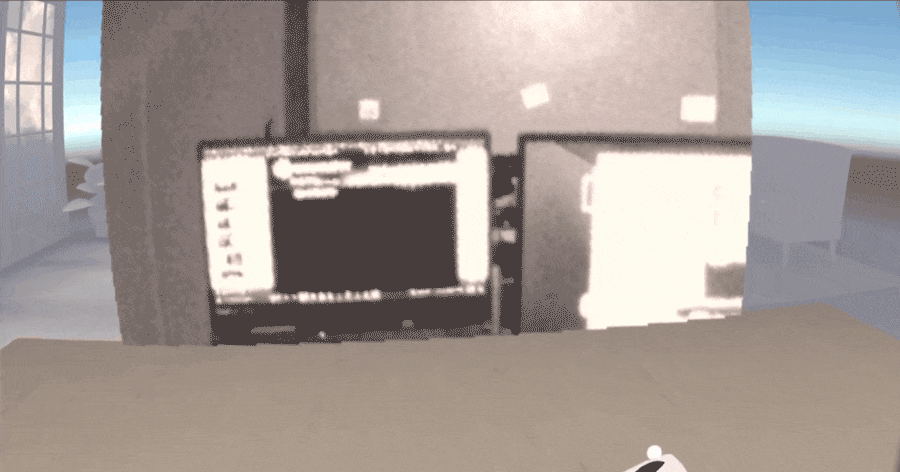
- With that, we have successfully created a surface projected passthrough. Now, what if we want the passthrough to be projected on more than one surface? We’ll see that in the next section.
Multiple Surface Projection
Creating another projection surface is simple:
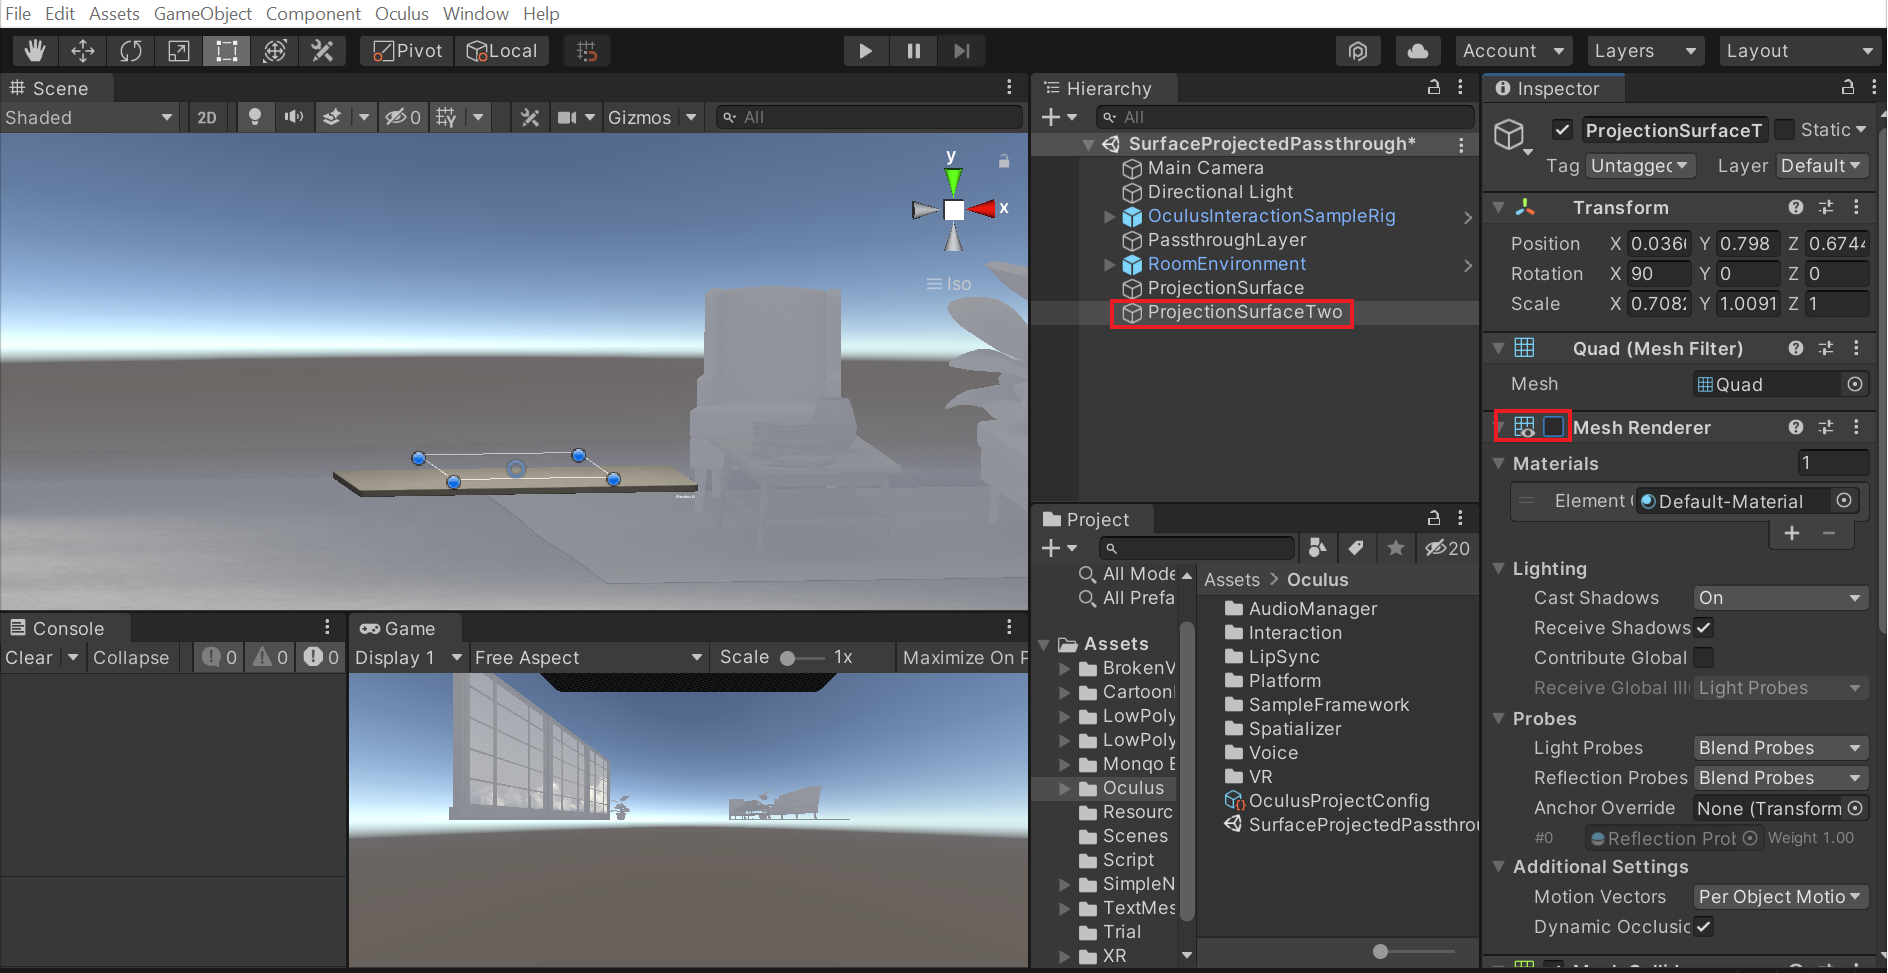
- Create another Quad by right-click on the Hierarchy window → 3D Object → Quad.
- Name is ProjectionSurfaceTwo → adjust its size and position. This time we’ll place it horizontally on top of the table
- Just like before, add the UserDefinedSurface component to it → drag and drop the PassthroughLayer GameObject into the Passthrough Layer parameter → leave the Update Transform parameter disabled.
- Disable the mesh renderer as we only need the mesh.
- Press Play to test the scene and we’ll be able to see passthrough projected on both the surfaces.
Now, what if we want to distinguish between the two surfaces? For that, we’ll have to create another passthrough layer and tweak its properties like color/brightness/contrast/edge rendering, etc.
- Create an empty GameObject and name it as PassthroughLayerTwo → add the OVR Passthrough Layer component → Set the Projection Surface parameter as User Defined → set the Placement parameter as Overlay.
- Or Just duplicate the PassthroughLayer GameObeject and rename it as PassthroughLayerTwo.
- Set the Color Map parameter as Controls → use the Colorize parameter to change the color of the passthrough layer.
- Select the ProjectionSurfaceTwo GameObject → drag and drop the PassthroughLayerTwo **GameObject into the Passthrough Layer parameter.
- Test the scene by pressing the Play button. We’ll be able to see the two different passthrough layers being projected on two different projection surfaces.
With that we have learned to create surface project passthrough. Up next is Selective Passthrough.
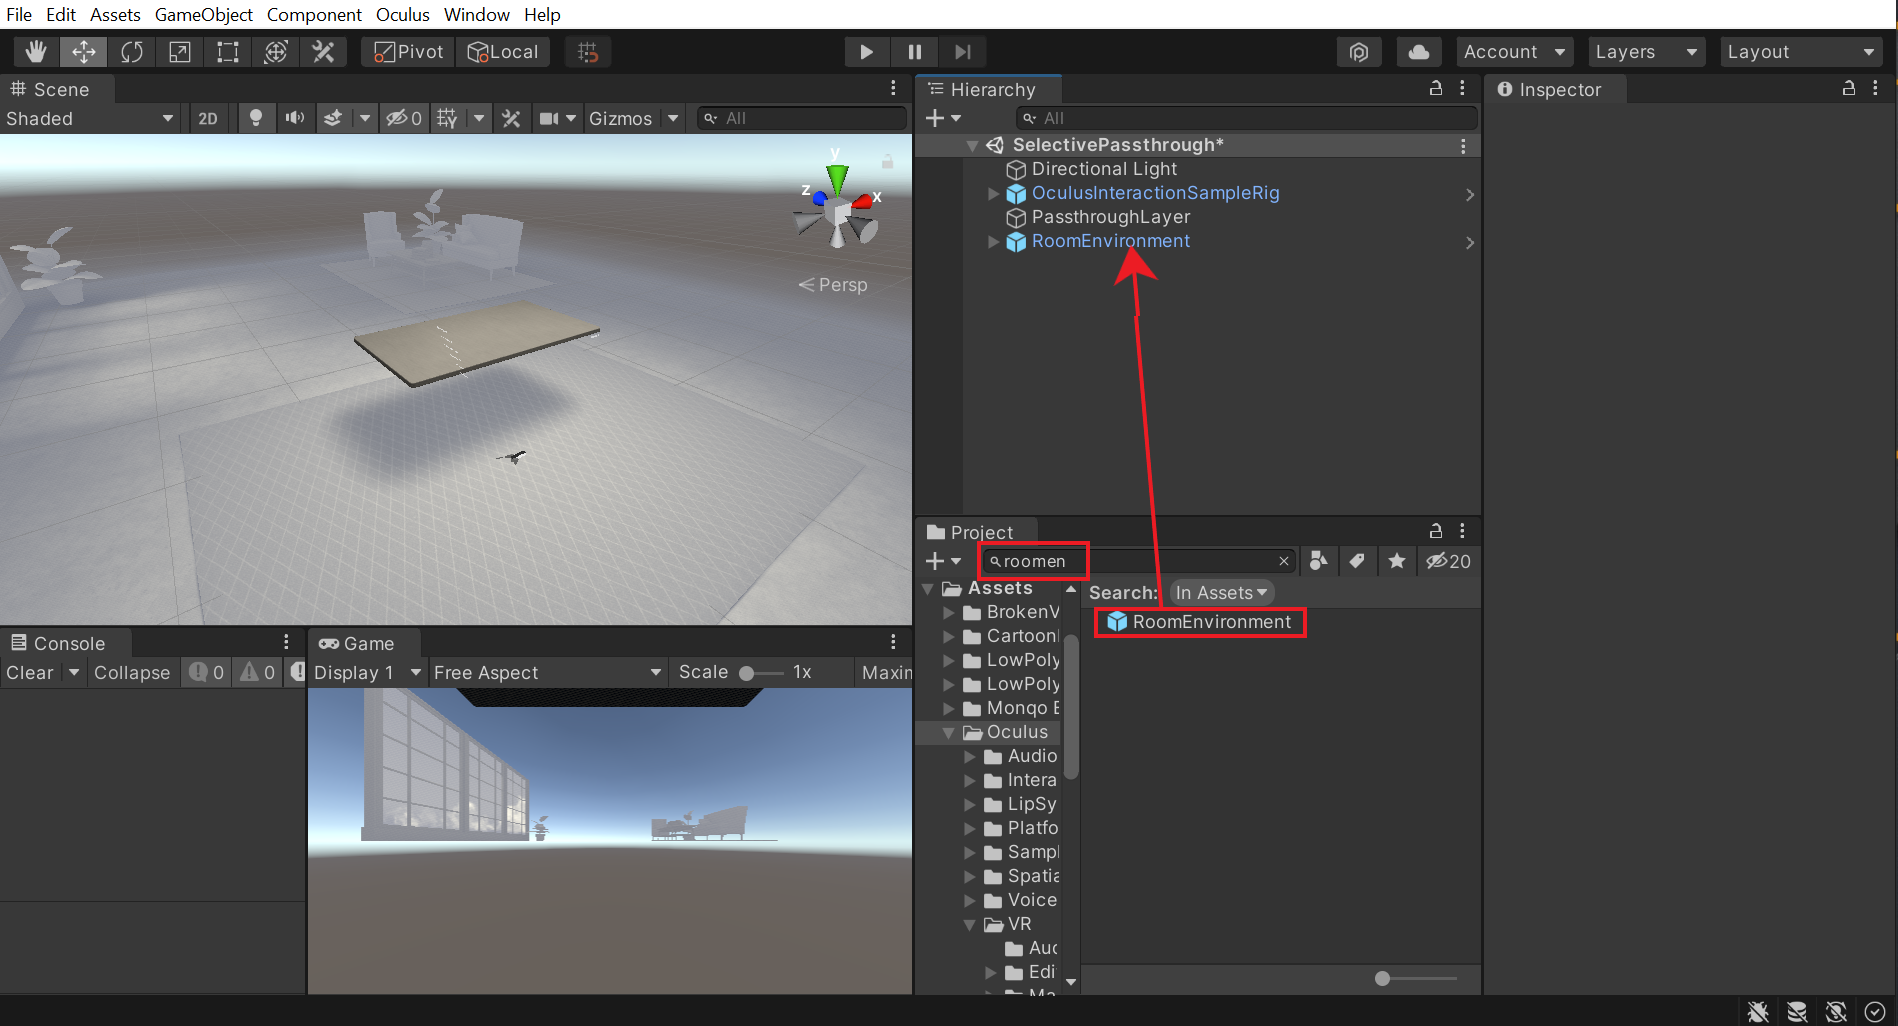
Selective Passthrough
Now, we’ll learn to create selective passthrough. Unlike surface projected passthrough, selective passthrough doesn't require a geometry as it will show the reconstructed environment.
Scene Setup
In this section, we’ll set up our scene to work with passthrough.
- We’ll start by creating a new scene. Right-click on the Project window → Create → Scene → name it as SelectivePassthrough → Open The scene
- Delete the Main Camera from the Hierarchy window.
- Search forOculusInteractionSampleRig in the Project window → drag and drop it in the Hierarchy
- Select the OVRCameraRig GameObject and make sure the Passthrough Capability and Enable Passthrough parameters of the OVR Manager component are checked.

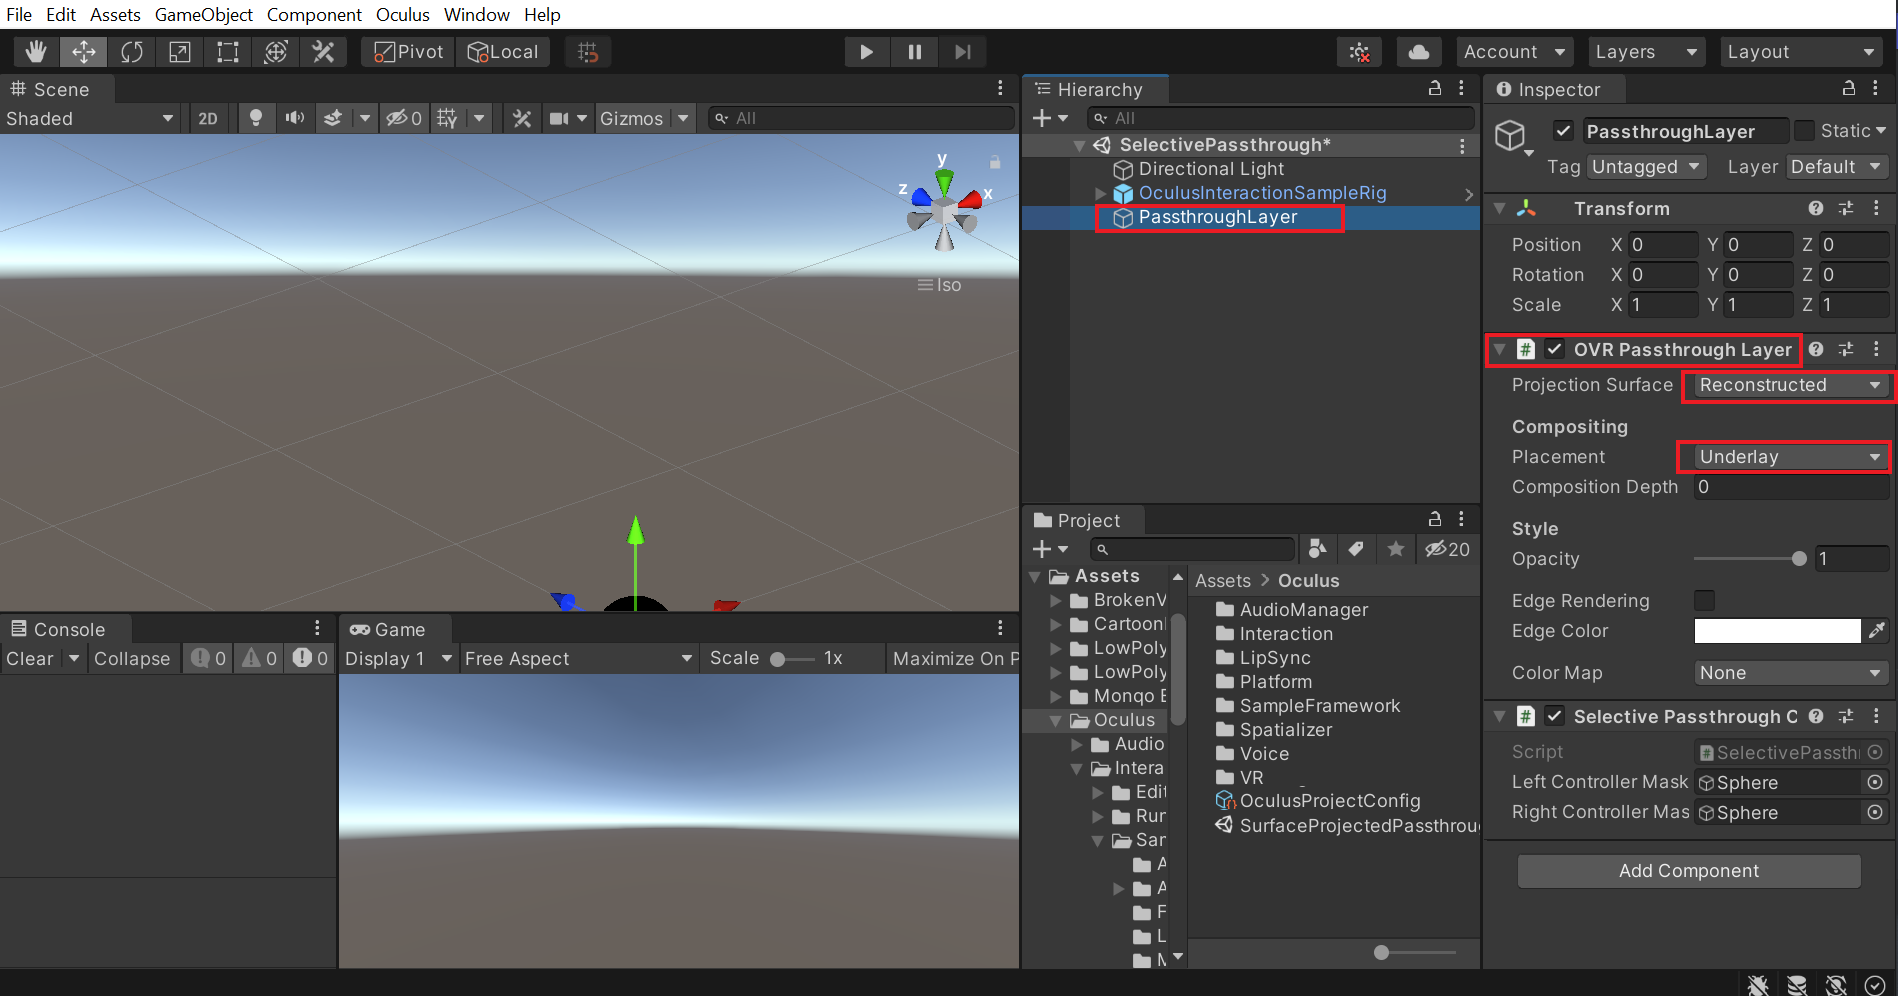
- Create an empty GameObject and name it as PassthroughLayer → add the OVR Passthrough Layer component → make sure the Projection Surface parameter is Reconstructed → set the Placement parameter as Underlay.
- Now to add a virtual environment, search forRoomEnvironment in the Project window → drag and drop it in the Hierarchy.
With that, we have our scene setup. Next, we’ll see how to create and use the selective passthrough material onto which the passthrough layer should get projected upon.
Creating a Selective Passthrough Material
To create a material for selective passthrough:
- Right-click on the Project window → Create → Material → name it as SelectivePassthroughMaterial.
- Click on the Shader drop-down menu and search for SelectivePasstrhough Shader → select the option SelectivePasstrhough(MixedRerality/SelectivePasstrhough)
- Set the Blend Color to Subtract
- Set the Render Queue to 4000.
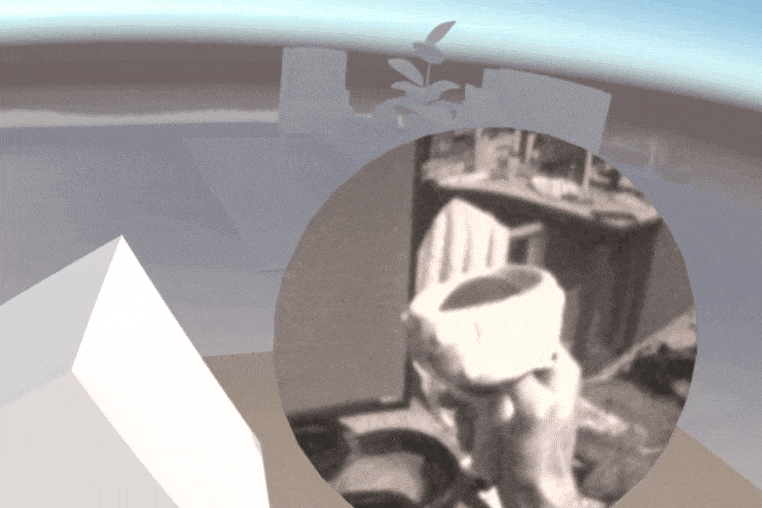
- With these settings, the material when applied to an object will subtract that volume of the object from the VR environment and show the passthrough.
💡 Render queue sets the priority/order of the material being rendered at. The higher the number, the later it gets rendered. All the default materials have a render queue of 2000, so by setting the Render Queue of passthrough material to 4000, it will ensure that the passthrough gets rendered after all other materials are done rendering.
Implementing Selective Passthrough
We’ll create two spheres enclosing the controllers and add the material we just created. Along with that, we’ll write a script which will enable and disable the spheres on the controller with a button press.
- Select the OculusInteractionSampleRig GameObject and open its children till the LeftHandAnchor and RightHandAnchor GameObjects are found.
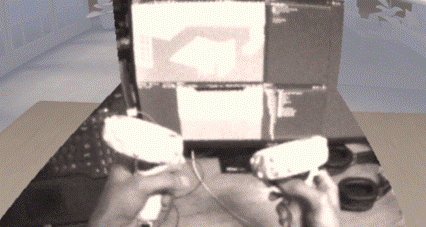
- Right-click on the LeftHandAnchor GameObject → Create → 3D Object → select Sphere → set the scale to 0.3 in all directions.
- Similarly, select the RightHandAnchor GameObject and create a sphere with a scale of 0.3 in all directions.
- Select both the spheres and add the SelectivePassthroughMaterial to it.

Now, we’ll write a script which will allow us to enable and disable these selective passthrough spheres using the controller button. So, create a new script, name it SelectivePassthroughController and copy the following script:
- Select the PassthroughLayer GameObject and add the SelectivePassthroughController component → drag and drop the Spheres from the LeftHandAnchor and RightHandAnchor GameObjects into the leftControllerMask and rightControllerMask parameters respectively.
- Finally, we’ll add a cube GameObject on the table which will help us visualize the Selective passthrough better.
- Press the play button and test the scene.
With that, we learned to create selective passthrough experience.
Conclusion
The surface projected passthrough has better depth accuracy when compared to selective passthrough. The only disadvantage is that the geometry of the passthrough should match the physical world surface. However, both of these can be used in apps to enable the user to have a window into their physical world.
Previously, we learnt about Passthrough and how it’s set up, we learned about implementing the passthrough and we saw how to customize the passthrough layer. If you haven’t checked it out yet then we highly recommend reading it first. In this blog post, we’ll learn how to create surface projected passthrough and selective passthrough.
