
Previously, we saw how to set up hand tracking, we learned about grab interaction, poke interaction and ray interaction. We also learned about pose detection. If you haven’t checked out the first part of this series, we highly recommend checking it out. In this blog, we’ll see how to create a VR drawing experience.
Prerequisites
Before we start:
- Make sure you have a Unity project with version 39 of the Oculus Integration package imported.
- A scene with the OculusInteractionRig setup for hand tracking.
- The OculusInteractionRig setup with Hand Grab Interactors.
Setting up the Scene Environment
- We’ll first download all the required assets and set up the scene for drawing.
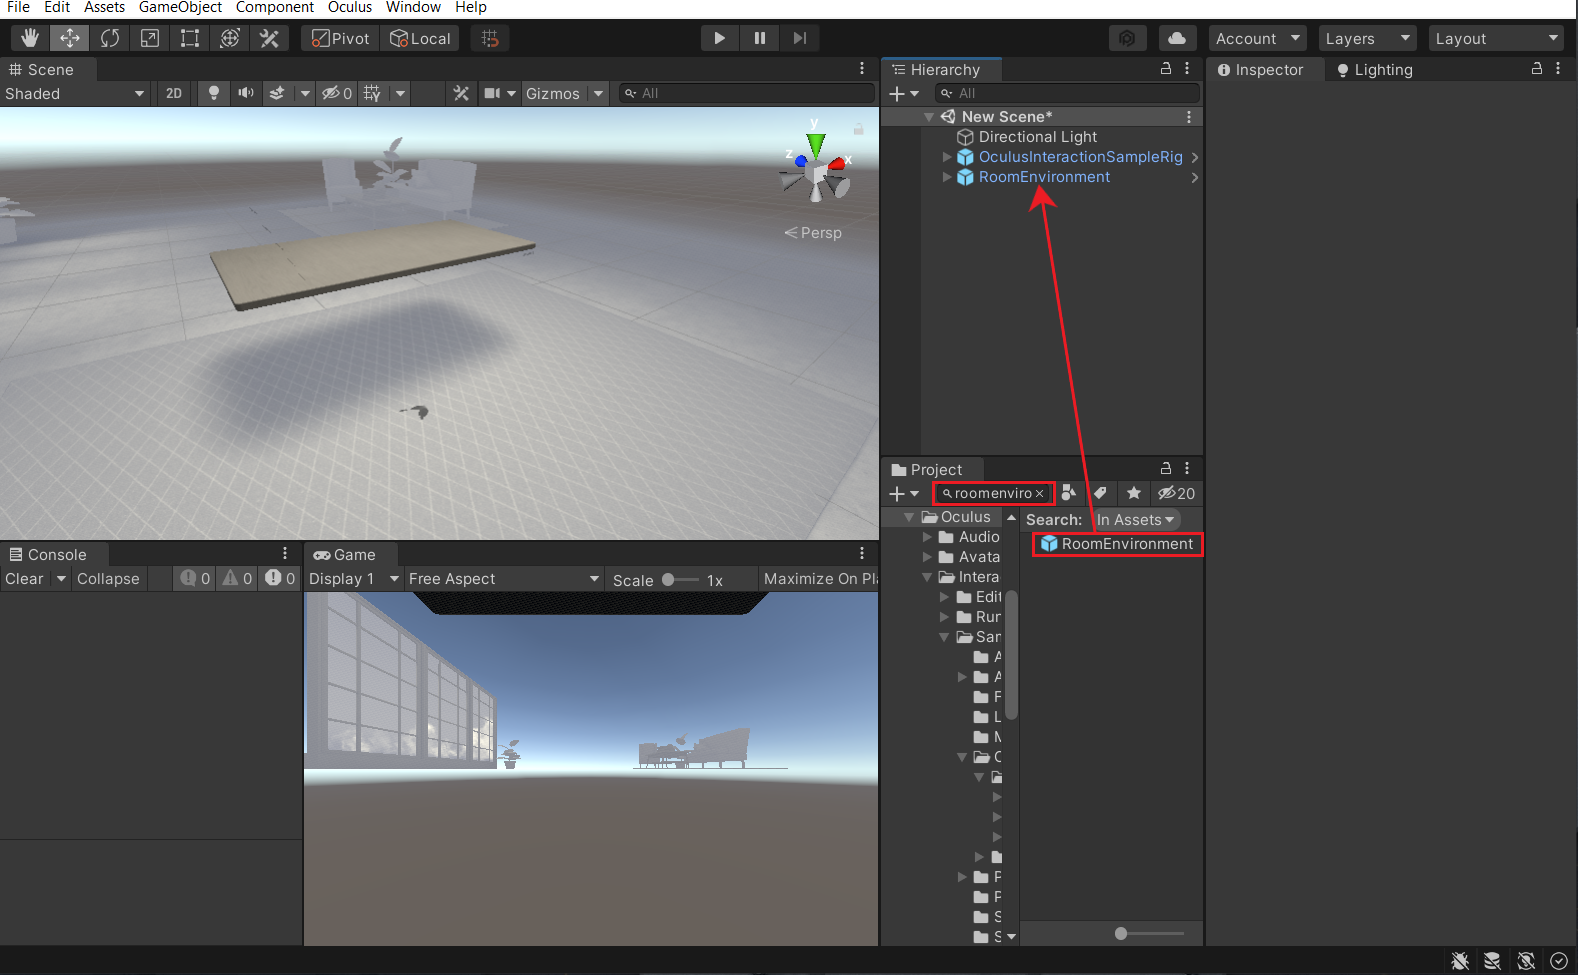
- In the Project, window search for Room Environment → drag and drop the prefab into the scene.
- We’ll now create a plane and place it on the desk, which will act like paper. So, create a 3D Plane → rename it as Paper → resize it to a size of your choice → place it on top of the table.
- To place it exactly on top we can use vertex snapping i.e press and hold the V key → select any edge of the paper and drag it toward the edge of the table → to avoid z-fighting, move the plane slightly above.
- Next, we’ll download the School Supplies asset and use the pencil prefab as a drawing tool.
- Once we have downloaded the assets, drag and drop the pencil prefab into the scene → adjust its position such that it’s close to the paper but not touching it → adjust its rotation such it’s slightly inclined like a pencil would when held.

With that, the setup of our scene is done. Next, we’ll make the Pencil GameObject interactable.
Making The Drawing Tool Interactable
To make the pencil interactable:
- Select the Pencil GameObject → add a Rigidbody component, uncheck the Gravity parameter and check the parameter for Is Kinematic.
- Also, add the Grabbable component.
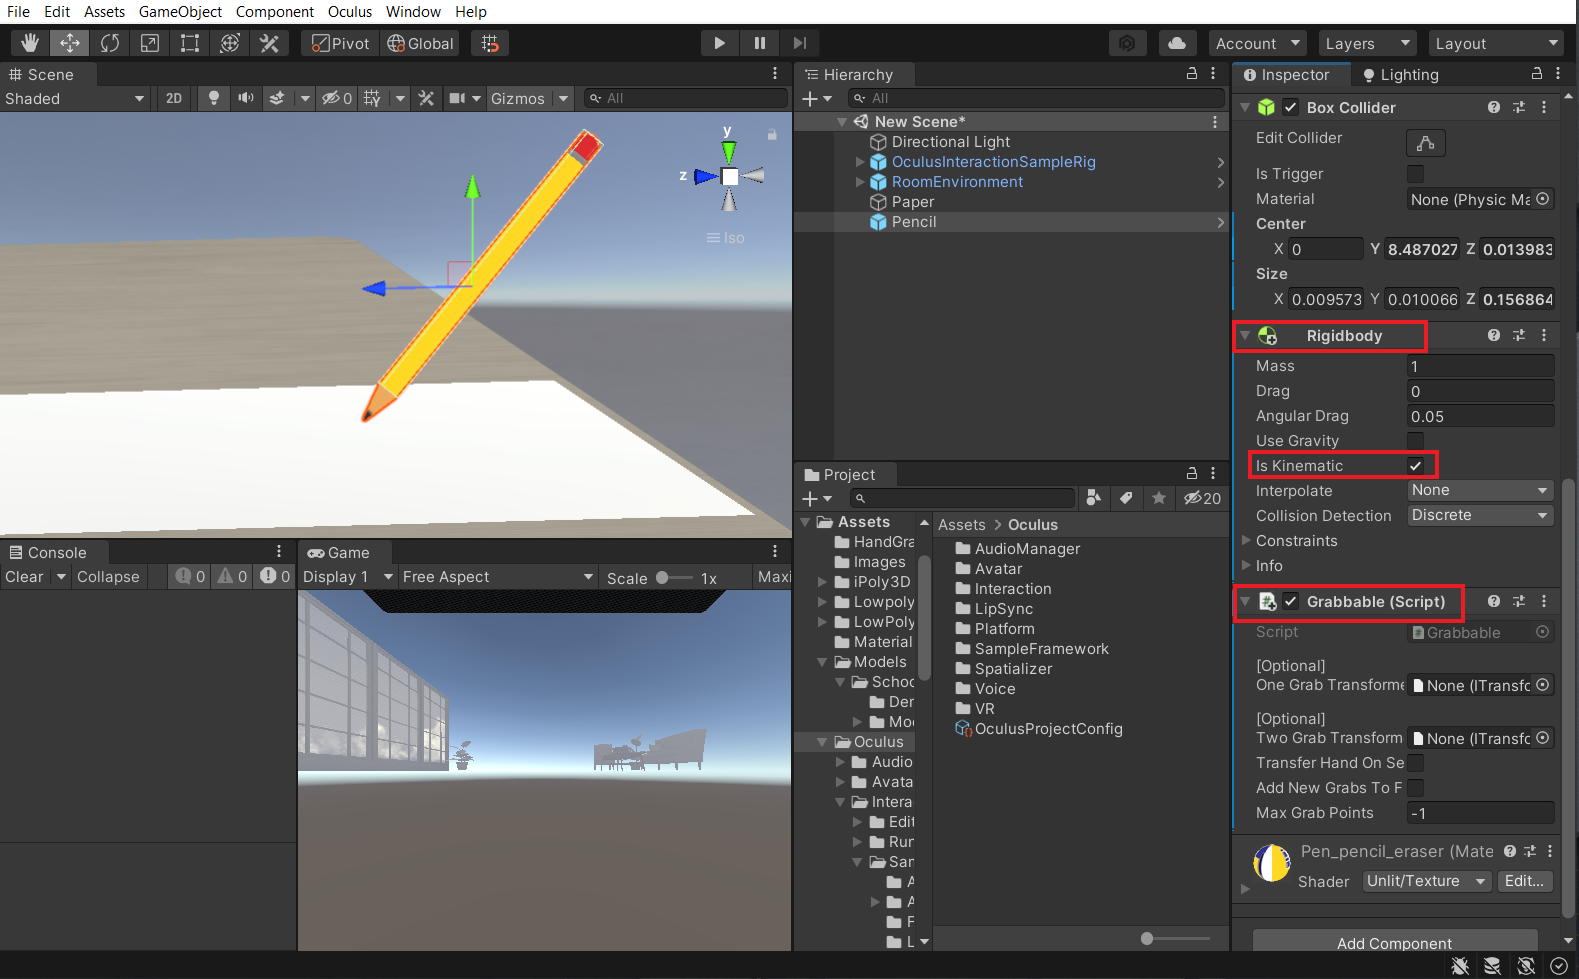
- Adjust the size of the Box Collider
- Now to make the experience more immersive, we’ll have to record the hand pose. Since we have already covered the recording of the hand pose in another post, we’ll move to the next step.
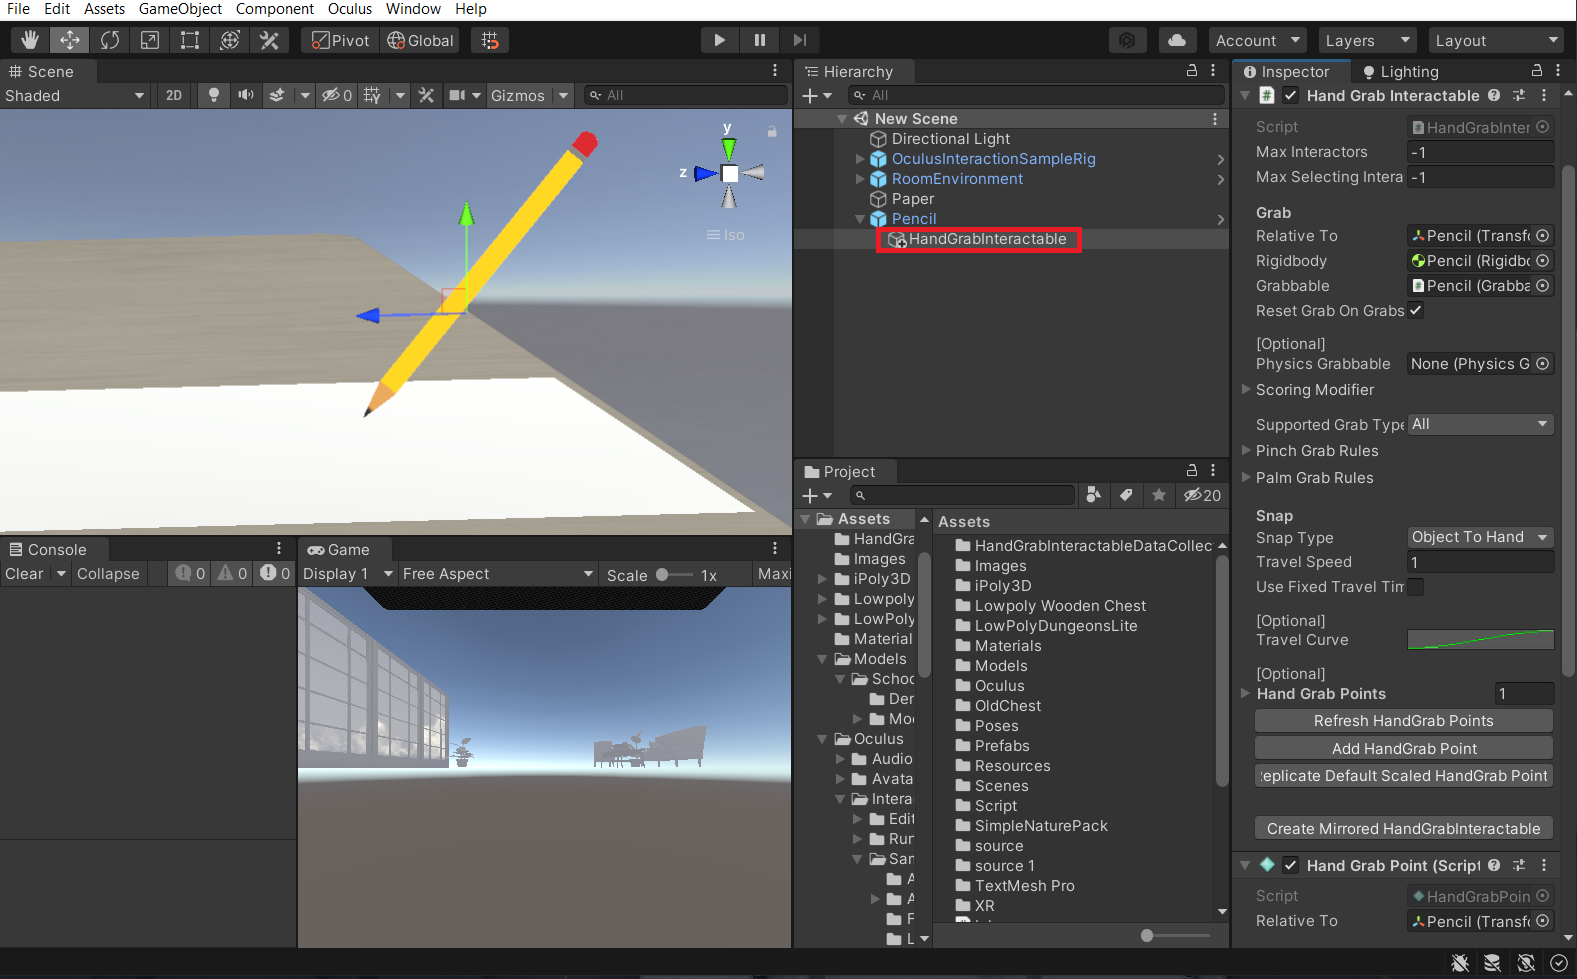
- Now if you Play the scene and test it, we’ll be able to interact with the pencil.
Now that the pencil is interactable, the next step would be to constrain it within the boundaries of the paper.
Constraining the Drawing Tool Movement
We need to constrain the Pencil movements in all three dimensions so that the pencil can remain within the boundaries of the paper and also it can be lifted only to a certain height.
To do that:
To fill in the values of the parameters Min/Max X and Min/Max Z:
Now to fill in the values of the parameters Min/Max Y:
To do that:
- Select the Pencil GameObject → add the One Grab Translate Transformer component.
To fill in the values of the parameters Min/Max X and Min/Max Z:
- Change the scene view to the top isometric view.
- Bring the Pencil GameObject to the left lower corner of the paper → copy and paste the transform values of X and Z into the Min X and Min Z parameter of the One Grab Translate Transformer component.
- Similarly, bring the Pencil GameObject to the right upper corner of the paper → copy and paste the transform values of X and Z into the Max X and Max Z parameter of the One Grab Translate Transformer component.
- Also, make sure to check the box ✅ for the Constraint parameter for each parameter.
Now to fill in the values of the parameters Min/Max Y:
- Change the scene view to the right isometric view and then pan it a little
- Move the Pencil GameObject down till it touches the paper → copy and paste the transform value of Y into the Min Y parameter of the One Grab Translate Transformer component.
- In addition, move the Pencil GameObject down up to a small height above the paper → copy and paste the transform value of Y into the Max Y parameter of the One Grab Translate Transformer component.
- Finally, drag and drop the One Grab Translate Transformer component into the One Grab Transformer parameter of the Grabbable component. Then, press the play button to test the scene.
With that, we have successfully constrained the pencil movement. The next step would be to create an Ink prefab that will be used to draw lines.
Creating The Ink Prefab
The ink prefab should be a line renderer whose position and size can be altered to visualize the line as it’s being drawn.
- Create an empty GameObject and name it Ink.
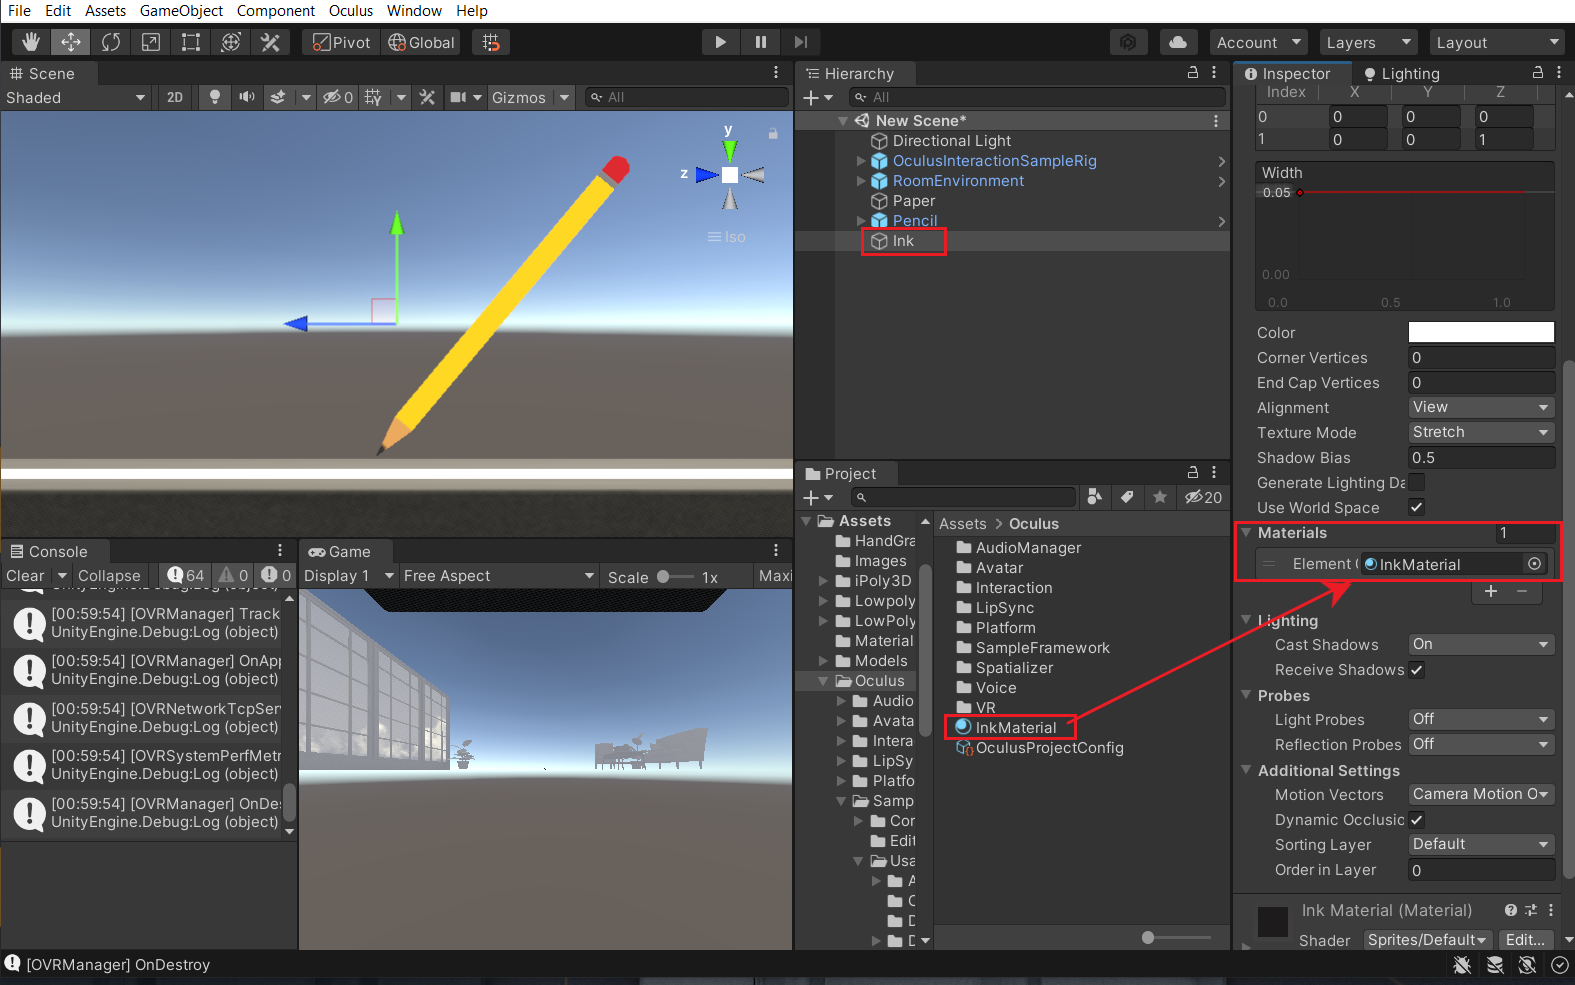
- Add a Line Renderer component to it → adjust its width to 0.005 → uncheck the Use World Space Parameter

- The Line renderer requires a material. To create one, right on the project window → Create → Material → name it as InkMaterial.
- Select the InkMaterial → select the Shader as Sprites/Default → choose the Tint as per your choice.
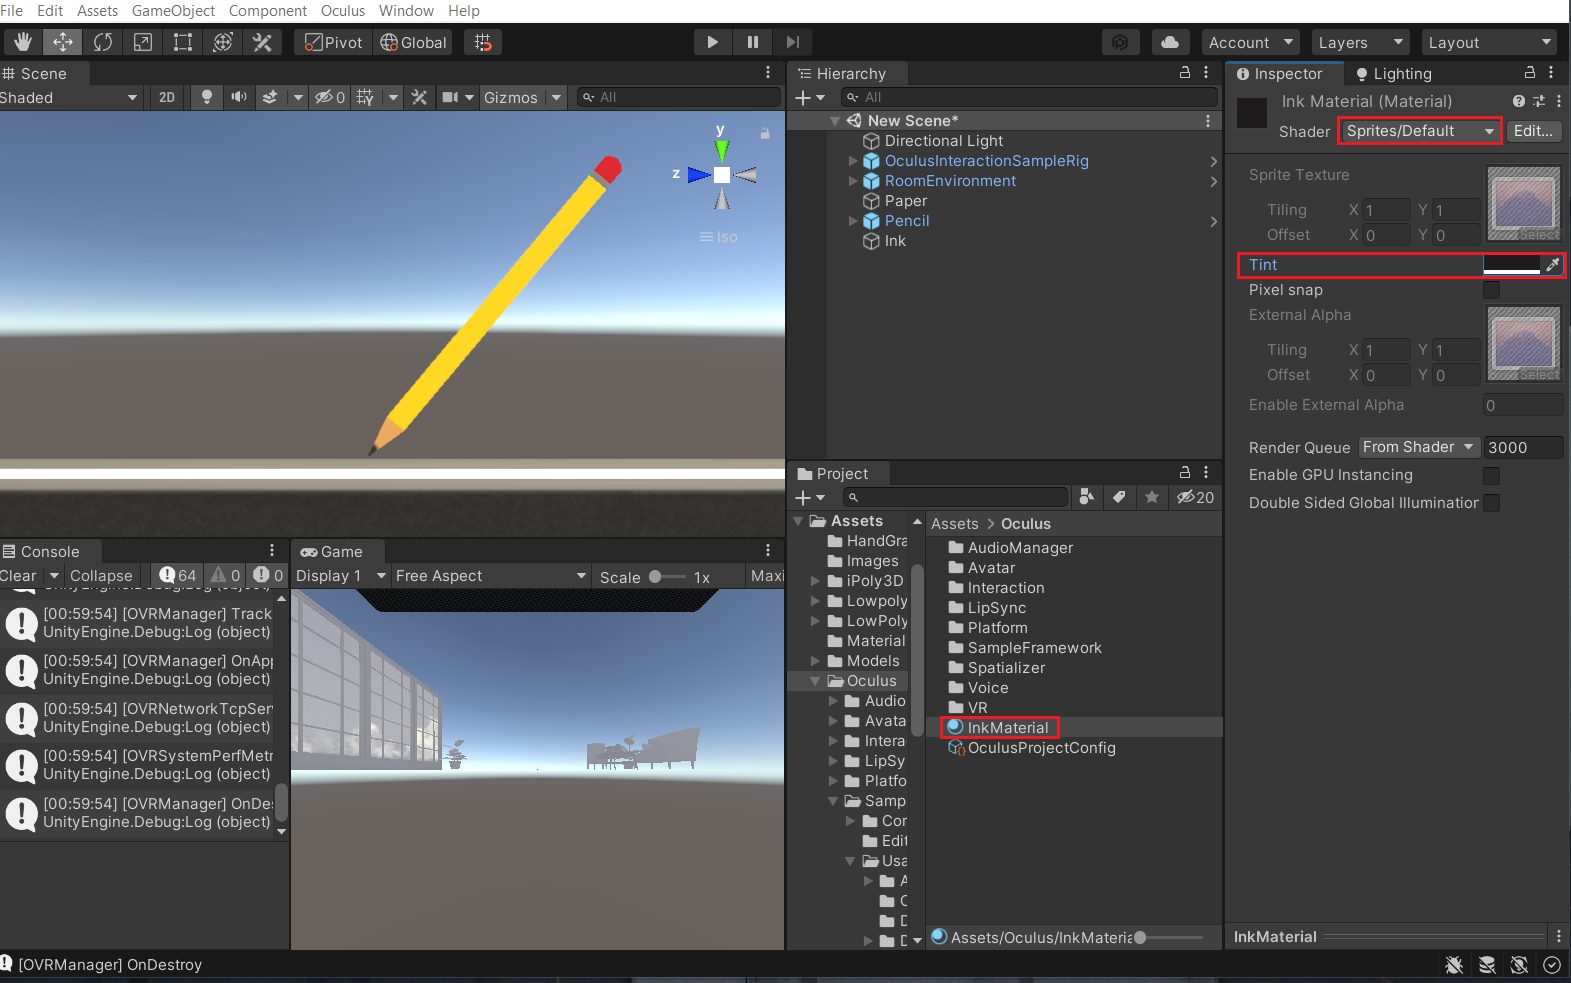
- Add the InkMaterial to the Line Renderer component.
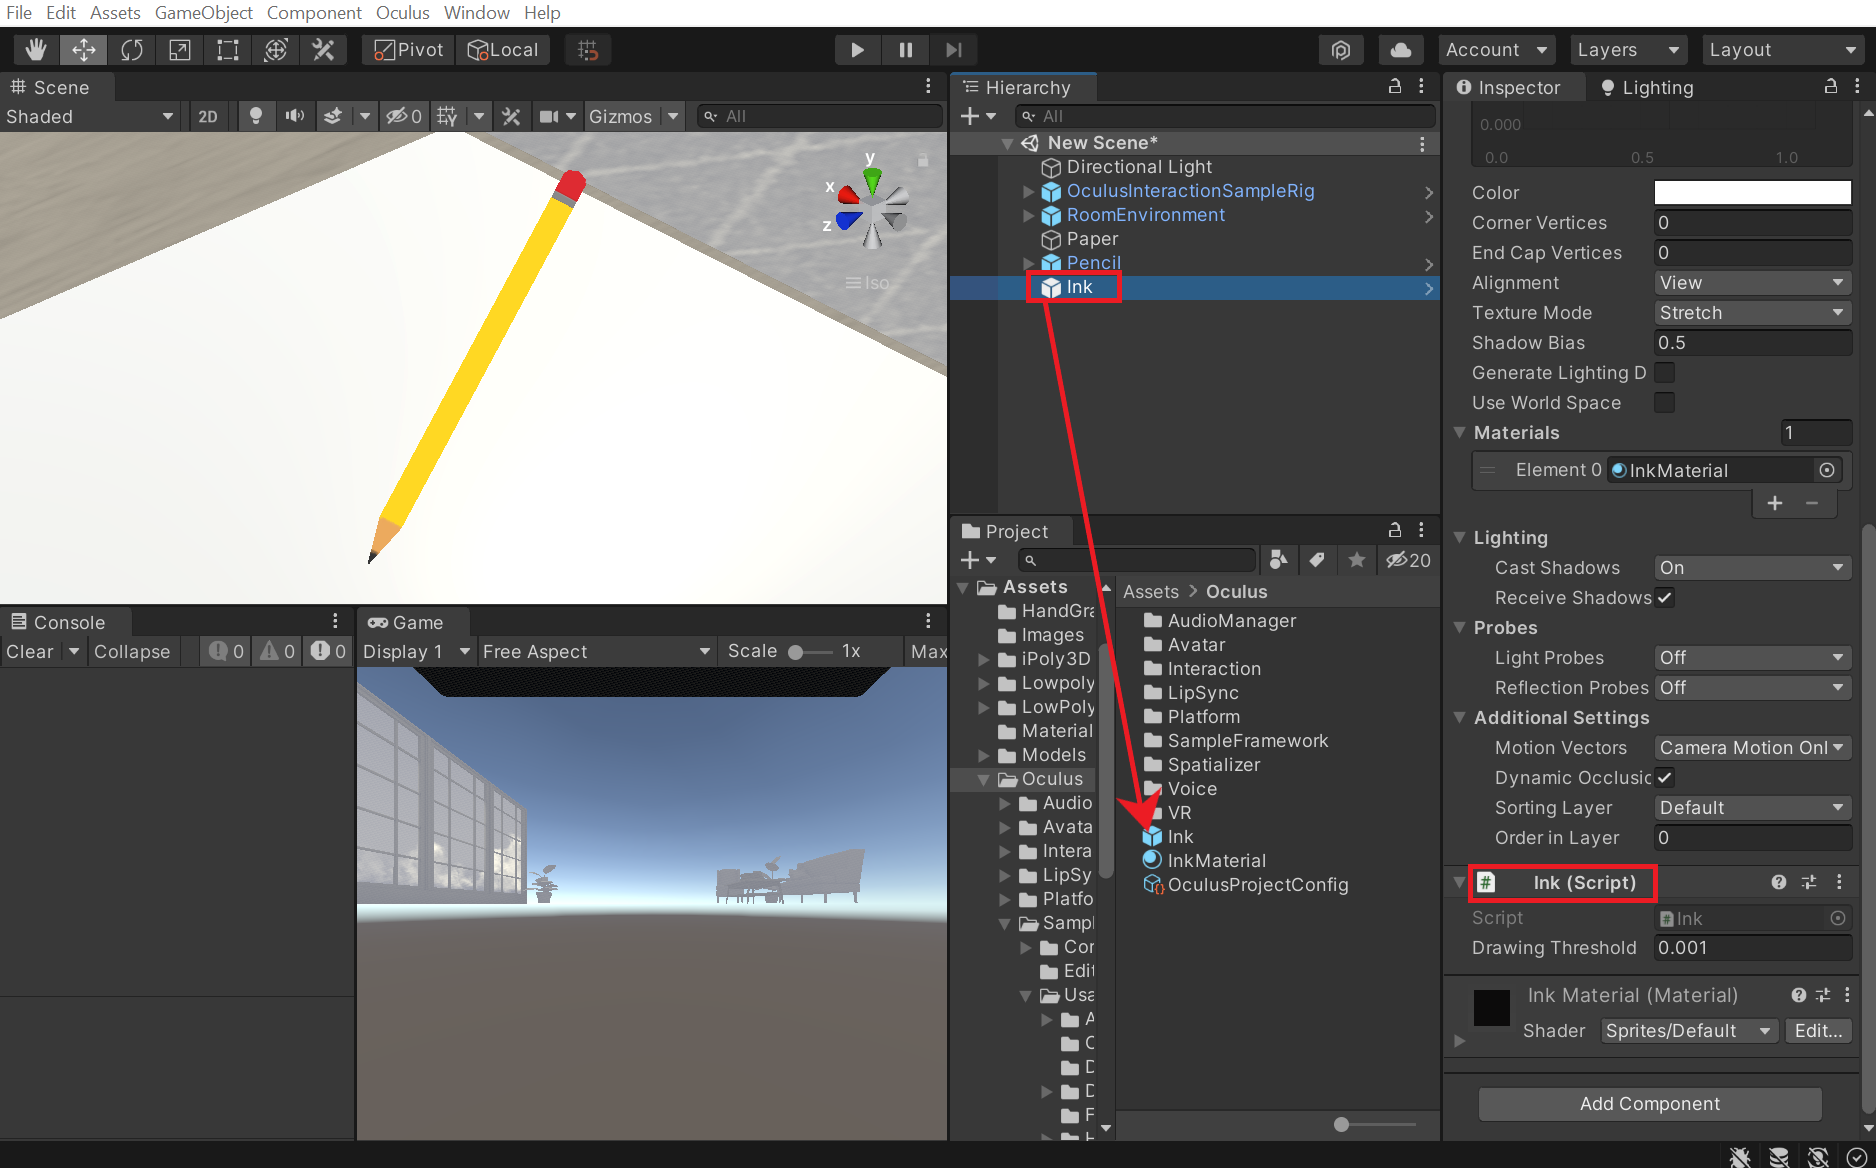
- Now we need a script that takes the position of the pencil tip and updates the line accordingly. So, create a new script and name it InkTracer → copy and paste the following code. The code updates the line renderer with a new position when the pencil has moved more than the set threshold value.
- Add the script to the Ink GameObject → drag and drop the GameObject into the Project window to convert it into a prefab.
With that, we have created the Ink prefab that can be used to draw. The next step would be to use the Ink prefab and its properties to allow the user to draw when the pencil is touching the paper.
Drawing Logic
To keep the drawing logic as simple as possible, we’ll create a box collider at the tip of the pencil. When the pencil touches the paper it collides with the mesh collider of the paper and that’s when we’ll be able to draw.
- Select the Pencil GameObejct and add the Box Collider component → enable ✅ the Is Trigger parameter → adjust the box collider such that its covers the tip of the pencil.
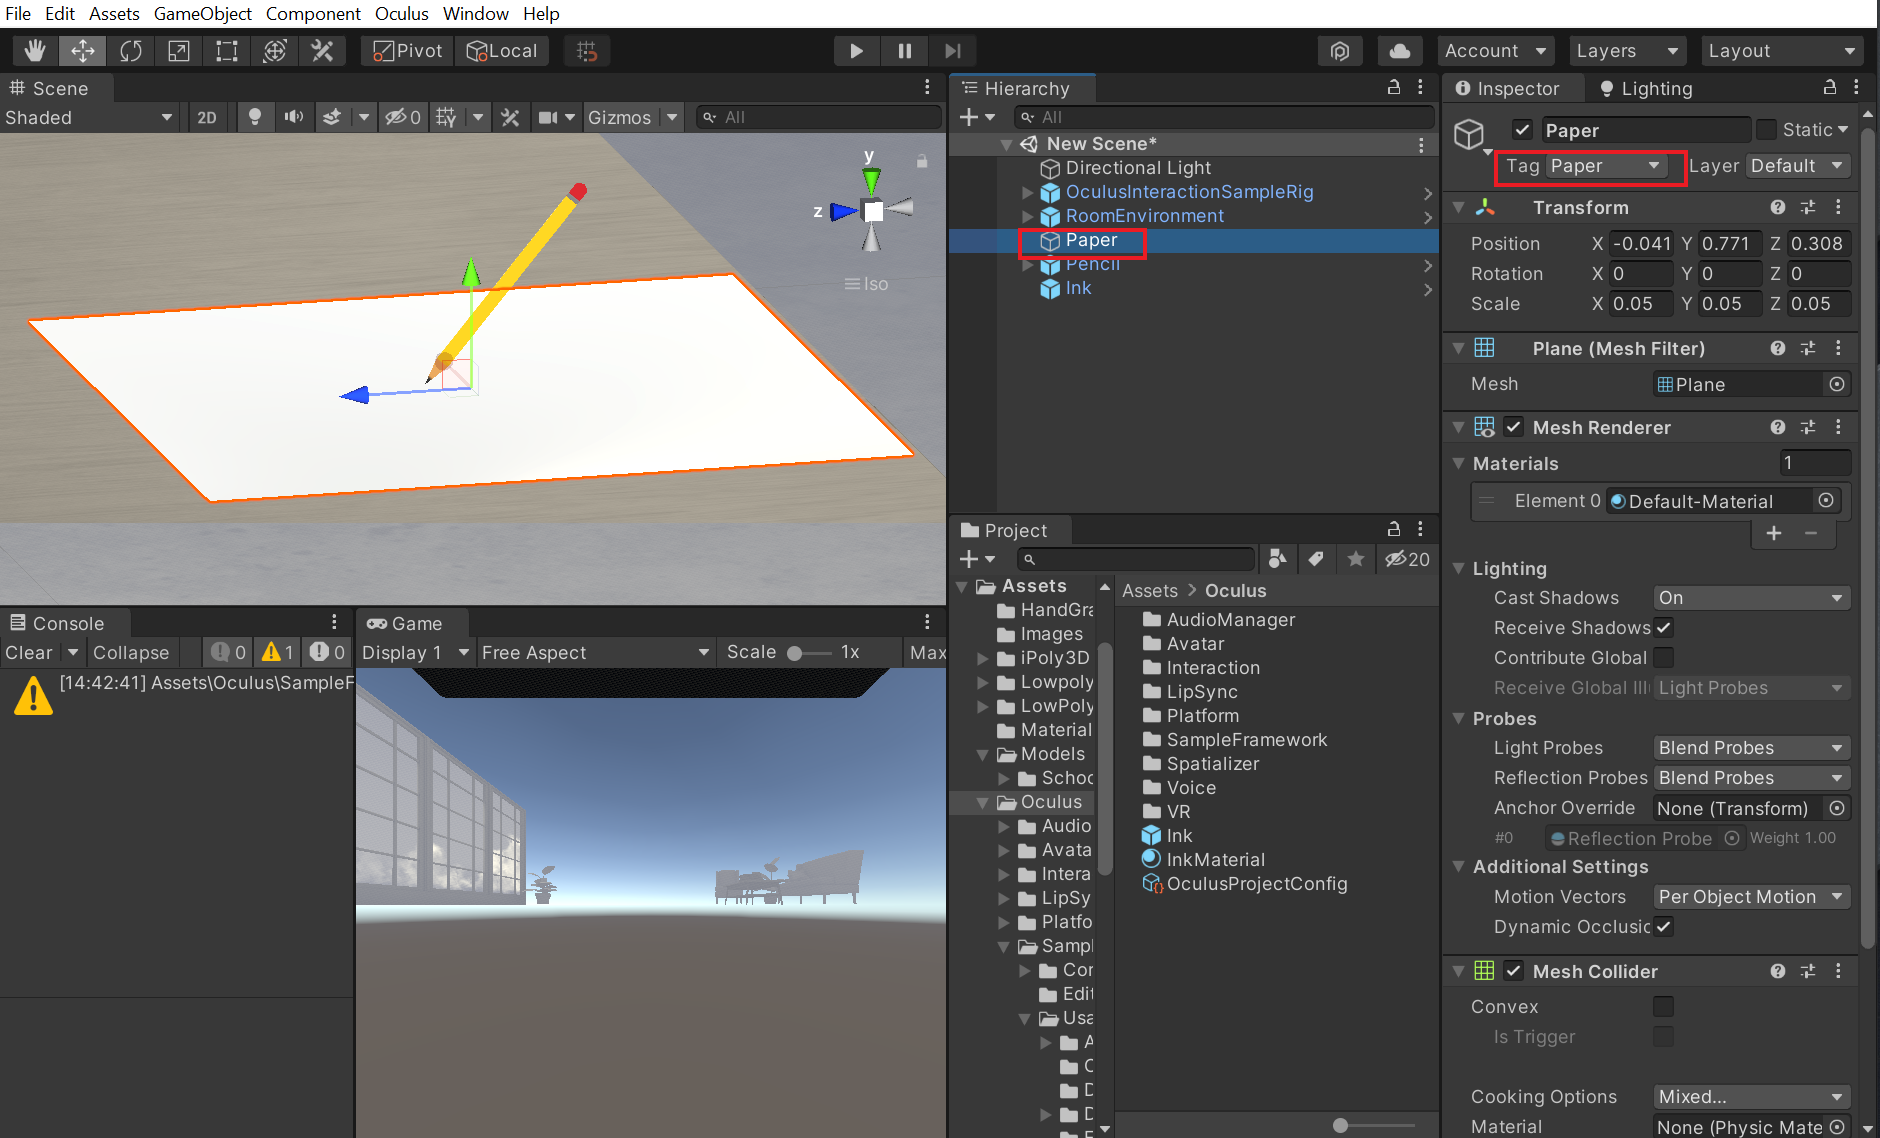
- Select the Paper GameObject, create a tag called Paper and assign the same to it.
Now we need a script that will take the Ink prefab, the position of Pencil GameObject and the position of Paper GameObject to draw on top of the paper. So, create a new script and name it InkGenerator→ copy and paste the following code. The code creates an instance of the ink prefab every time the Pencil touched the Paper. It also updates that line renderer of the current instance of the Ink as the pencil is moved across the paper.
- Select the Pencil GameObejct and the InkGenerator script → drag and drop the required objects into the respective parameter
- Now if you test the scene by pressing the Play button, you will notice that there is some offset between the pencil tip and the drawn line. Also, if we look closely the offset is only there in the Z-direction.
- To fix that we make use of the offset parameter and to find that value there are multiple approaches. The easiest one would be to:
- Create an empty object.
- Place it on the tip of the pencil using vertex snapping i.e drag the object while pressing the V key.
- Copy its position in the Z direction.
- Select the Pencil GameObject → paste the copied value into the Z Pencil Offset parameter of the Ink Generator component.
- Copy the position in the Z direction of the Pencil GameObject → subtract it from the current value of the Z Pencil Offset parameter of the Ink Generator component.
- Delete the empty object
- Now press the play button to test the scene.
Conclusion
With that, we have created a VR drawing experience using hand tracking. This blog was mainly about demonstrating one of the many applications the One Grab Translate Transformer component has to offer. Since hand tracking is still in its initial stages, we can expect some amount of jitter i.e we’ll not be able to draw a perfectly smooth curve. But nevertheless it’s a cool experience.
