
Prerequisite
Setting up the GameObjects
In this section, we'll set up the model by adding a few components to it from the XR Interaction Toolkit. We'll also learn how to use a render texture to display the camera's output.
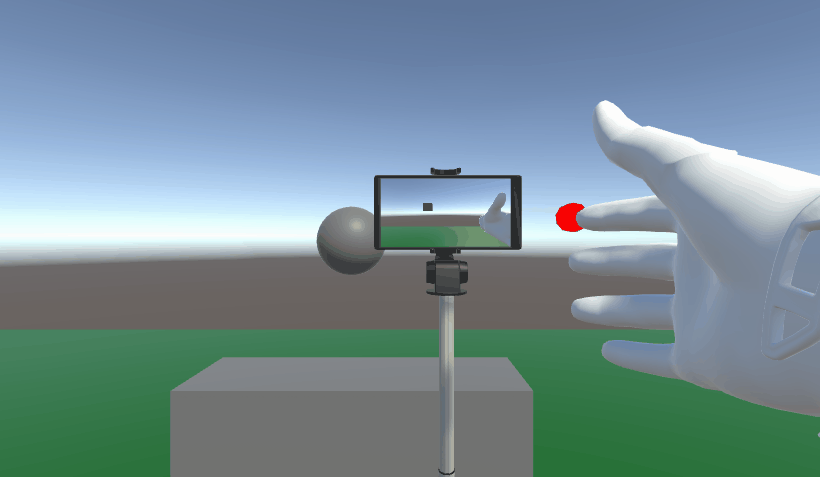
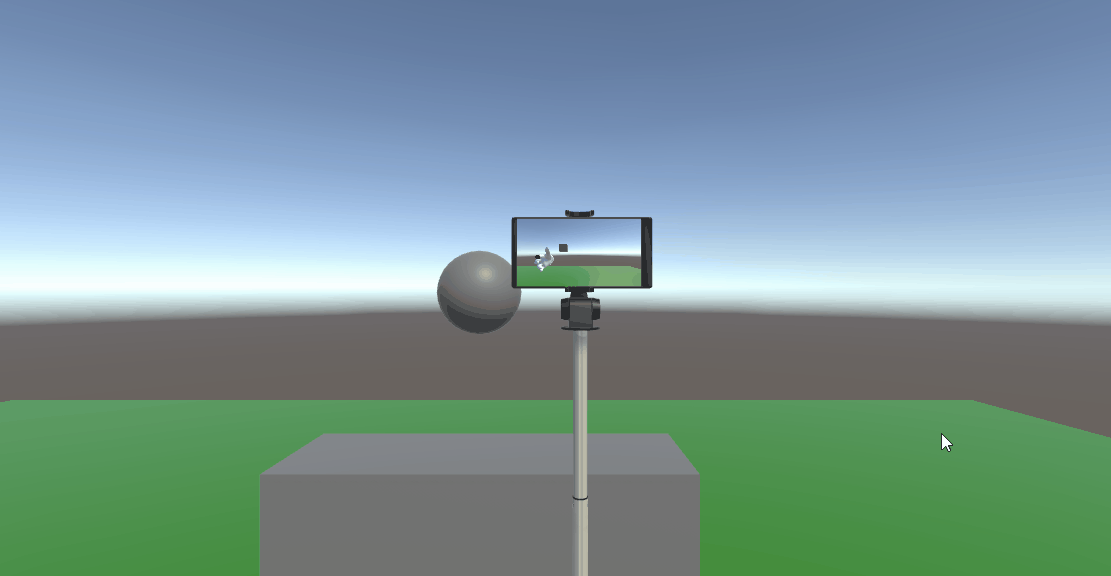
By the end of this section, we will have a selfie stick that can be grabbed and a "realistic" phone which can be attached to the selfie stick.
Importing the model to the scene
Let's start by importing the prefabs for the selfie stick. You can download the model from here.* Or you can use any asset of your choice.
Once you have imported the models, follow the steps below:
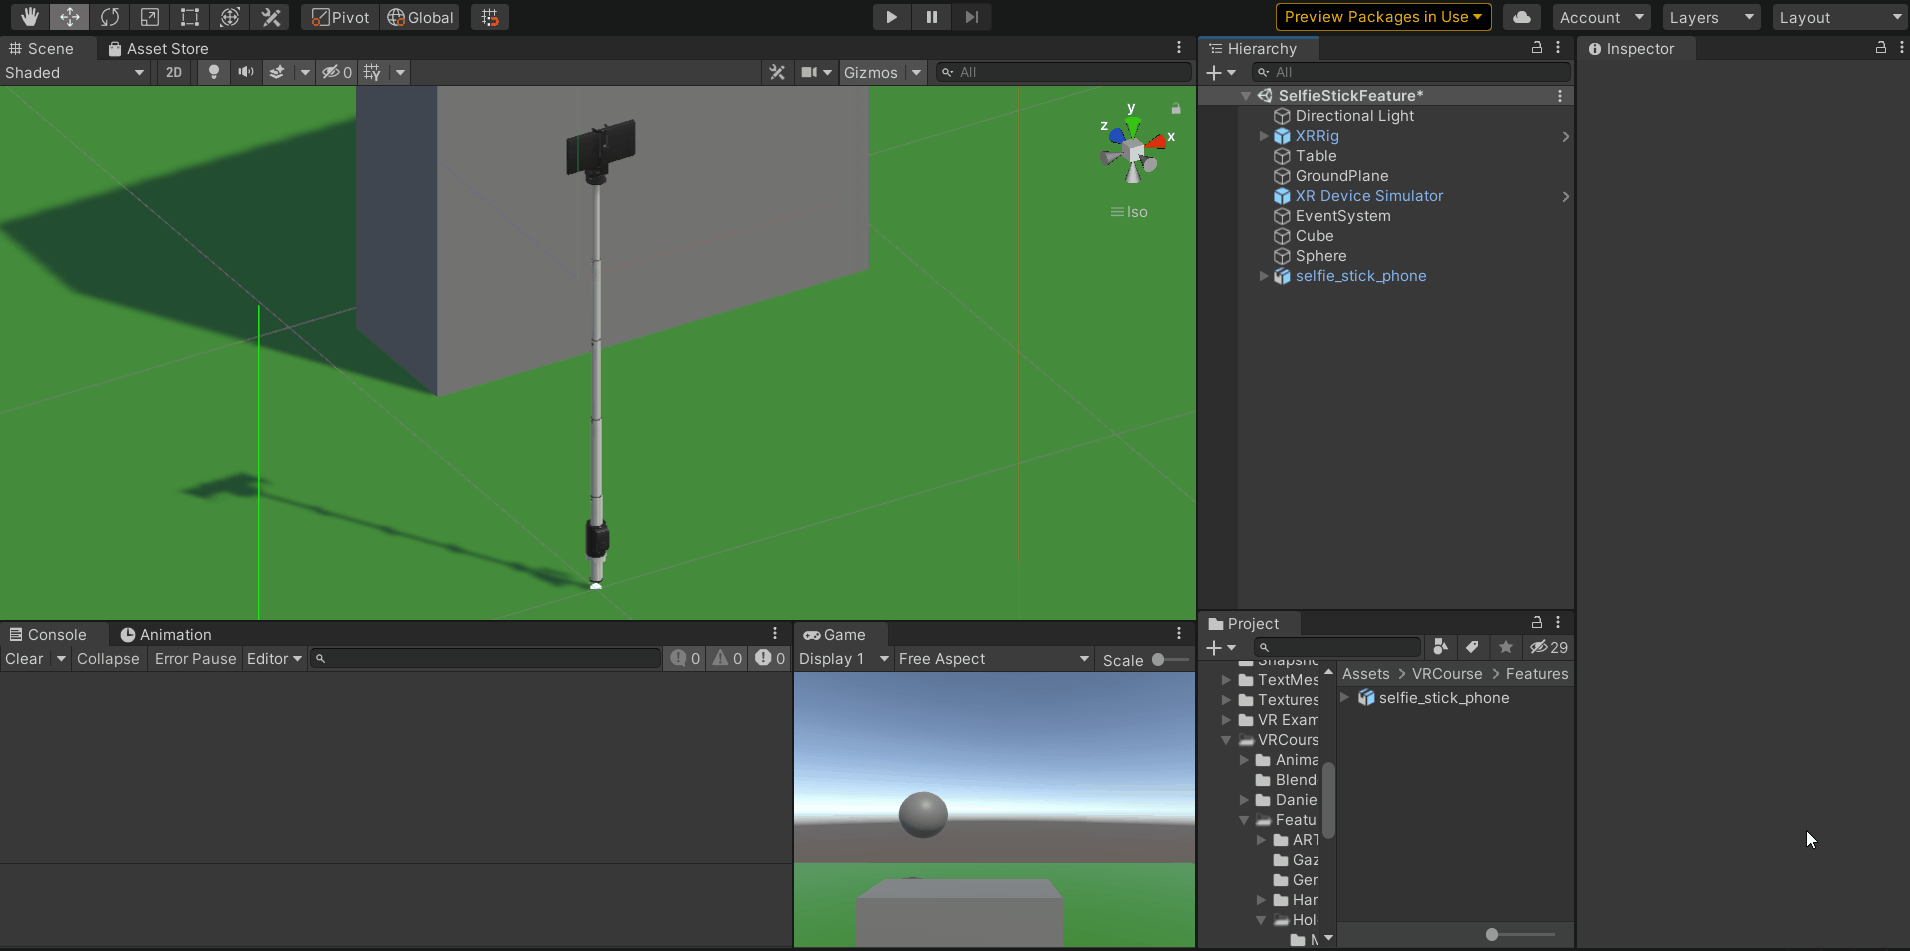
- Drag and drop the prefabs into the hierarchy window.
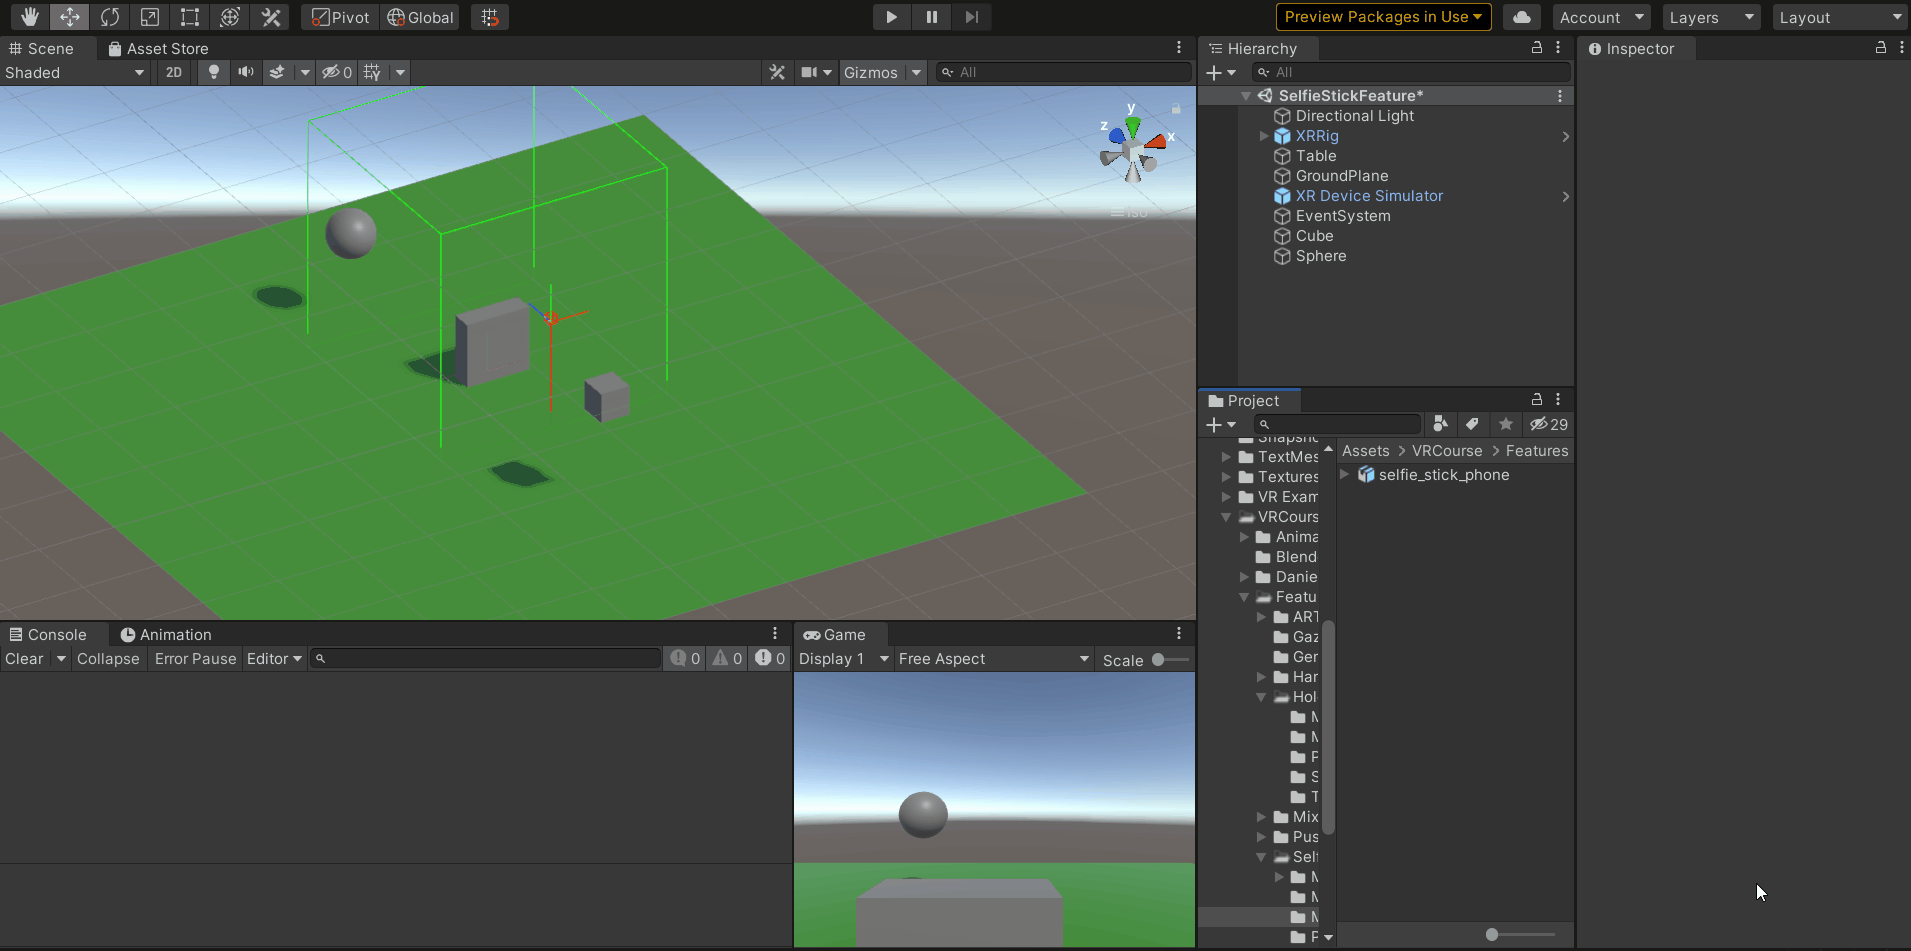
- The imported prefab has two models, one is the selfie stick and the other the phone. Separate them by prefab unpacking and rename the prefabs as "SelfieStick "and "Phone".
Adding Grab Functionality
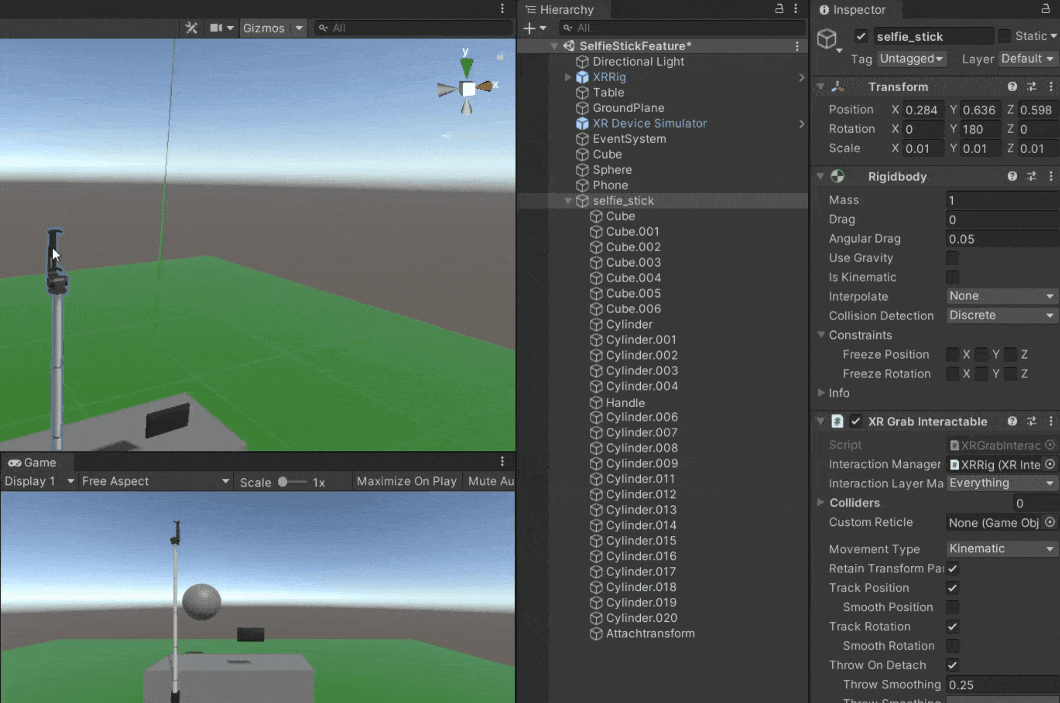
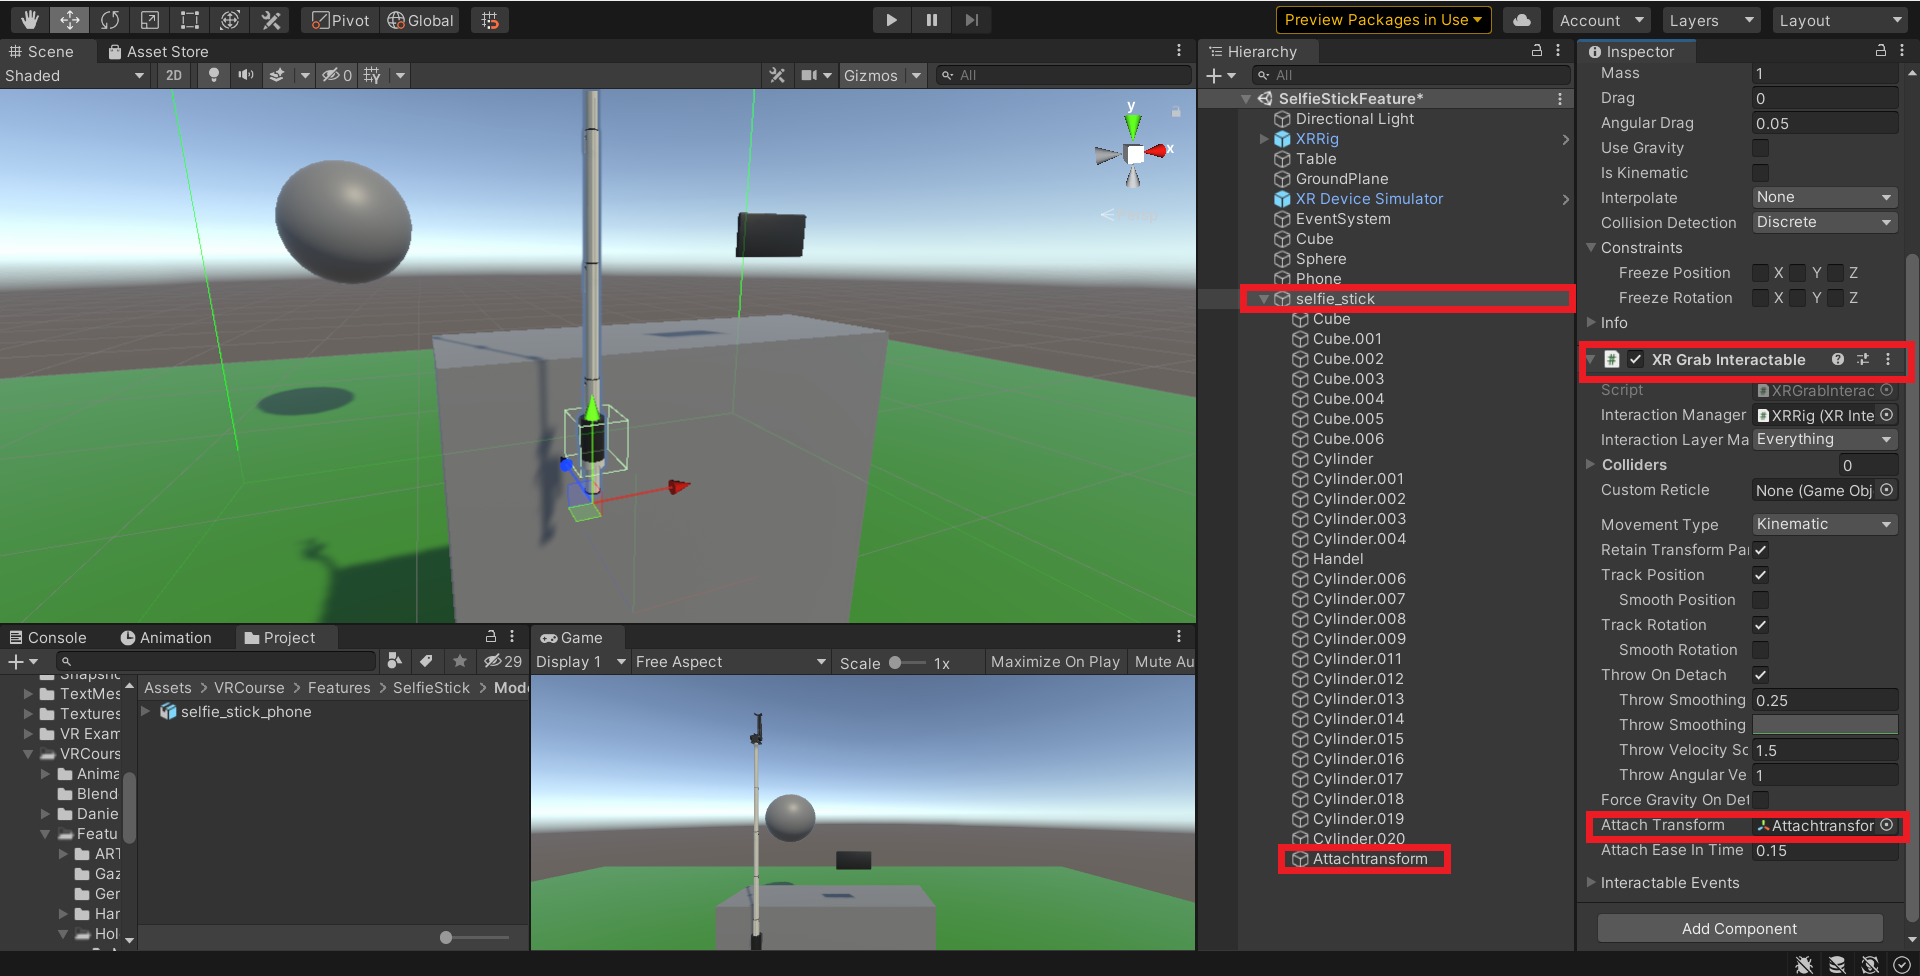
Add the XR Grab Interactable component to both GameObjects, the SelfieStick, and the Phone. The RigidBody component gets added as well since it's a required component for the XR Grab Interactable.
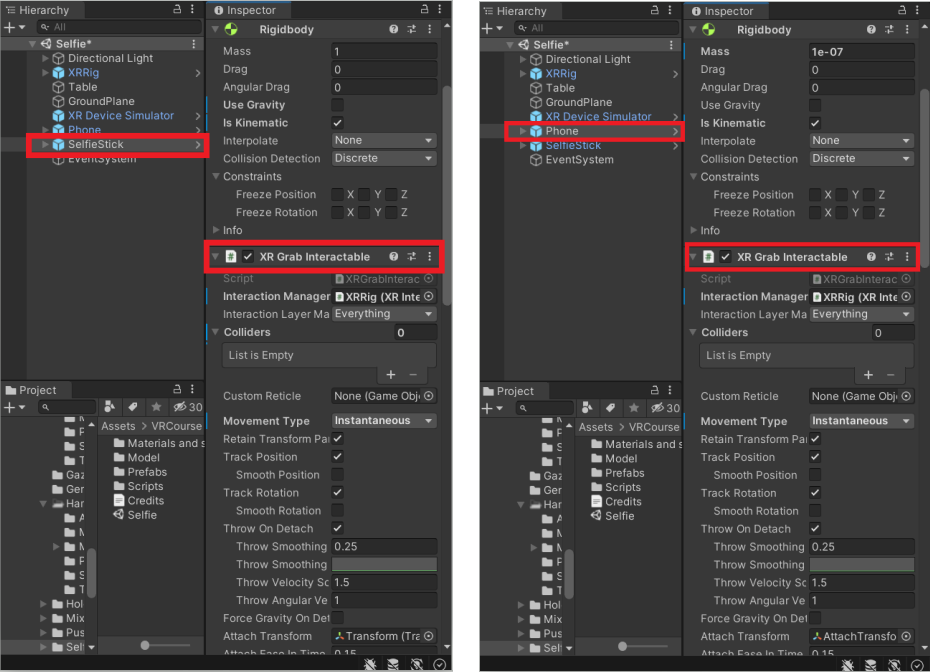
- For this tutorial let's set up the physics of the rigid body as IsKinematic and turn off the Use Gravity option.
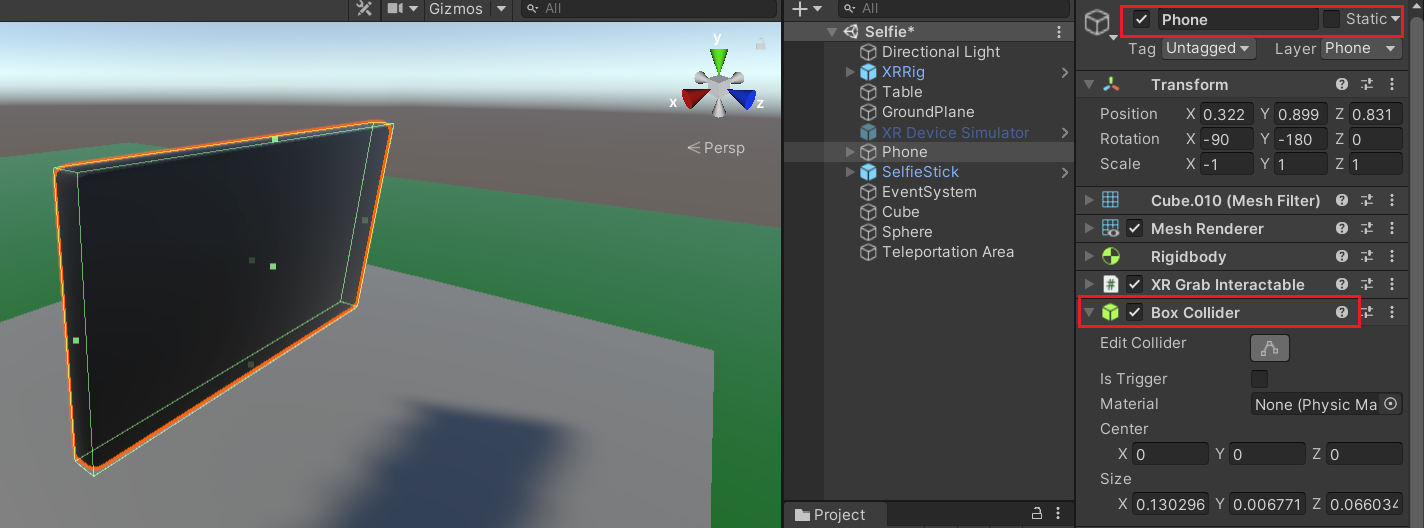
- The XRGrabInteractable component is not enough to make an object interactable. There is another component that's required and that's a collider. So, select the GameObject that has the handle and rename it as "Handle ". Add a Box Collider and adjust it accordingly.
- Then, add a Box Collider to the phone and adjust it accordingly as well.
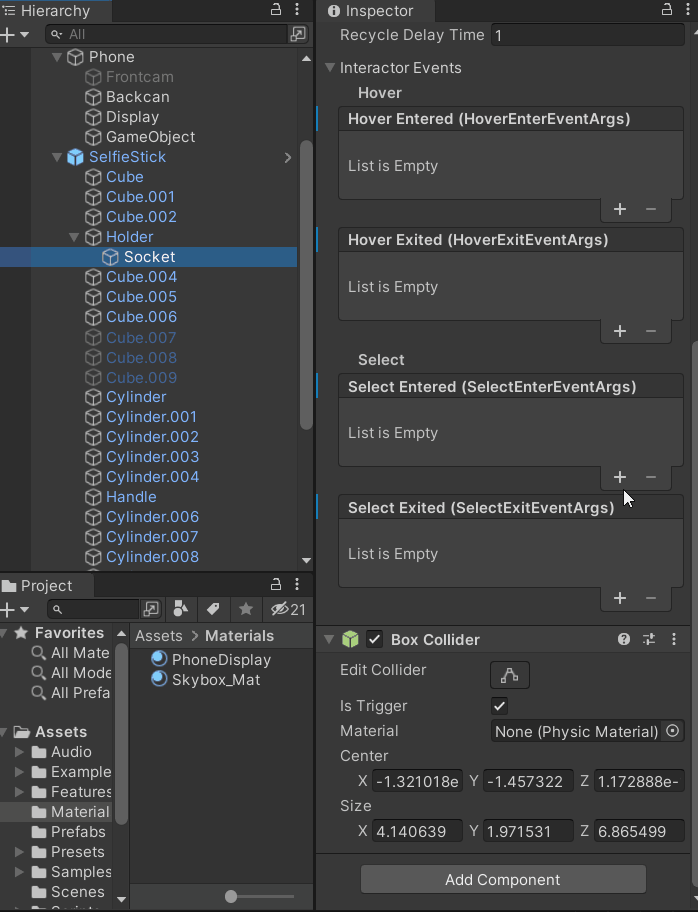
Adding Socket Interaction
When the phone is held close to the holder of the selfie stick, the phone should get attached to the selfie stick. For us to do that we need to make use of the XRSocketInteractor component.
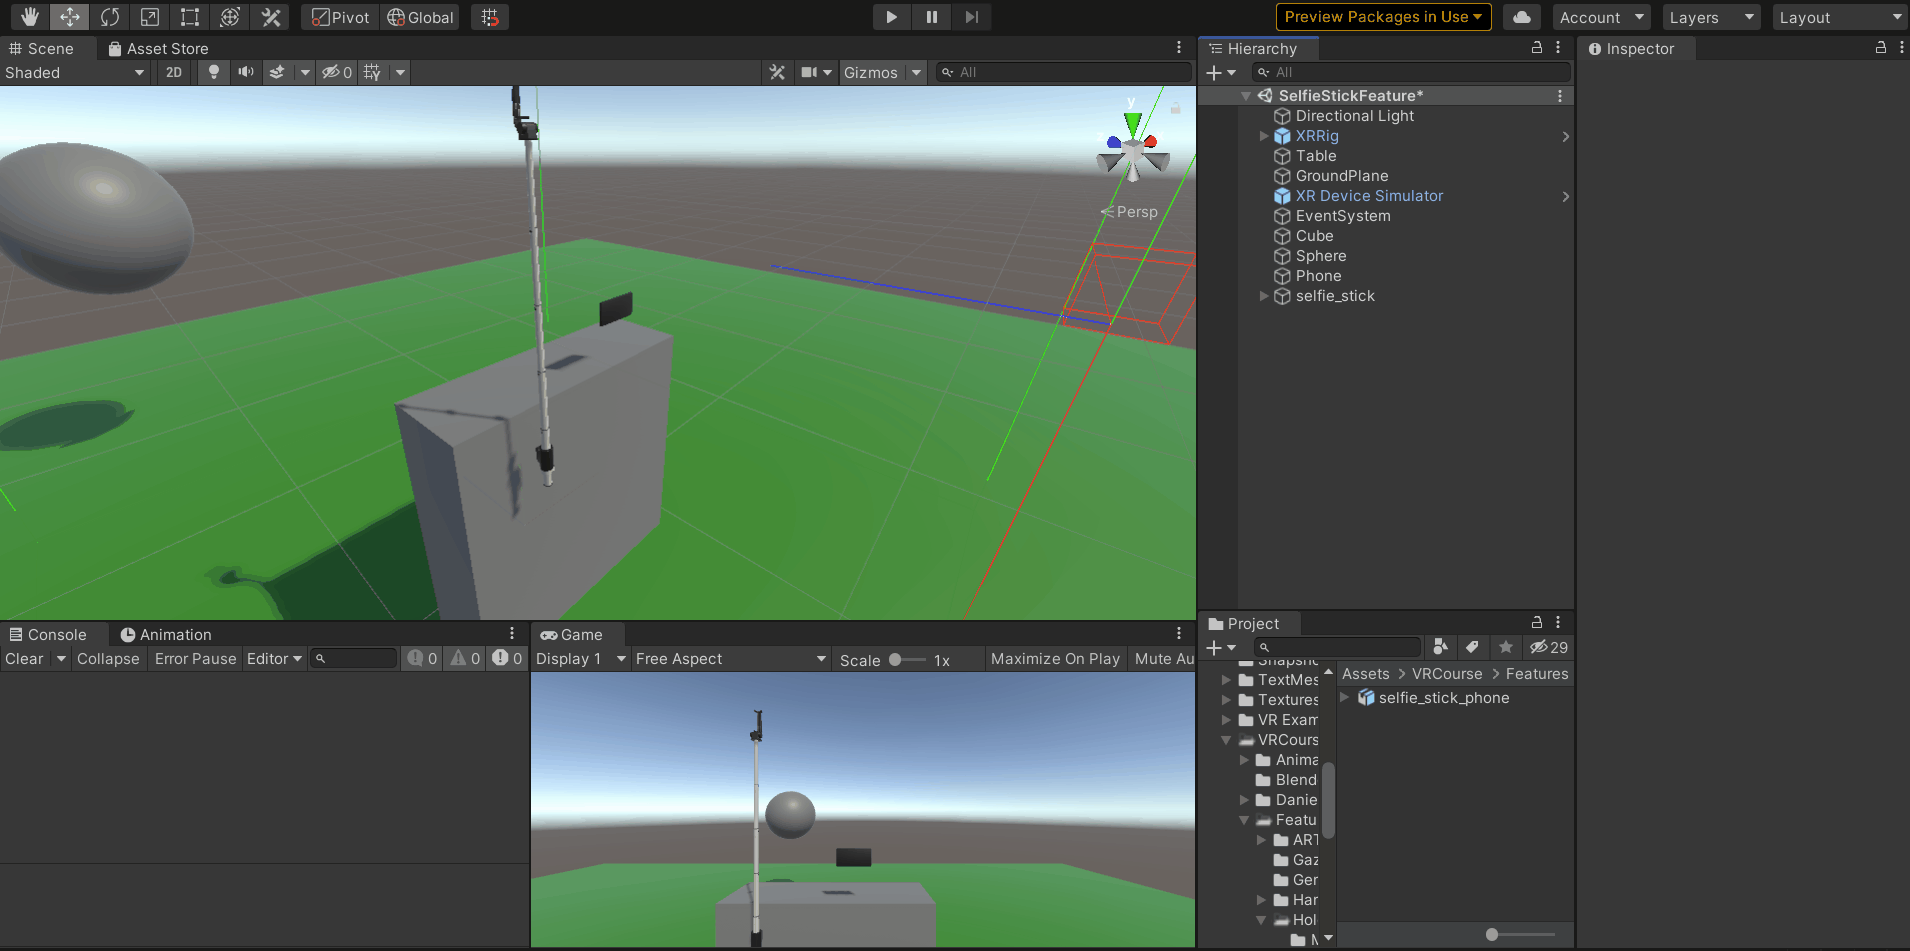
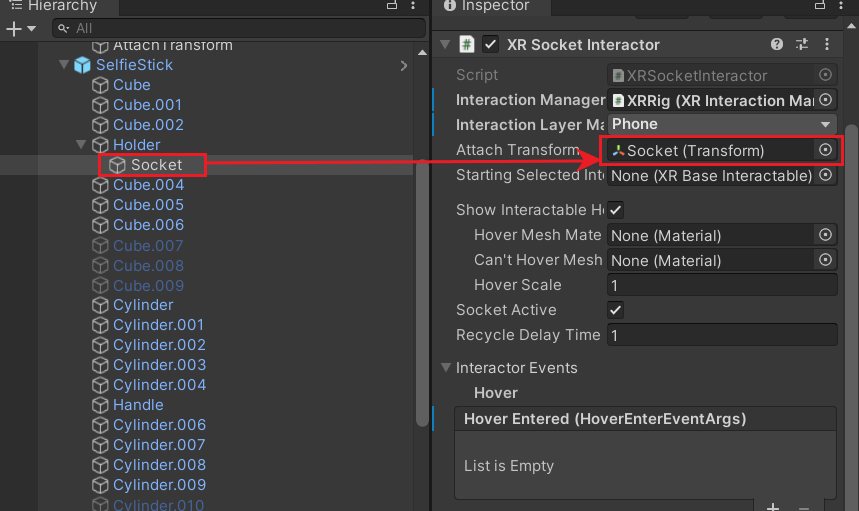
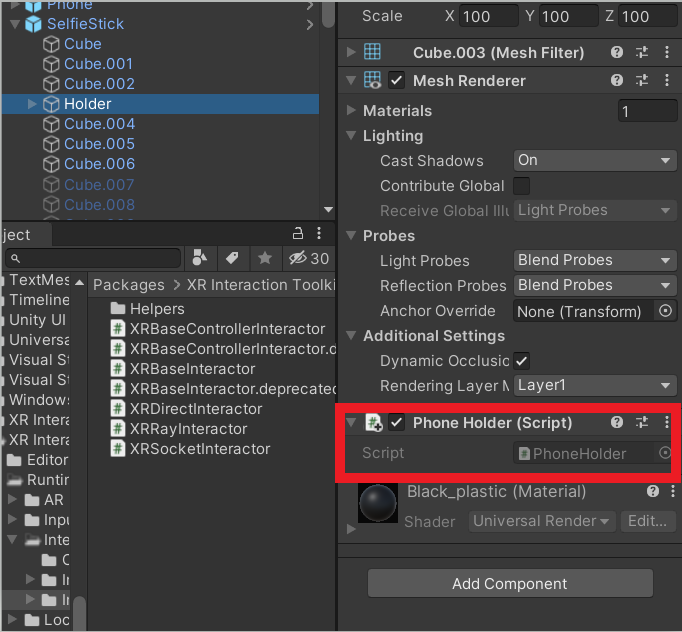
- In the hierarchy, select the GameObject that has a phone holder (The object that holds the camera onto the selfie stick) and rename it to "Holder". Create an empty GameObject as a child of the "Holder" and name it "Socket".
- Add the XRSocketInteractor component to it, then add a Box Collider and adjust the size accordingly. Also, check the IsTrigger box.
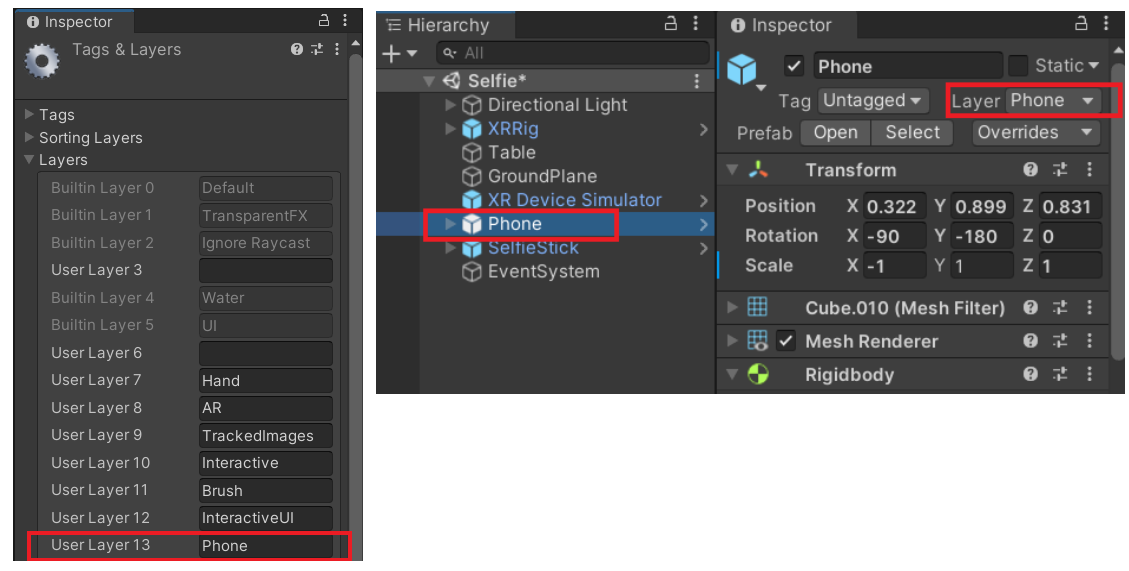
- How do we make sure that only the phone gets attached to the selfie stick and nothing else? Well, it's by making use of the layer mask! To do that, create a new layer called "Phone" and assign this layer to the GameObject Phone.
- Next, select the GameObject Socket, and in the XRSocketInteractor component, select the Interaction Layer Mask as Phone from the drop-down. In this way, only GameObjects are on the phone layer snap into the socket, and the rest of them are ignored.
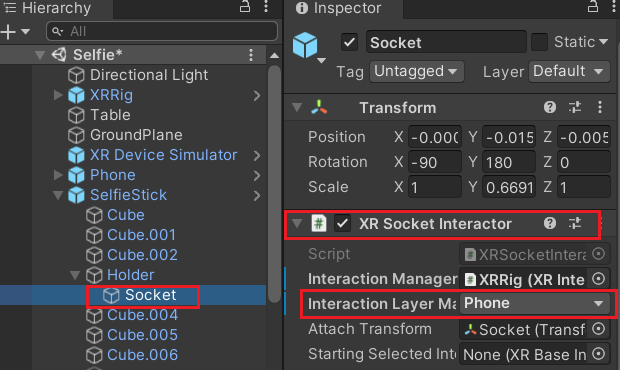
- Also, drag and drop the GameObject Socket in the Attach Transform field. This will be useful to adjust the orientation of the phone when it gets snapped into the Holder.
Creating a realistic Phone
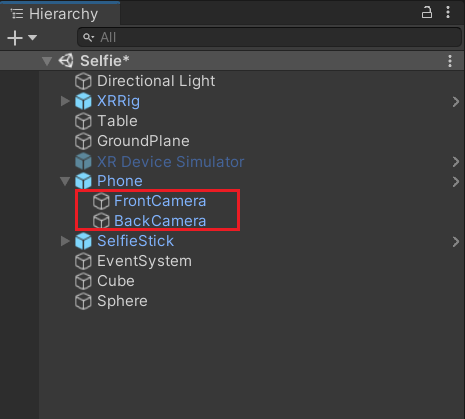
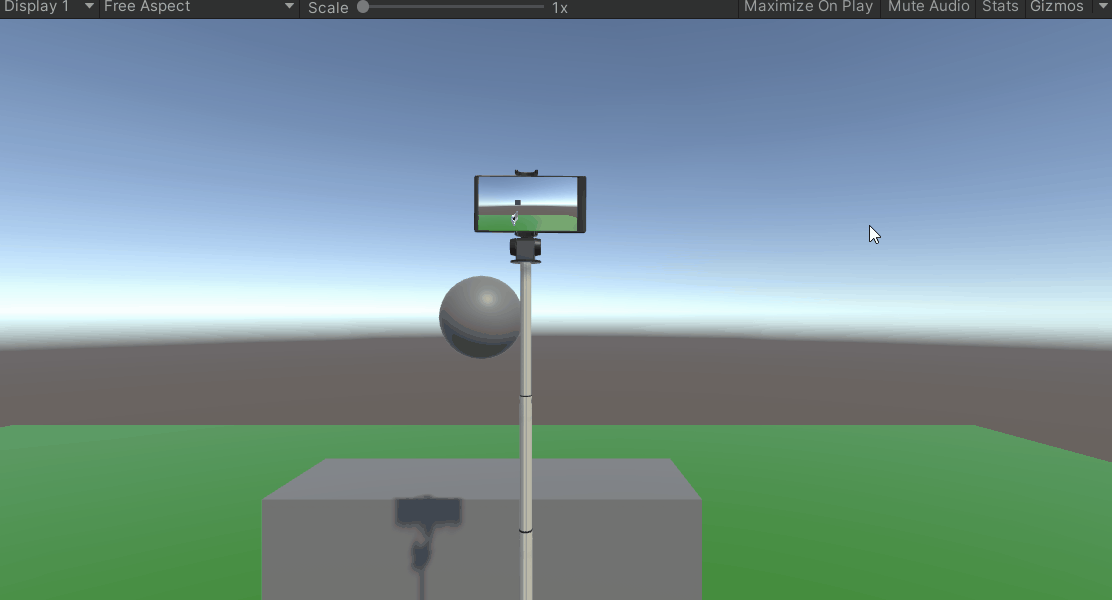
The GameObject Phone at its current state is just a 3D model. To make it work just like in real life, we need to add three components i.e two cameras and a quad. The two cameras act as the front and back camera while the quad forms the display for the camera's output.
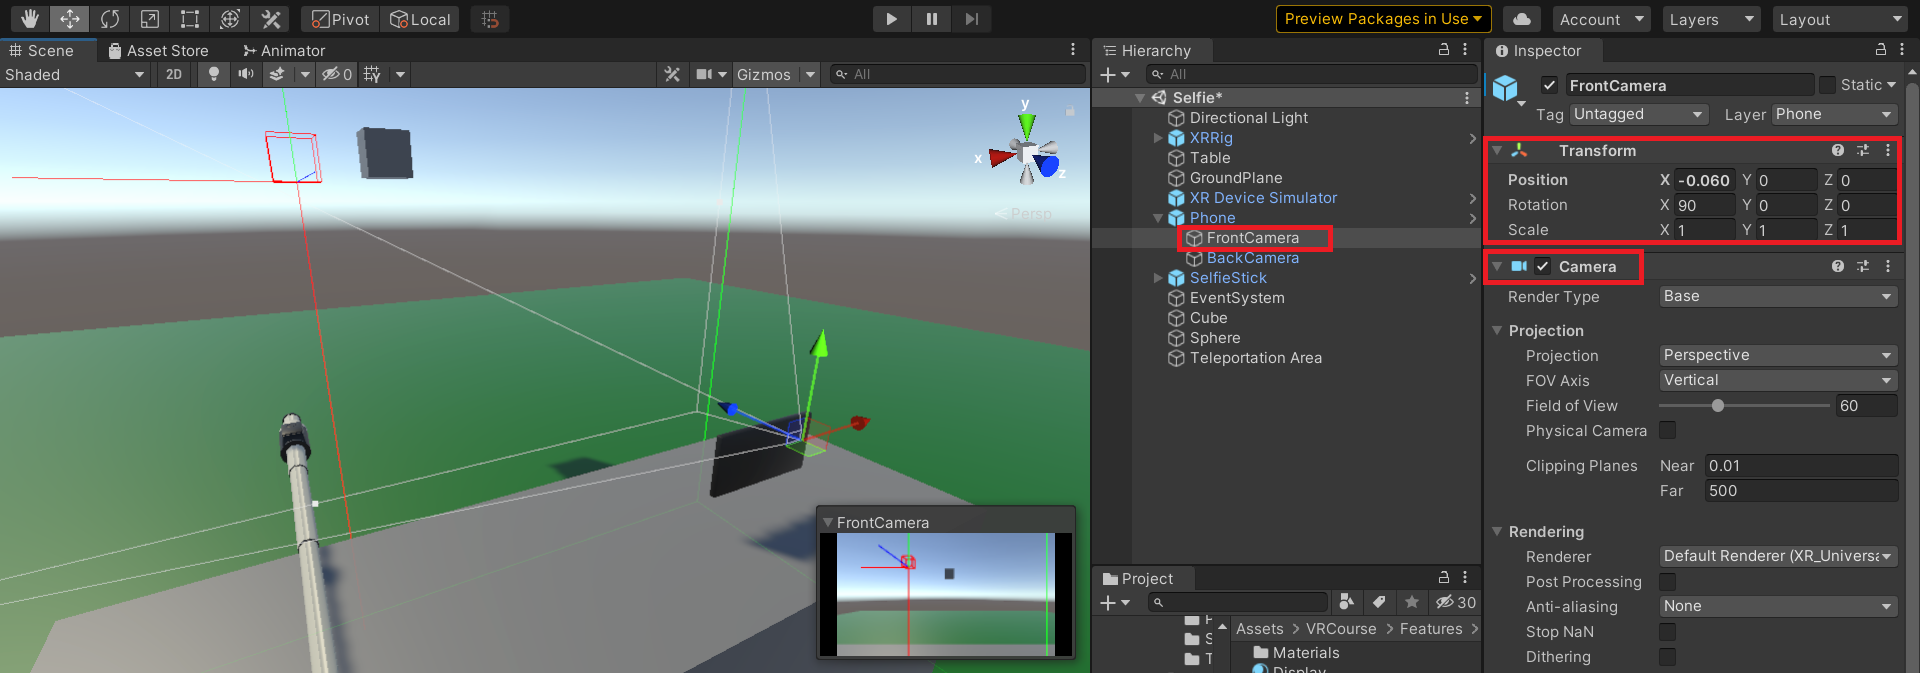
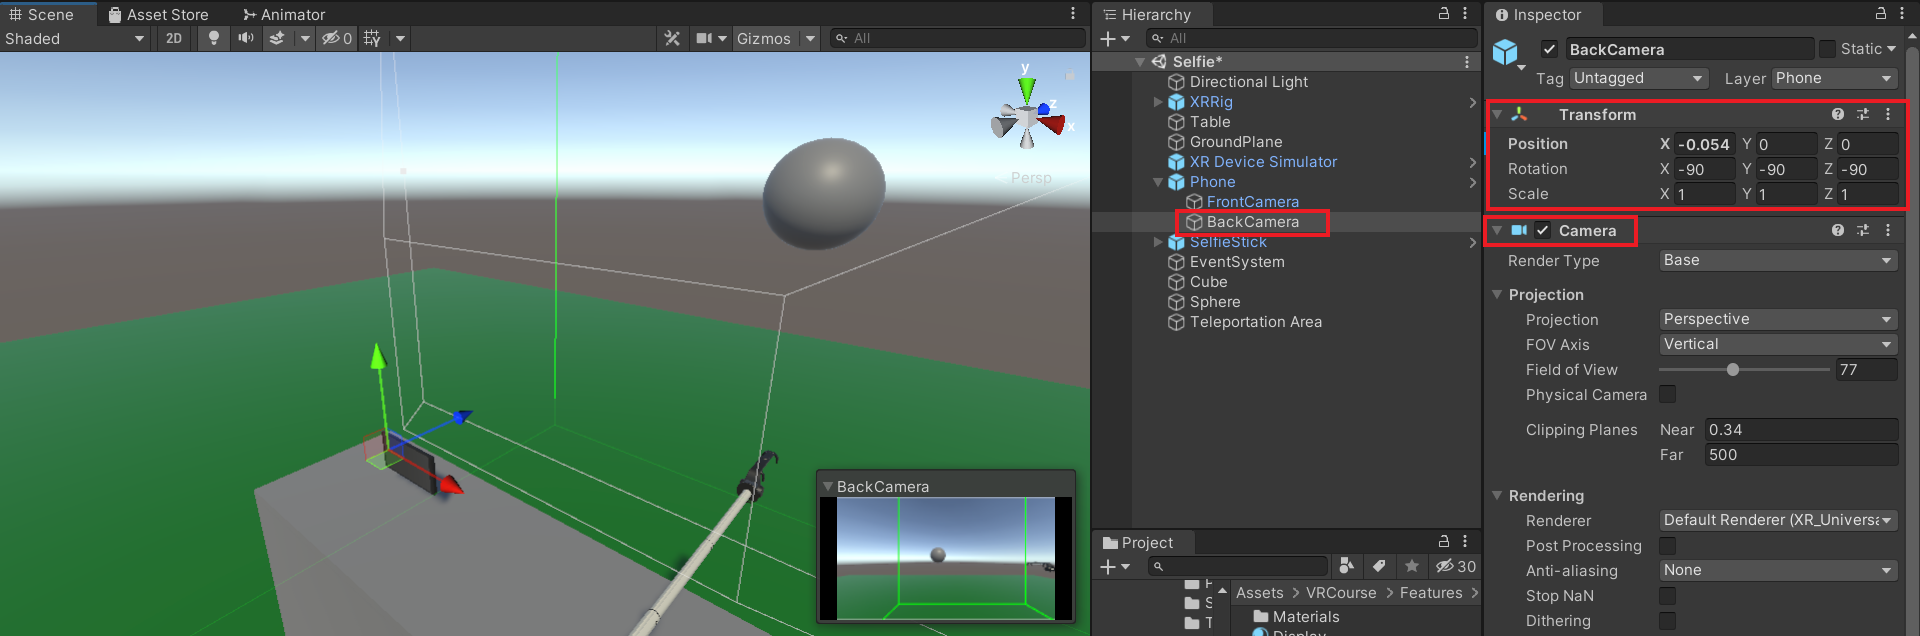
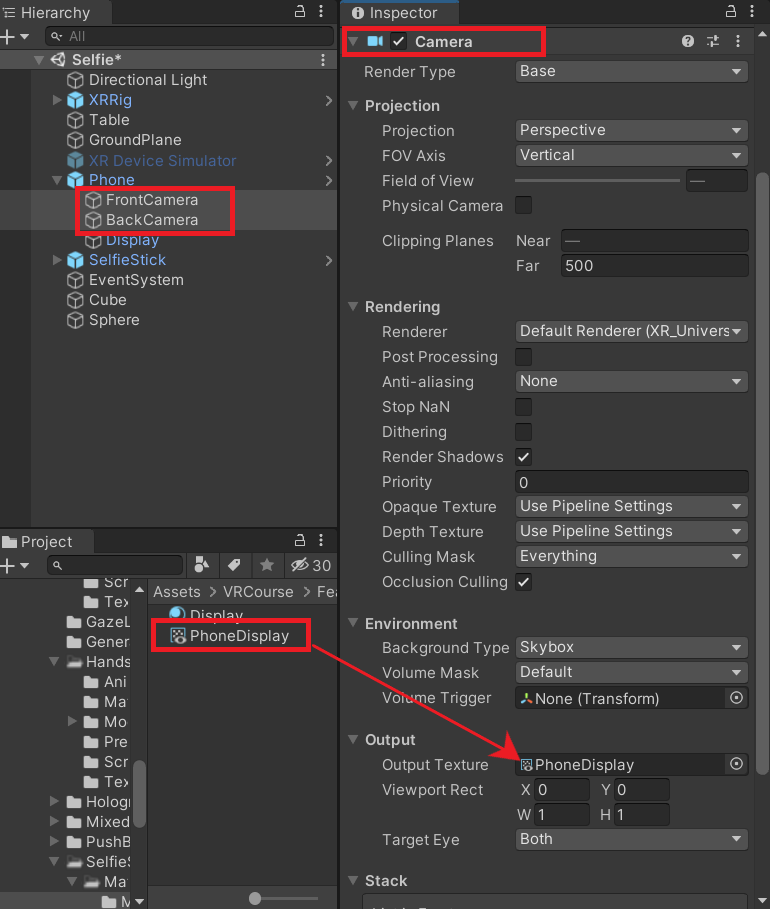
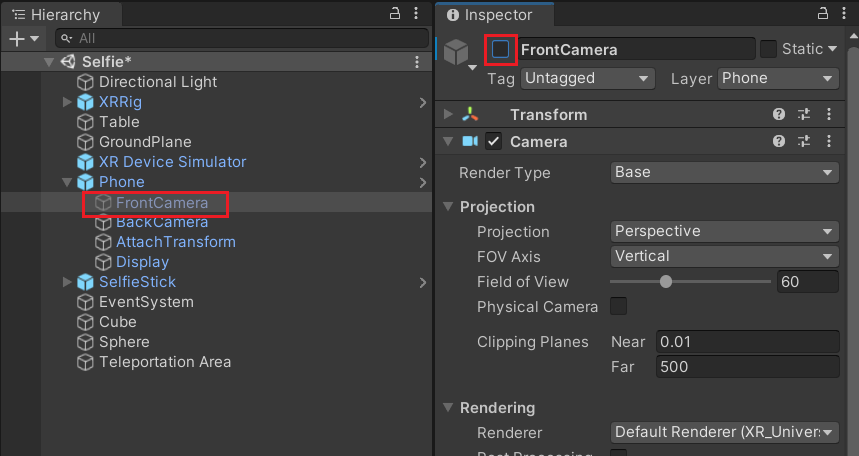
Let's implement this by creating two new GameObjects as a child of the Phone and naming them as "BackCamera" and "FrontCamera".
- Add the Camera component to the GameObjects BackCamera and FrontCamera. Adjust their transform accordingly.
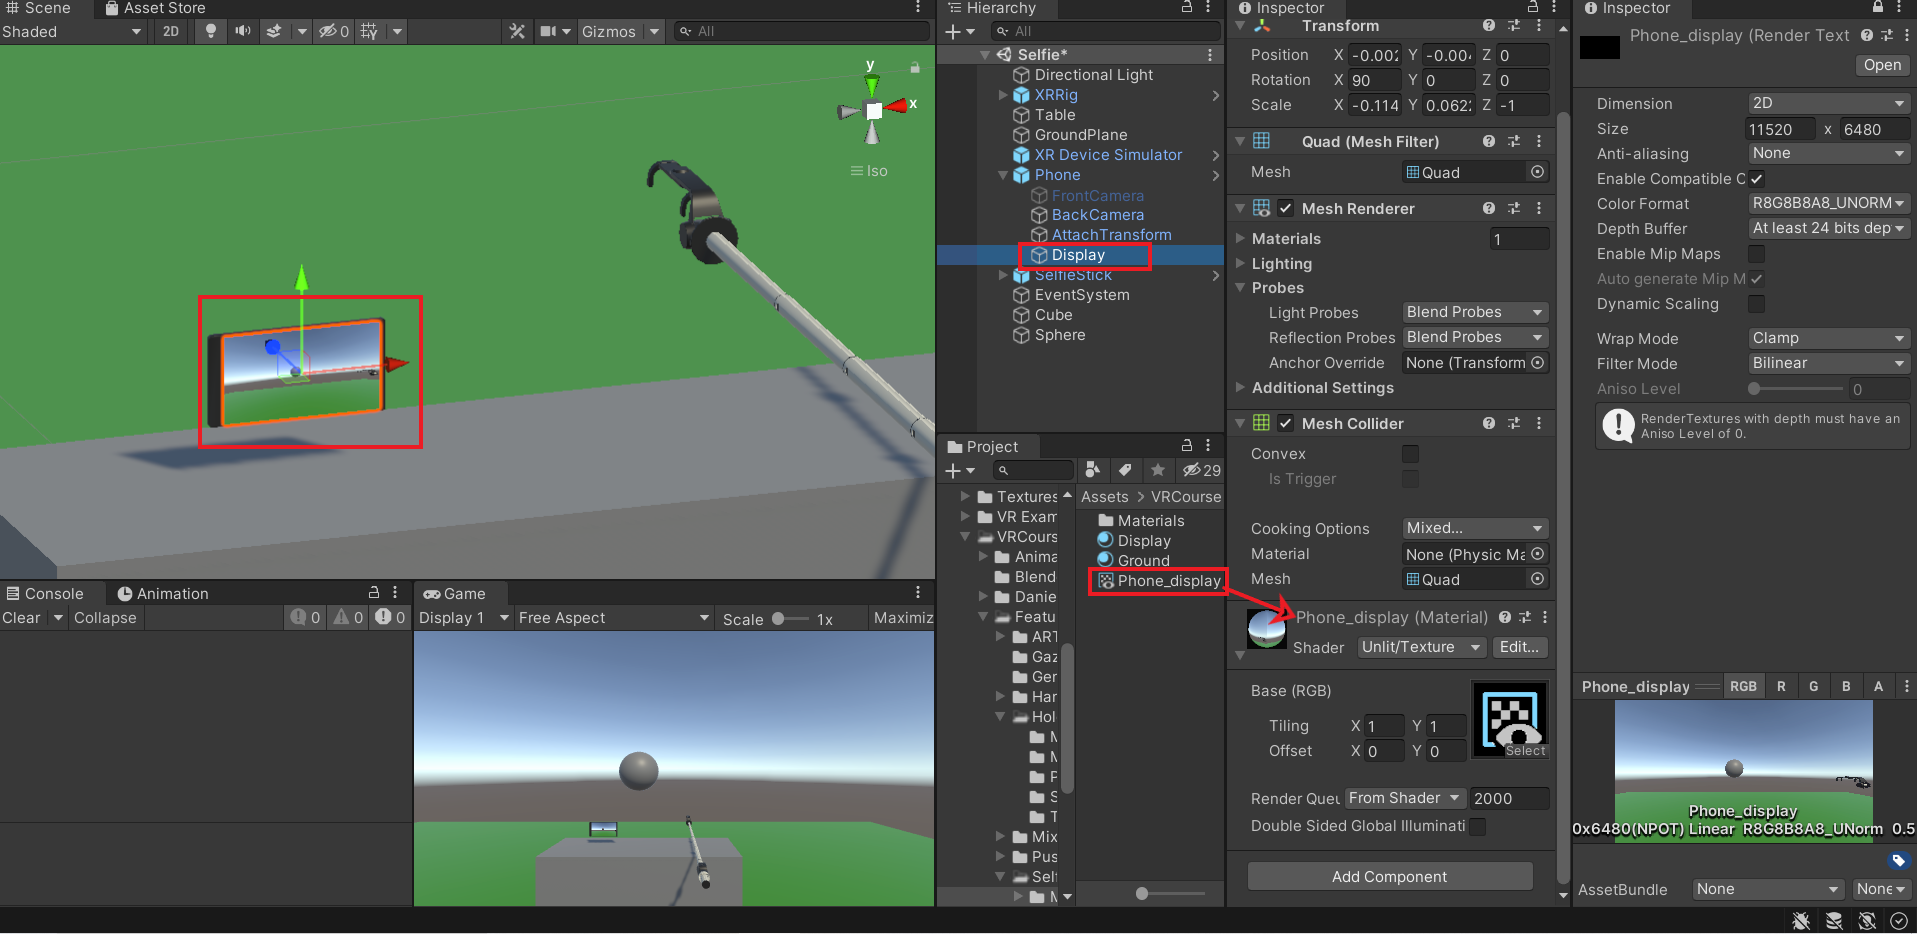
- Create a render texture by right-clicking in the project window, Create → Render Texture. Rename it as "PhoneDisplay" and adjust its size as per your desired output size when the picture gets saved.
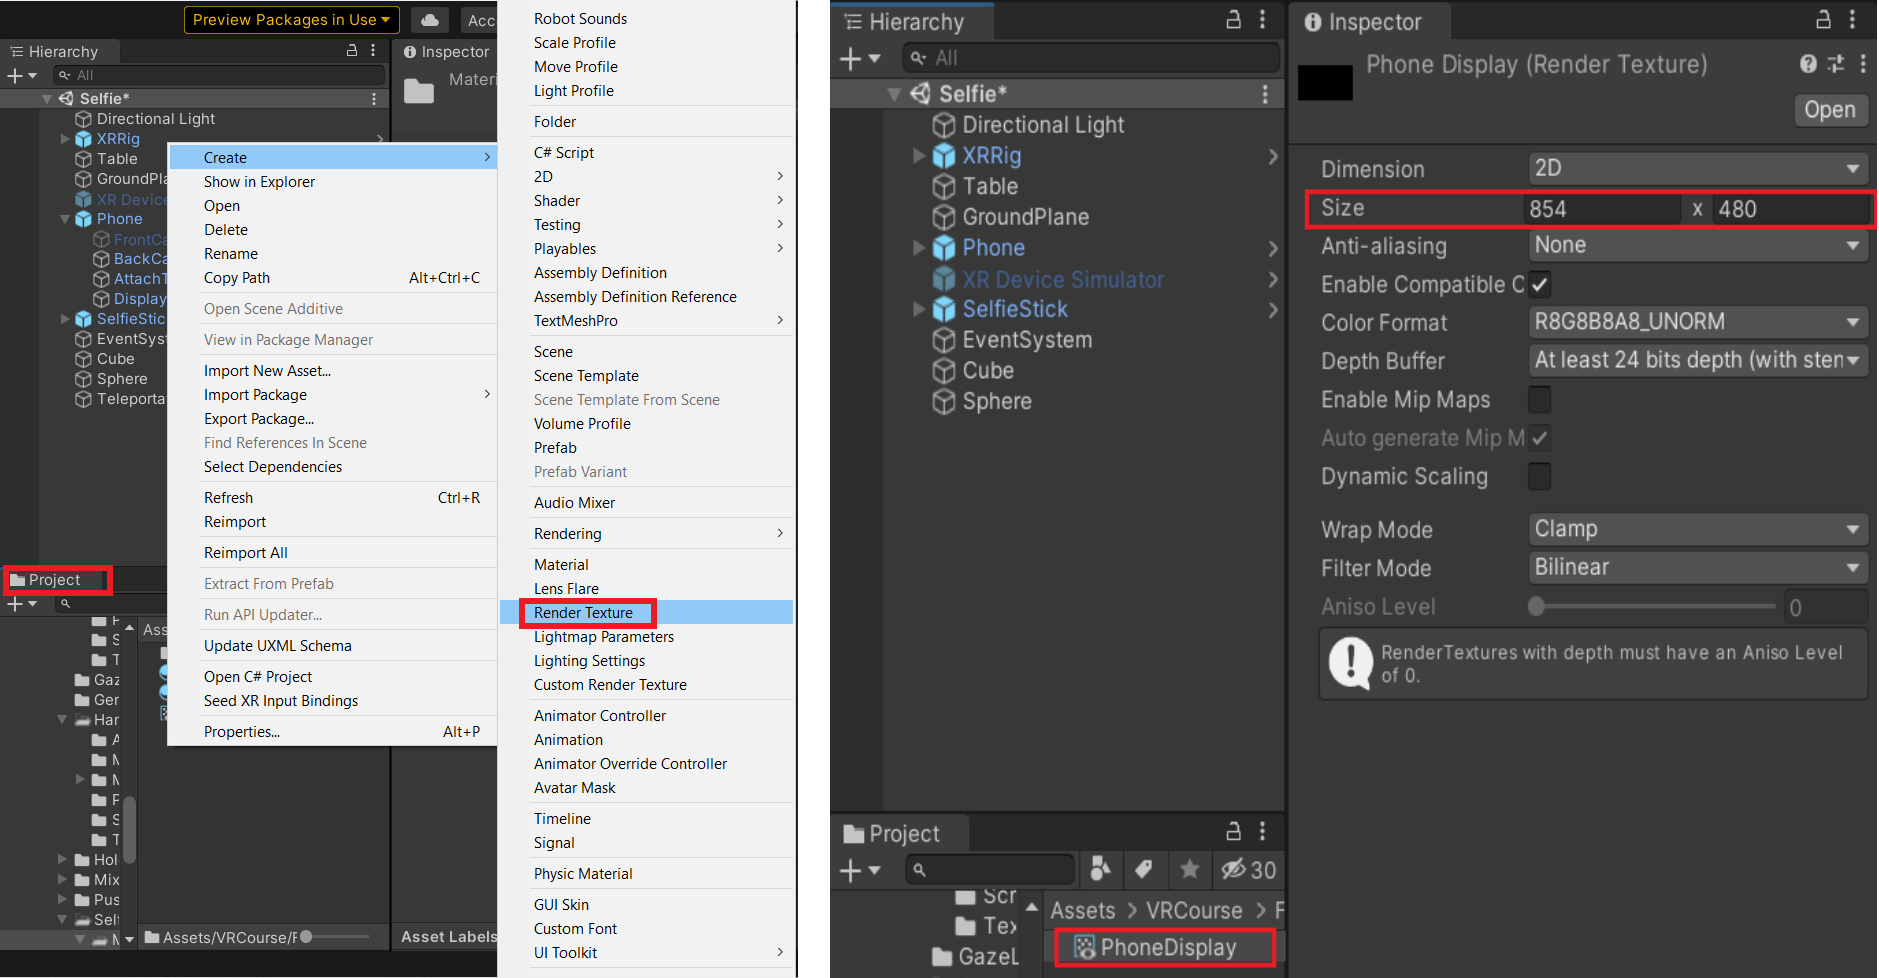
- Select the GameObjects FrontCamera and BackCamera. Drag and drop the Render Texture PhoneDisplay into the Output Texture of the Camera component.
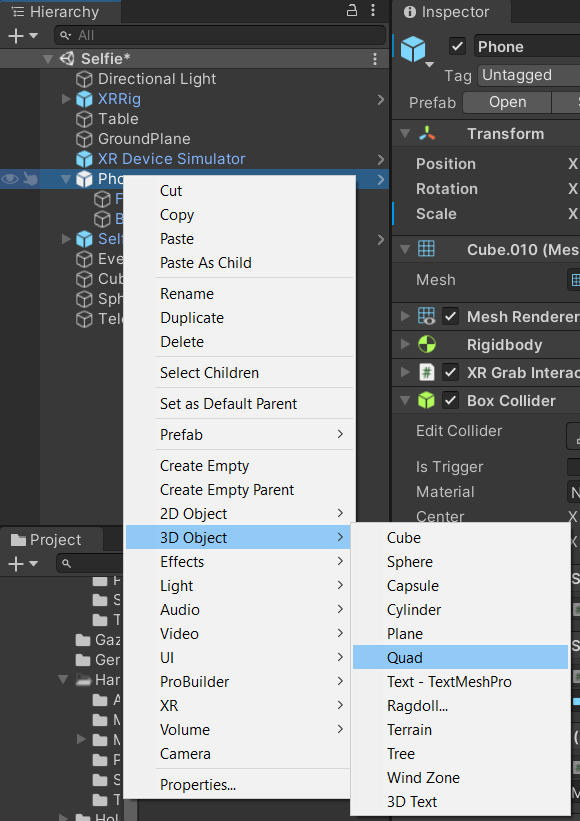
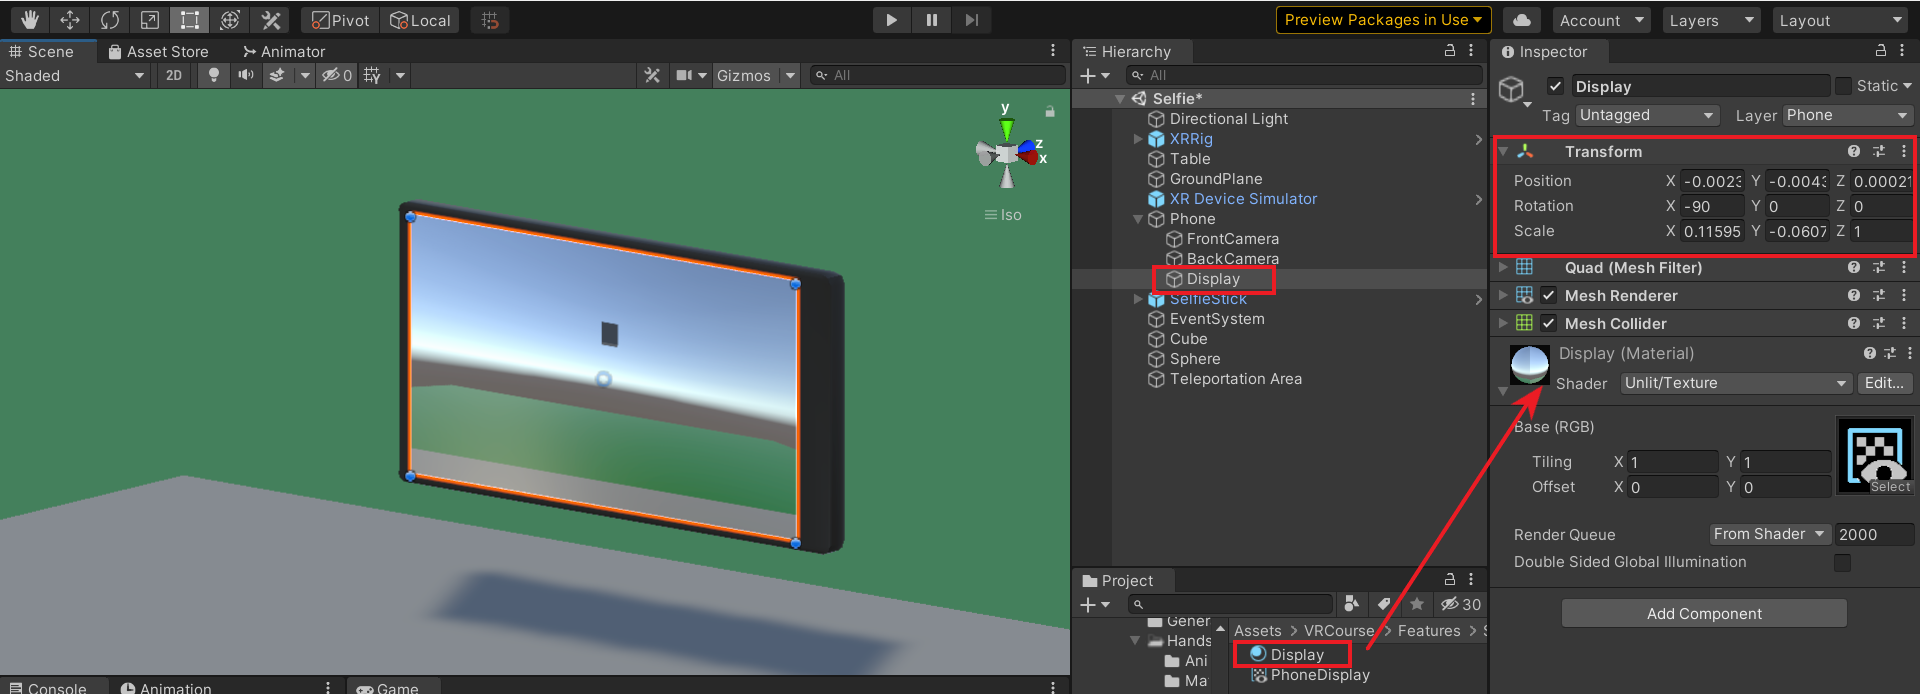
- Create a Quad by right-clicking onGameObject Phone → 3D Objects → Quad. Rename it to Display.
- Create a material by right-clicking in the project window, Create→ Material. Rename it to Display. Change the Shader type to Texture (Unlit/Texture) by clicking on the drop-down and searching for texture.
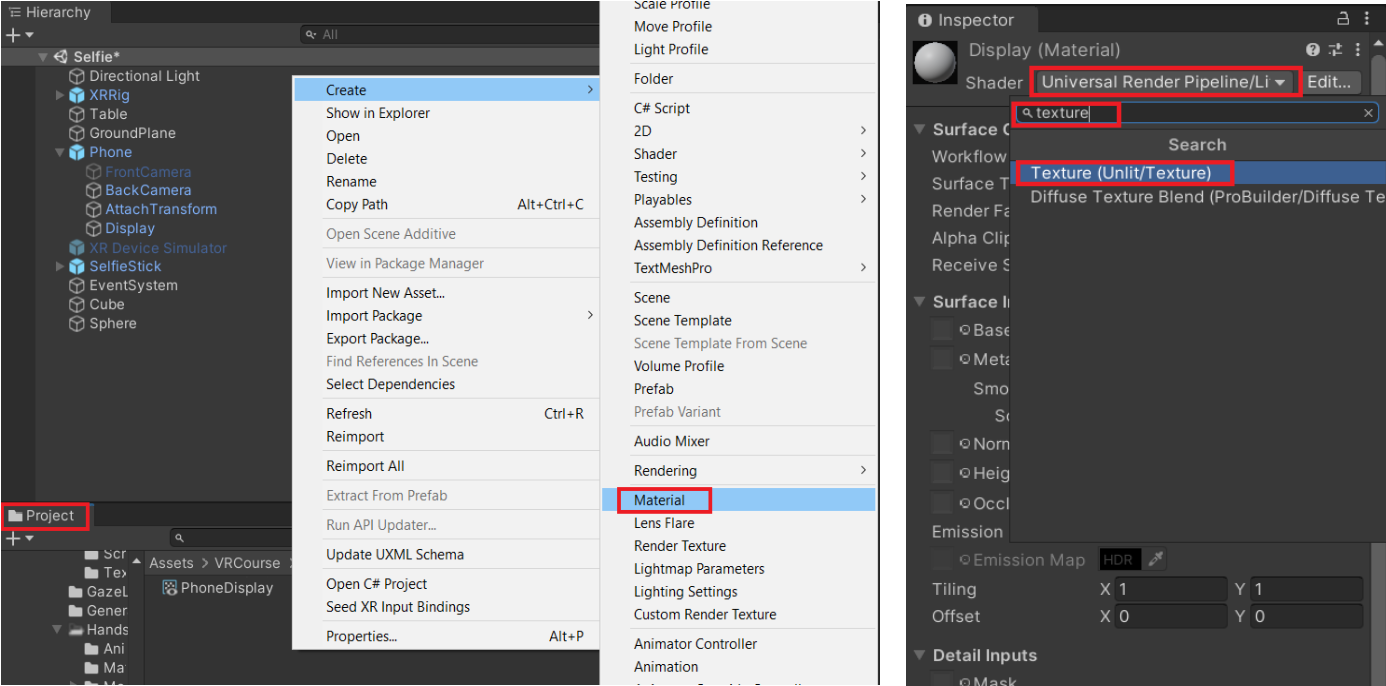
- Drag and drop the Render Texture PhoneDisplay into the material.
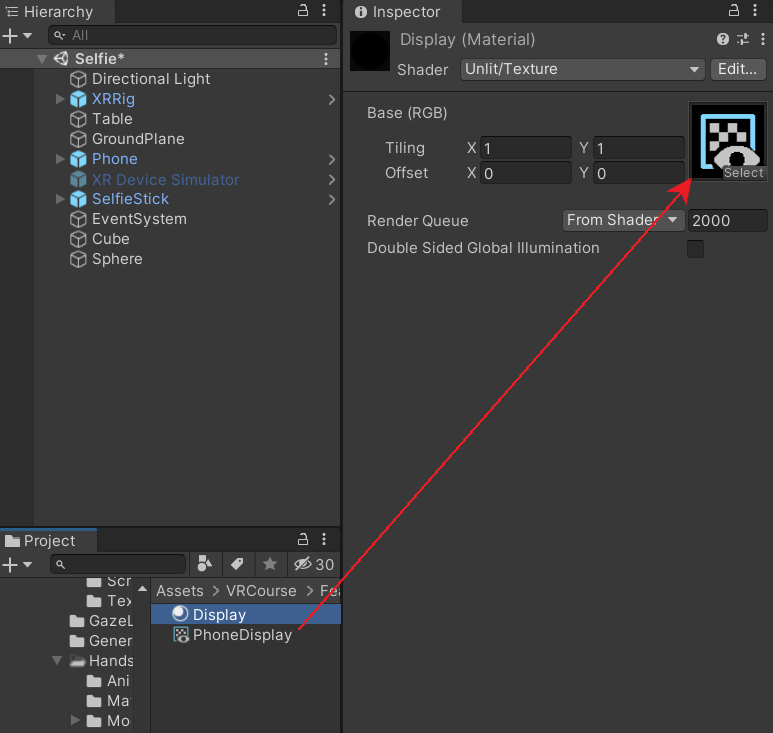
- Drag and drop the Material Display into the GameObject Display. Resize and adjust the position to match the Phone's display. This will now display the output of either the Front Camera or Back Camera.
Updating grab orientation
To make sure the phone and selfie stick is in the right orientation every time it's grabbed, we can make use of the Attach Transform feature of the XRGrabInteractable component.
- Create a new GameObject and rename it as AttachTransform. Drag and drop this GameObject into the XRGrabInteractable component of the phone.
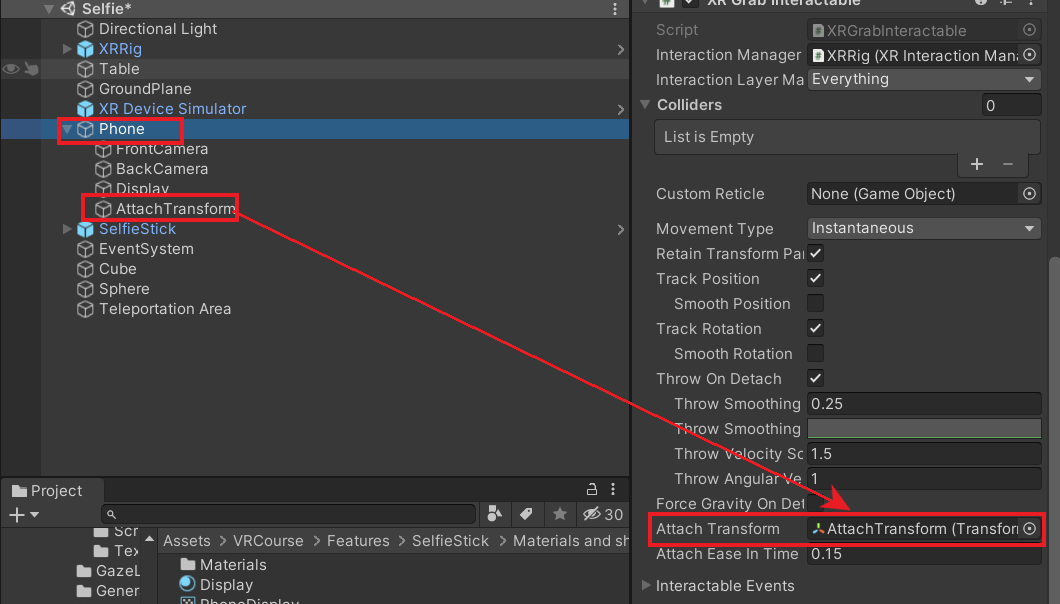
- Click on the Play button to enter the game preview. Adjust the transform component of the GameObject AttachTransform such it's having the right orientation when grabbed.
- Copy the transform values and exit the game preview by clicking the Play button once again. Then, paste the values back into the transform component.
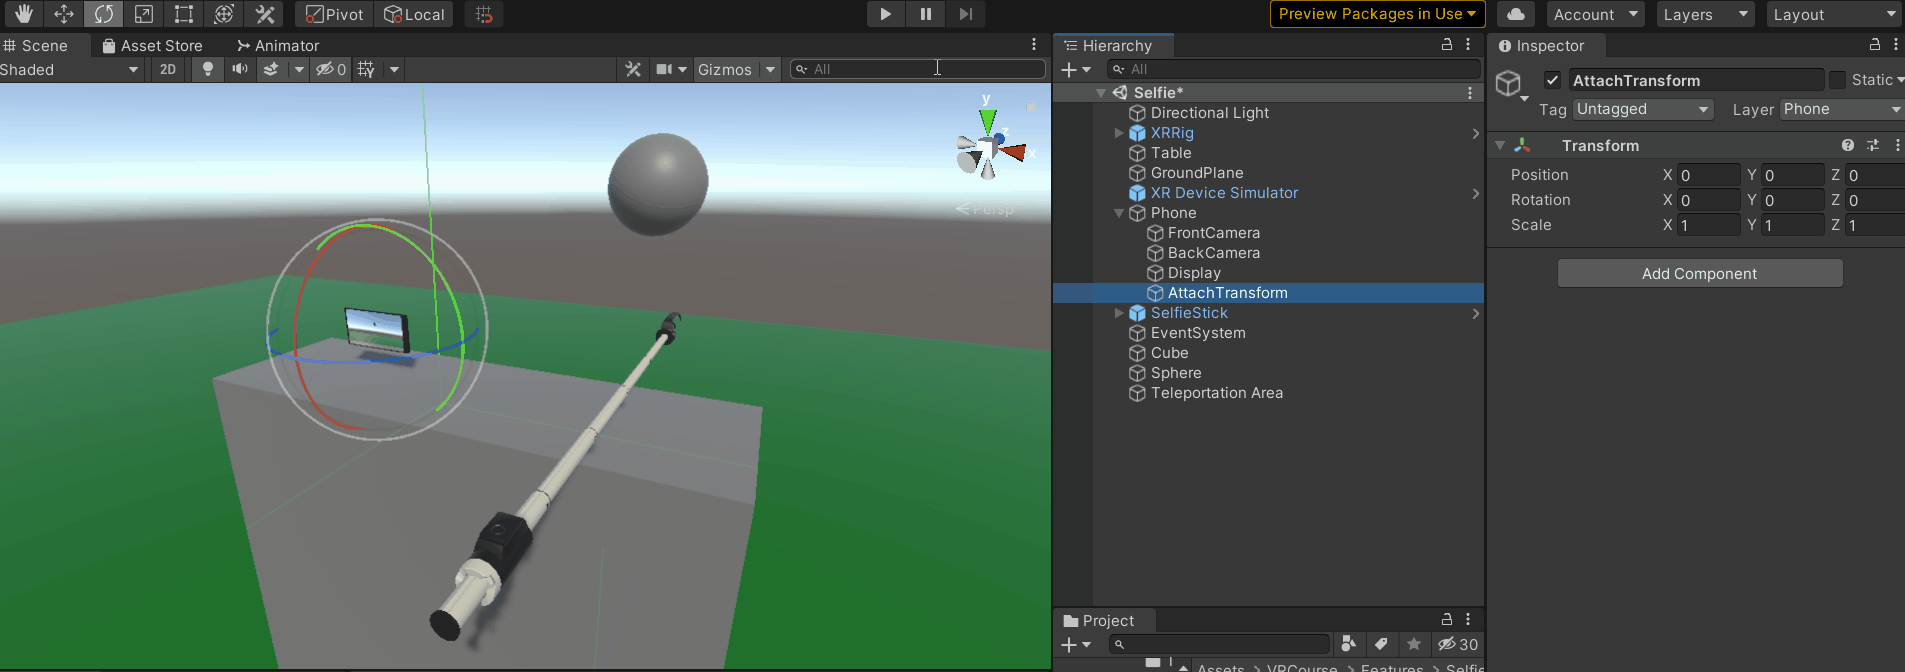
- Follow the same steps of adding AttachTransform to the GameObject SelfieStick.
- Finally, adjust the transform of the GameObject Socket such that the Phone snaps into the socket with the correct orientation.
Scripting additional features
Just like in the real world, the VR Phone should have the ability to click and save pictures. For that, we need to write a few scripts.
Functionality to save a picture
Let us start by creating the functionality that will save the picture in your local drive. For that create a new C# script, name it as SavePicture.
The following script takes the given camera and saves the output that is seen on the render texture.
- The script SavePicture has a function TakePicture() that will be called in the ClickPicture script.
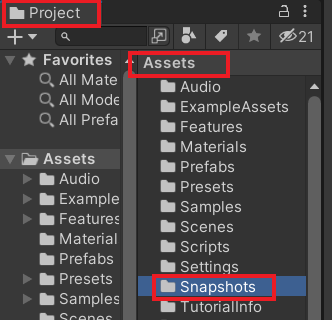
- In the Project window create a new folder and name it Snapshots.
Functionality to click a picture
Now let's create the functionality that will detect the controller's trigger press to click the picture. To do so, create a new C# script and name it ClickPicture.
The following script takes the input from the controller and calls the function from the SavePicture script to save the picture on the local drive.
Joining the pieces
Alright, we have the SelfieStick, the Phone, and the additional scripts ready. Now it's time to stitch them all together.
To simplify the mechanics, we will have the back camera turned on and the front camera turned off by default. When the Phone is placed onto the holder of the selfie-stick, the front camera is turned on and the back camera is turned off, vice versa when removed from the selfie-stick.
- Select the GameObject FrontCamera and deactivate the component by unchecking the box.
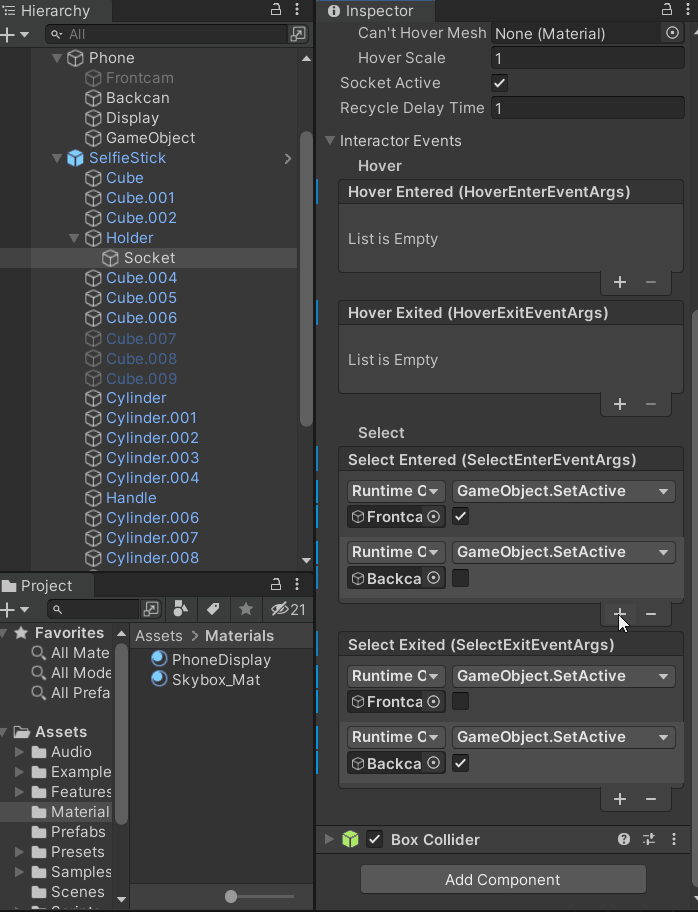
- Use the Select Entered and Select Exited events of the Socket interaction to turn the camera on and off. This will also ensure that only one camera is active at a given time.
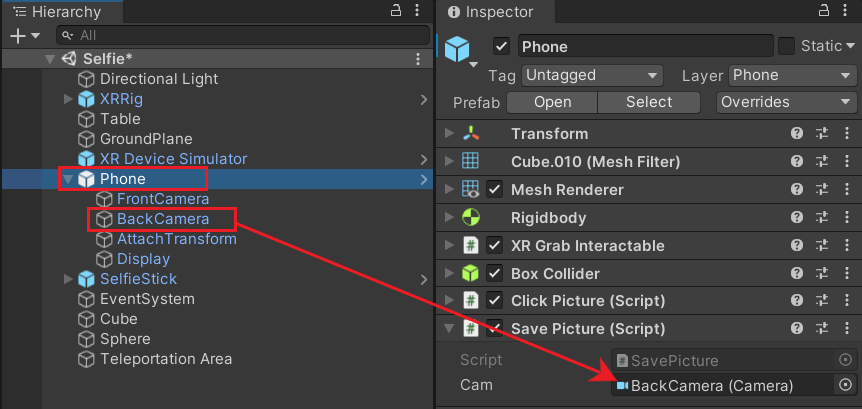
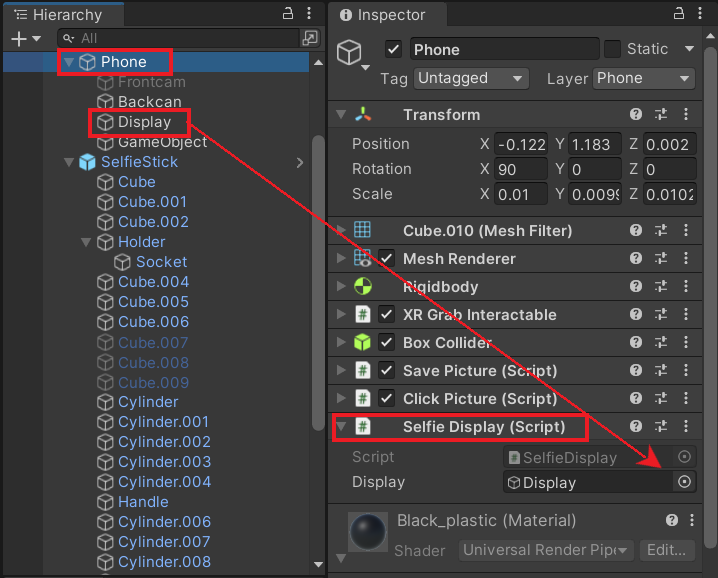
- Next, add the component ClickPicture to the GameObject Phone. The component SavePicture gets added automatically. Then, drag and drop the GameObject BackCamera into the field Cam of the Save Picture component.
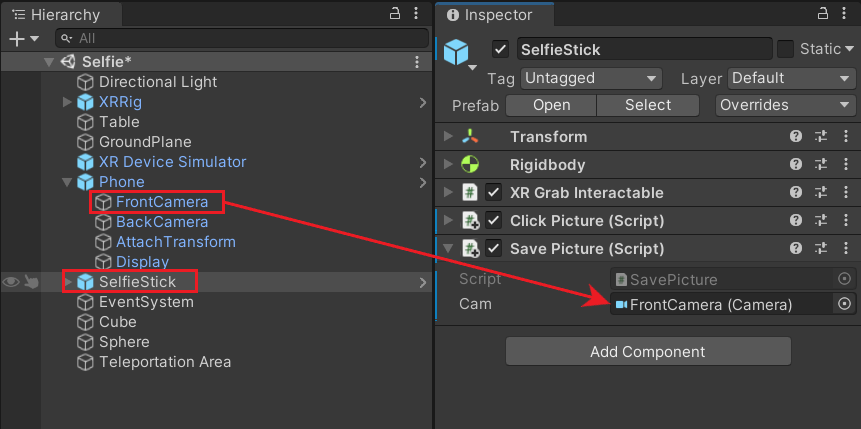
- Similarly, add the component ClickPicture to the GameObject SelfieStick. Then, drag and drop the GameObject FrontCamera into the field Cam of the Save Picture component.
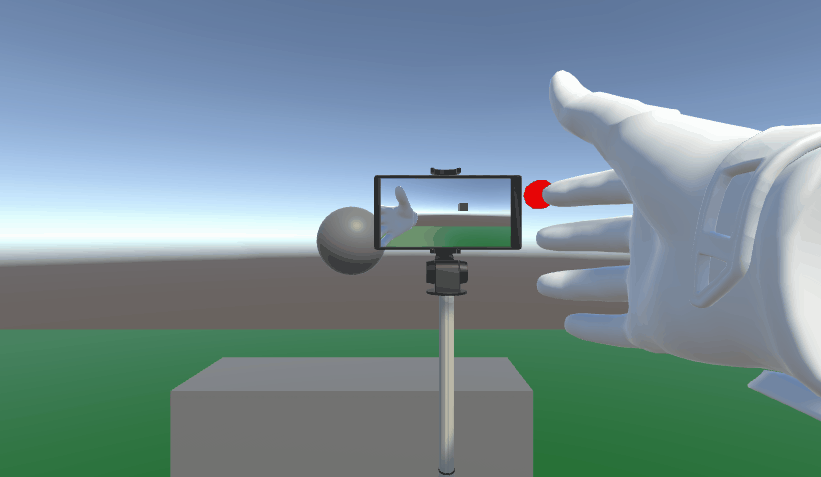
With this, we have finished setting up our phone and selfie-stick with all the functionalities in VR. You go ahead and test it now!
Polishing
Mirrored Display
You might observe that while using the front camera, it renders the mirror image on the display. It's not possible to flip the camera, so we can correct this by flipping the display instead.
- To do so create a new C# script, name it SelfieDisplay. The following code will flip the display every time the function "FlipDisplay()" is called.
- Add the SelfieDisplay component to the GameObject Phone. Then, drag and drop the GameObject Display into the display field.
- Use the Select Entered and Select Exited events of the Socket interaction once again to flip the display.
Now the display will render the mirrored image for the front camera.
Fixing jitters
There is another possible issue you could notice! When the selfie stick is moved the phone passes through the holder. To fix this the GameObject Phone has to be made a child of the GameObject SelfieStick. It's also important to unparent the GameObject Phone when it's removed from the holder.
- Let's implement this by creating a C# script and name it PhoneHolder. The following code will use the SelectEntered and SelectExited events of the XRSocketInteractor to parent and unparent the GameObject Phone.
- Add the PhoneHolder component to the GameObject Holder.
Congrats! We have successfully fixed the jitters.
Conclusion
This tutorial not only taught you how to take pictures in VR and save them, but also taught you how you can use RenderTexture to display the camera's output. So what can you do next?.
You can either extend this project by adding or modifying some elements. For example, you can add a timer to take pictures or modify the size, orientation of the phone/selfie stick. You can also create a whole new project with a slightly different mechanism. For example, you could probably create a tablet with UI buttons. One to take pictures and another to switch between the two cameras.
There are many other things you can do with the render texture and a camera as well, like creating a mirror to see your avatar or casting your phone on a big screen, etc.
One main concern with VR features is to make them as smooth as possible. Everything that doesn't work perfectly or has hiccups, breaks the immersion. But keep in mind that in VR things can be completely different than in real life.
