
AR Foundation is a cross-platform framework, that enables you to build an AR application in Unity with one codebase, but lets you deploy it to multiple platforms. In this article, we’ll learn how to set up the Unity project for the Android platform.
Want to watch the video instead?
Prerequisites
For developing an AR application make sure to meet the following software and hardware requirements:
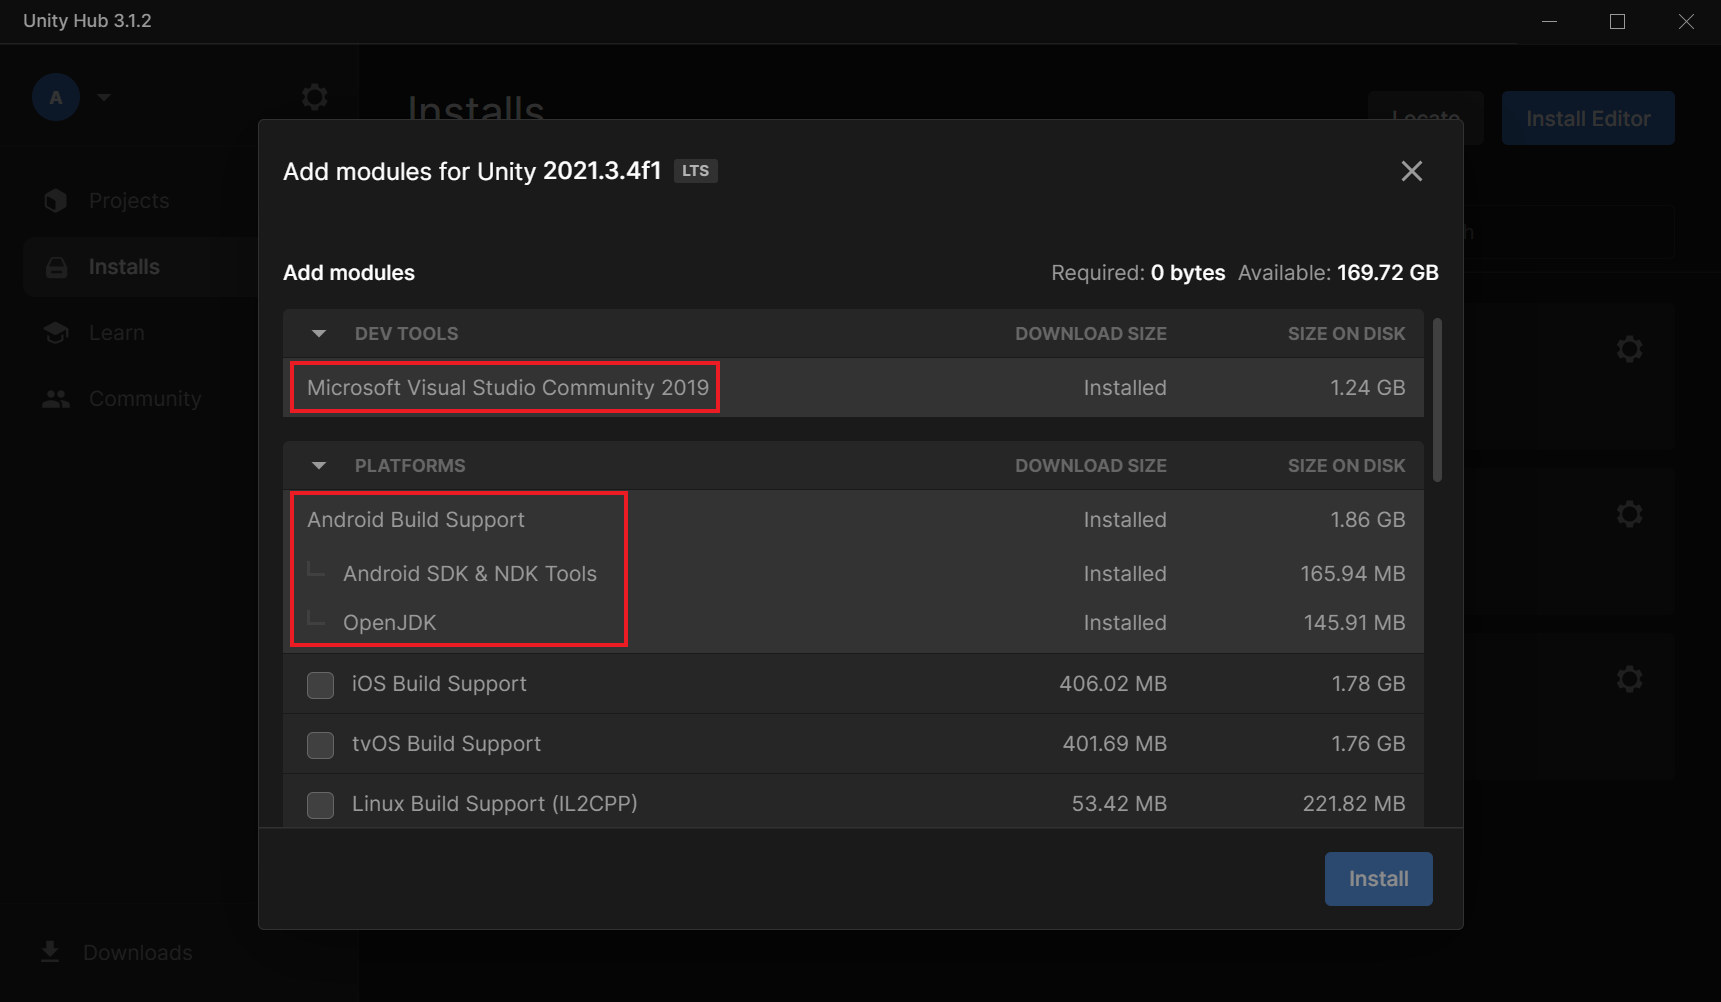
- One of the latest Long Term Support (LTS) Unity Editor versions installed with the following modules:
- Android Build Support
- Android SDK and NDK tools
- Open JDK
- Any IDE for scripting and development, preferably Visual Studio as it works best with Unity.
- An Android device which supports AR Core.
Creating a Unity Project
Let’s begin by creating a Unity project:
- Open Unity Hub → click on New Project.
- Enter a Project name.
- Make sure to select the 3D Core render pipeline and click on Create Project.

Setting Up A Project For Android Development
Now, we’ll set up the project in such a way that it can be built for our Android devices without any errors.
- Since we are building the application for Android, we first need to switch the build platform. You can do that by clicking on File → Build Settings → Android → Switch Platform.

- In the same Build Settings window, click on Player Settings → XR Plugin Management → Install XR Plugin Management. This will download and import the XR Plugin Management package.
- In the Project Settings window, enable the ARCore ✅. This will download and install the ARCore XR Plugin package.

- Next, click on Player and follow these steps:
- Change the Company Name.
- Disable the Auto Graphics API parameter.
- Under Graphics APIs, select Vulkan and remove it from the list. That’s because ARCore doesn’t support Vulkan graphics API.
- Disable the Multithreaded Rendering parameter as it’s not supported.
- Change the Minimum API Level to (API level 24).
- Change the Scripting Backend to IL2CPP.
- Under Target Architectures, enable ARM64.✅
- Finally, we can download the ARFoundation Package. Click on Window → Package Manager → from the Packages drop-down select Unity Registry → search for the AR Foundation package and install it.
With that, we have set up our project with AR Foundation for Android deployment.
Setting Up The Scene
As we have our project setup, the next thing to do would be to set up the scene for AR and test it out as well.
- In the Hierarchy window, select the Main Camera GameObject and delete it.
- Right-click in the Hierarchy window, and select XR → AR Session Origin.
- Once again right-click in the Hierarchy window, and select XR → AR Session.
Let’s have a detailed look at the GameObjects and components that we added:
The child GameObject AR Camera has five components:
The AR Session GameObject has two components:
With that have set up the basic scene for implementing AR.
- The AR Session Origin GameObject has an AR Session Origin component. The purpose of this component is to transform trackable features, such as planar surfaces and feature points, into their final position, orientation, and scale in the Unity Scene.
The child GameObject AR Camera has five components:
- The Camera component is used to capture and display the scene to the player.
- The Audio Listener component listens to the audio from the microphone.
- The AR Pose Driver component drives the local position and orientation of the parent GameObject according to the device's tracking information.
- The ARCameraManager is used to manage the AR Camera features like Auto Focus, Light Estimation and the Facing Direction (choice of camera i.e front or back).
- The ARCameraBackground component is used when we want the video feed from the device camera to show up as the rendered background of the scene at runtime.
The AR Session GameObject has two components:
- The AR Session component controls the lifecycle of an AR experience by enabling or disabling AR on the target platform.
- The AR Input Manager component is used to enable world tracking. Without it, the Tracked Pose Driver can't acquire a pose for the device.
With that have set up the basic scene for implementing AR.
Setting up the Android Device
For us to build the application into our device, the USB debugging mode has to be enabled. To do that:
We can now connect our device to our machine and Unity will be able to build an application into it.
- Open Settings on your device
- Scroll down till you find About Phone
- Tap on the Build number 8 to 10 times to enable Developer Options.
- Go back and select System → Developer Options → scroll till you find USB debugging, toggle it on to enable it → a popup will appear asking the permission to allow USB debugging, click on OK.
We can now connect our device to our machine and Unity will be able to build an application into it.
Testing: Demo Application
With the project, scene and device setup for AR, it’s now time to build a demo application and test it.
- Add a cube to the scene by right-clicking in the Hierarchy window. Select 3D Object → Cube.
- Change the scale, position and rotation of the Cube GameObject.
- Click on File → Build Settings → Add Open Scenes → Build and Run. This will open a window, and before saving the app, create a new folder called Builds. Save the app inside that folder with an appropriate name.
- Once the application is built, it will automatically launch on the device. For the first time, it might ask permission for camera access which we need to grant. After which we can test the application to see the augmented cube.
With that, we can safely say that our project is ready for AR and android deployment.
Conclusion
Setting up the project and the scene was just the beginning. We can now further this project and try other features of AR Foundation like image detection, plane detection and face recognition.
